

How to Clone a GitHub Repo (and Set Up Your Own DB for a CRUD App)


Update: If you're from #100Devs, please be sure to fork Leon's repo first, and then clone it, because we will need to make a pull request to submit our group project!
If you are new to cloning public repo from GitHub, or need a cheatsheet of the steps, I've got (too) many screenshots showing you and reminding myself how to do so. :)
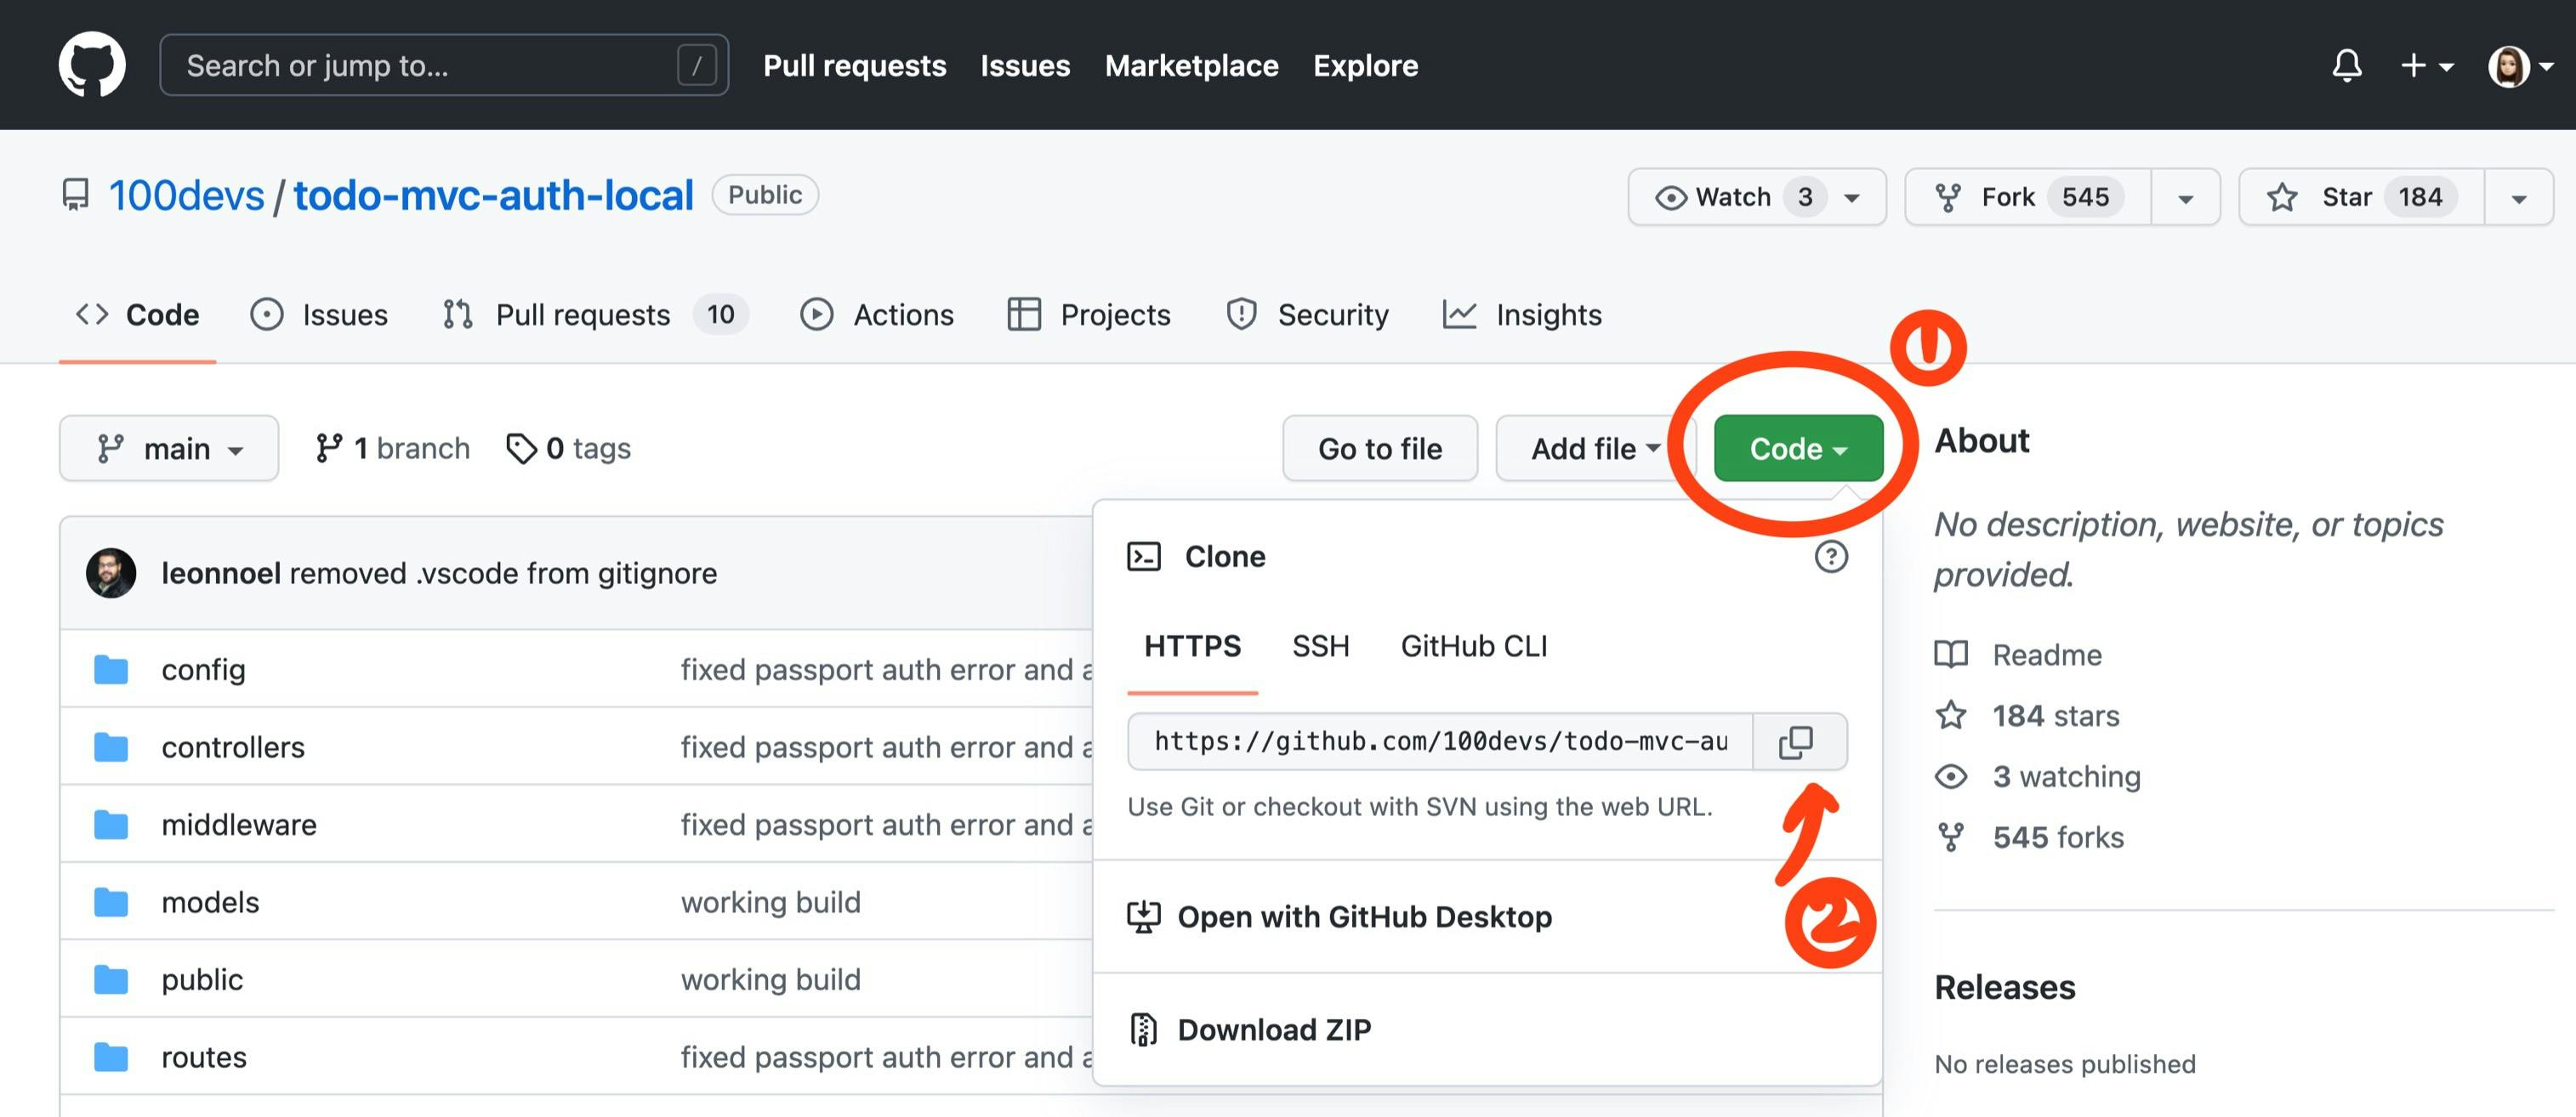
Step 1. Copy the link from GitHub.
Step 2. Set up directory and open in VS Code.
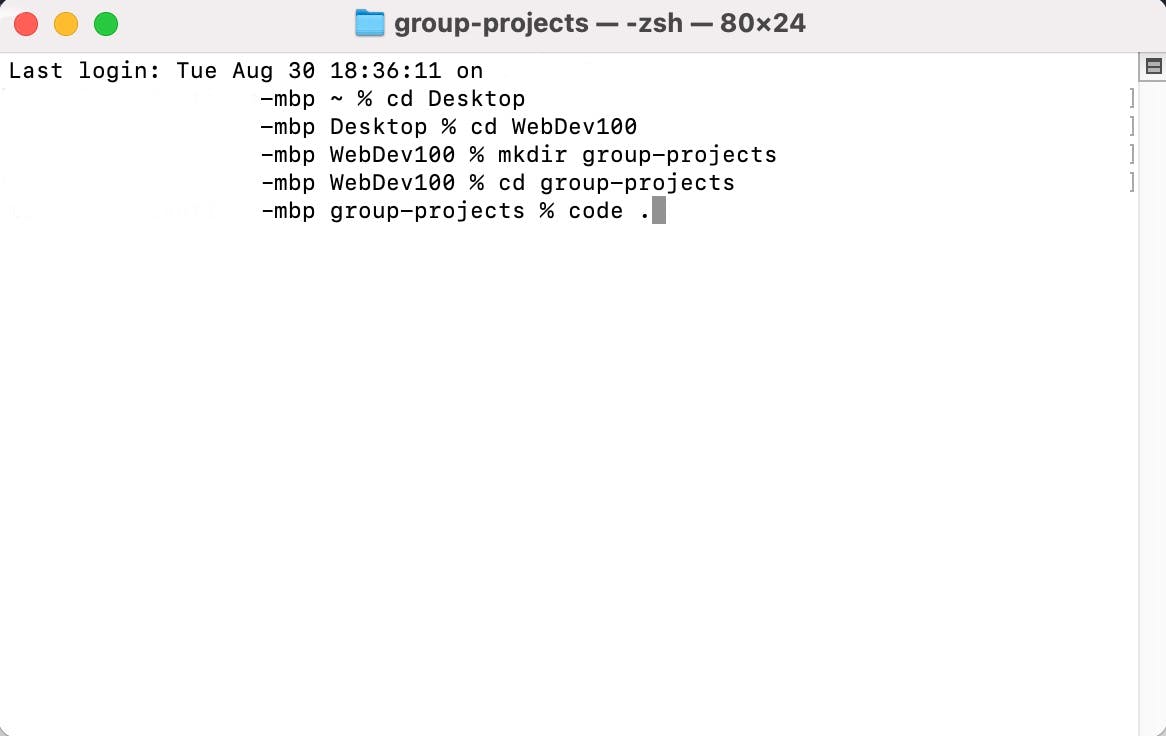
Open the terminal, create a folder where you plan to clone the code files to, use command "code ." to open the folder in VS Code.
Step 3. Clone code.
Open a new terminal in VS Code. Click on the Terminal -> New Terminal, or use short cut "control + shift + `", then write in command "git clone" and paste the link you copied in Step 1.

Step 4. Install Node Packages.
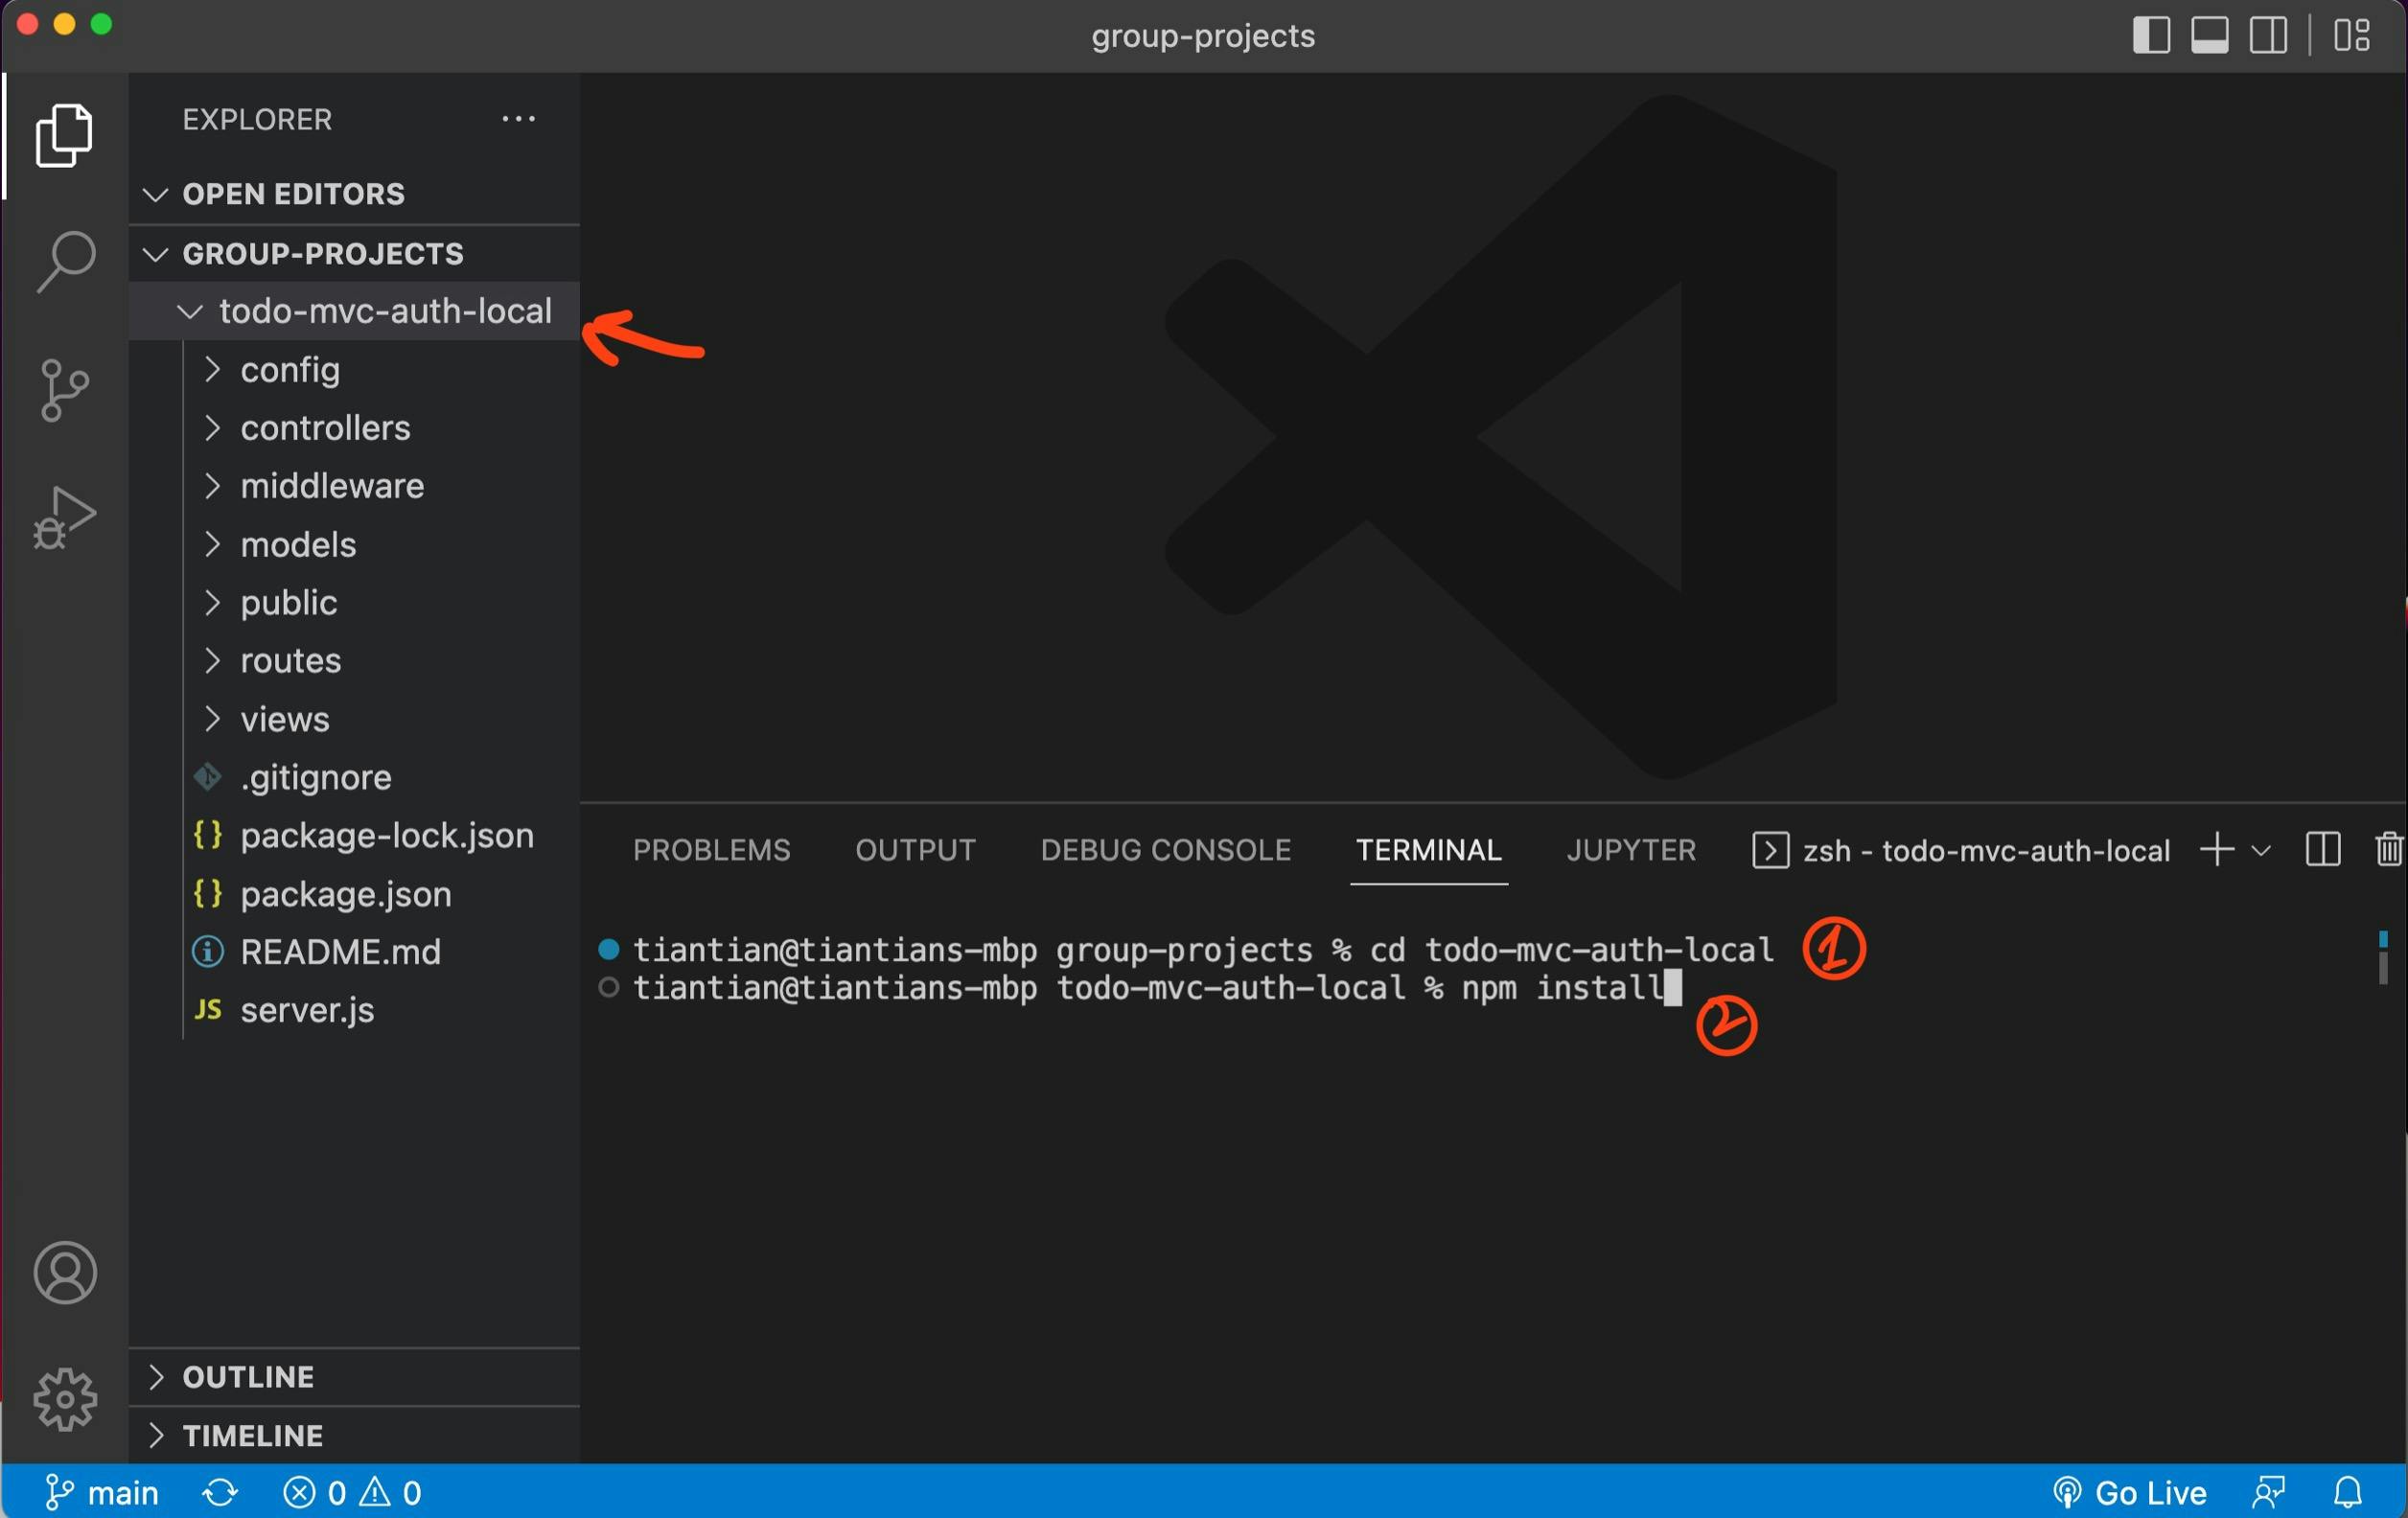
In the terminal, cd into the new directory (you just cloned), and write command "npm install" or "npm i" for short.
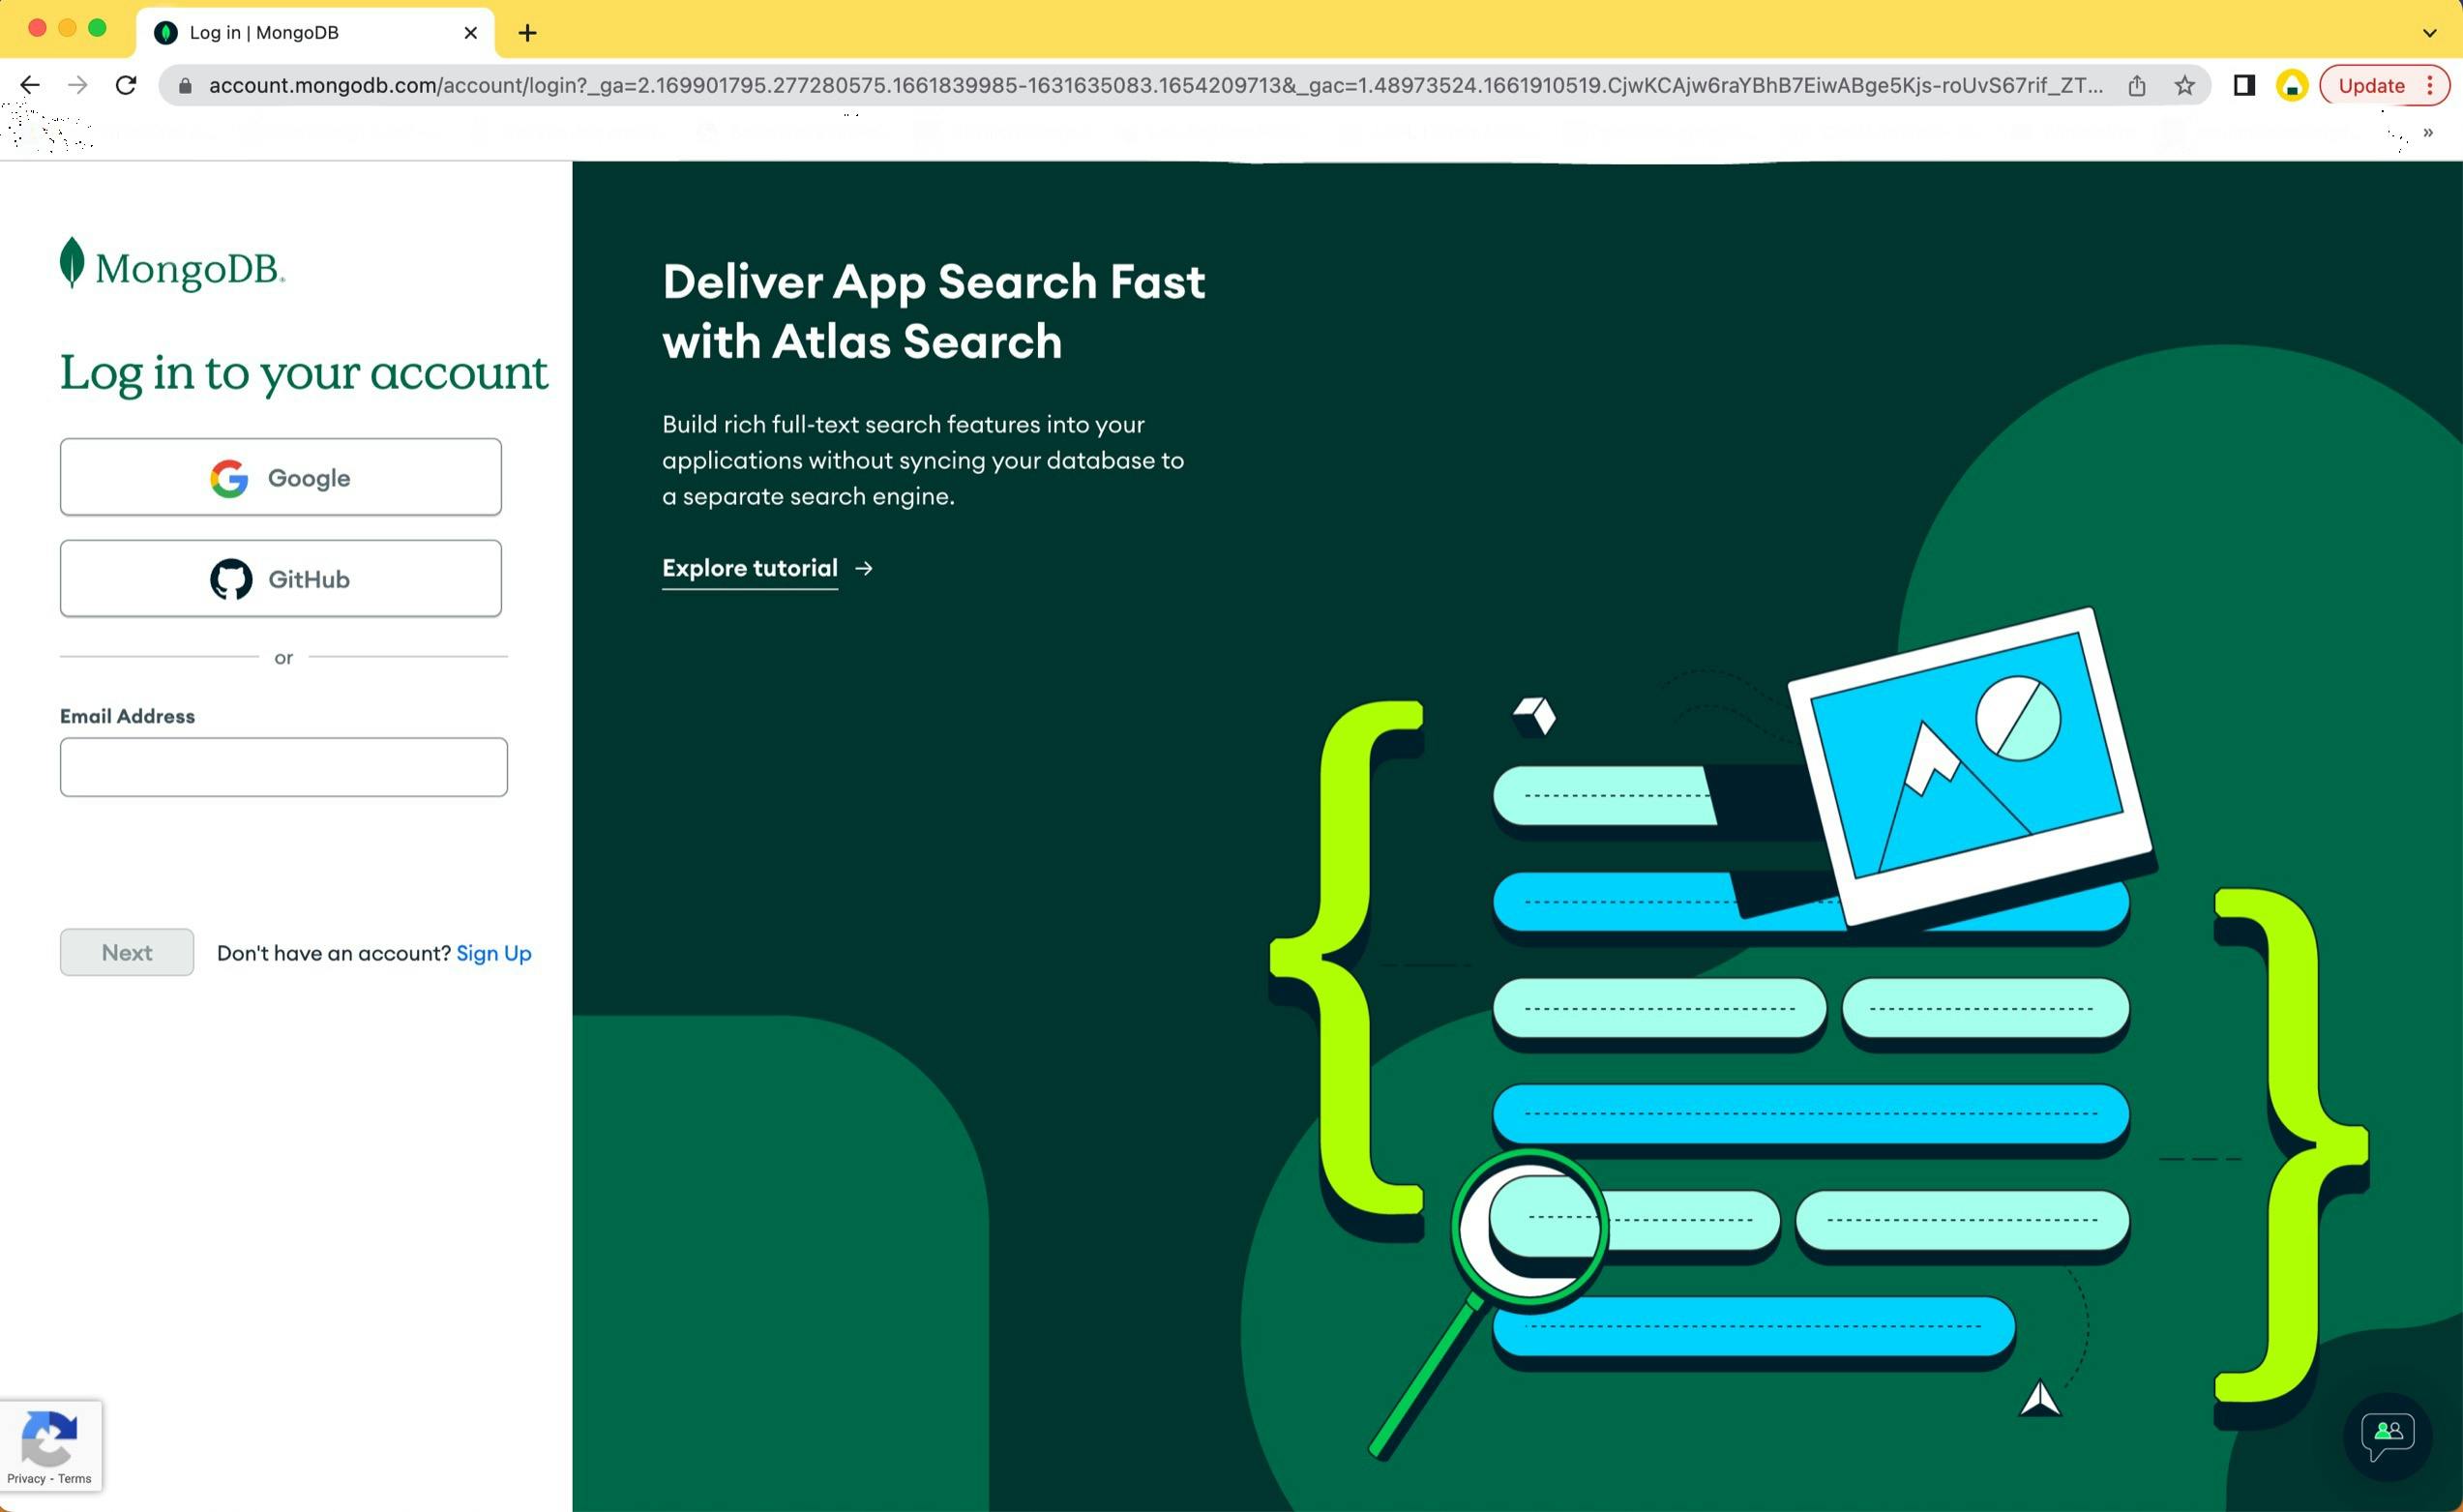
Step 5. Create DB.
Log in or sign up for Mongo Atlas.
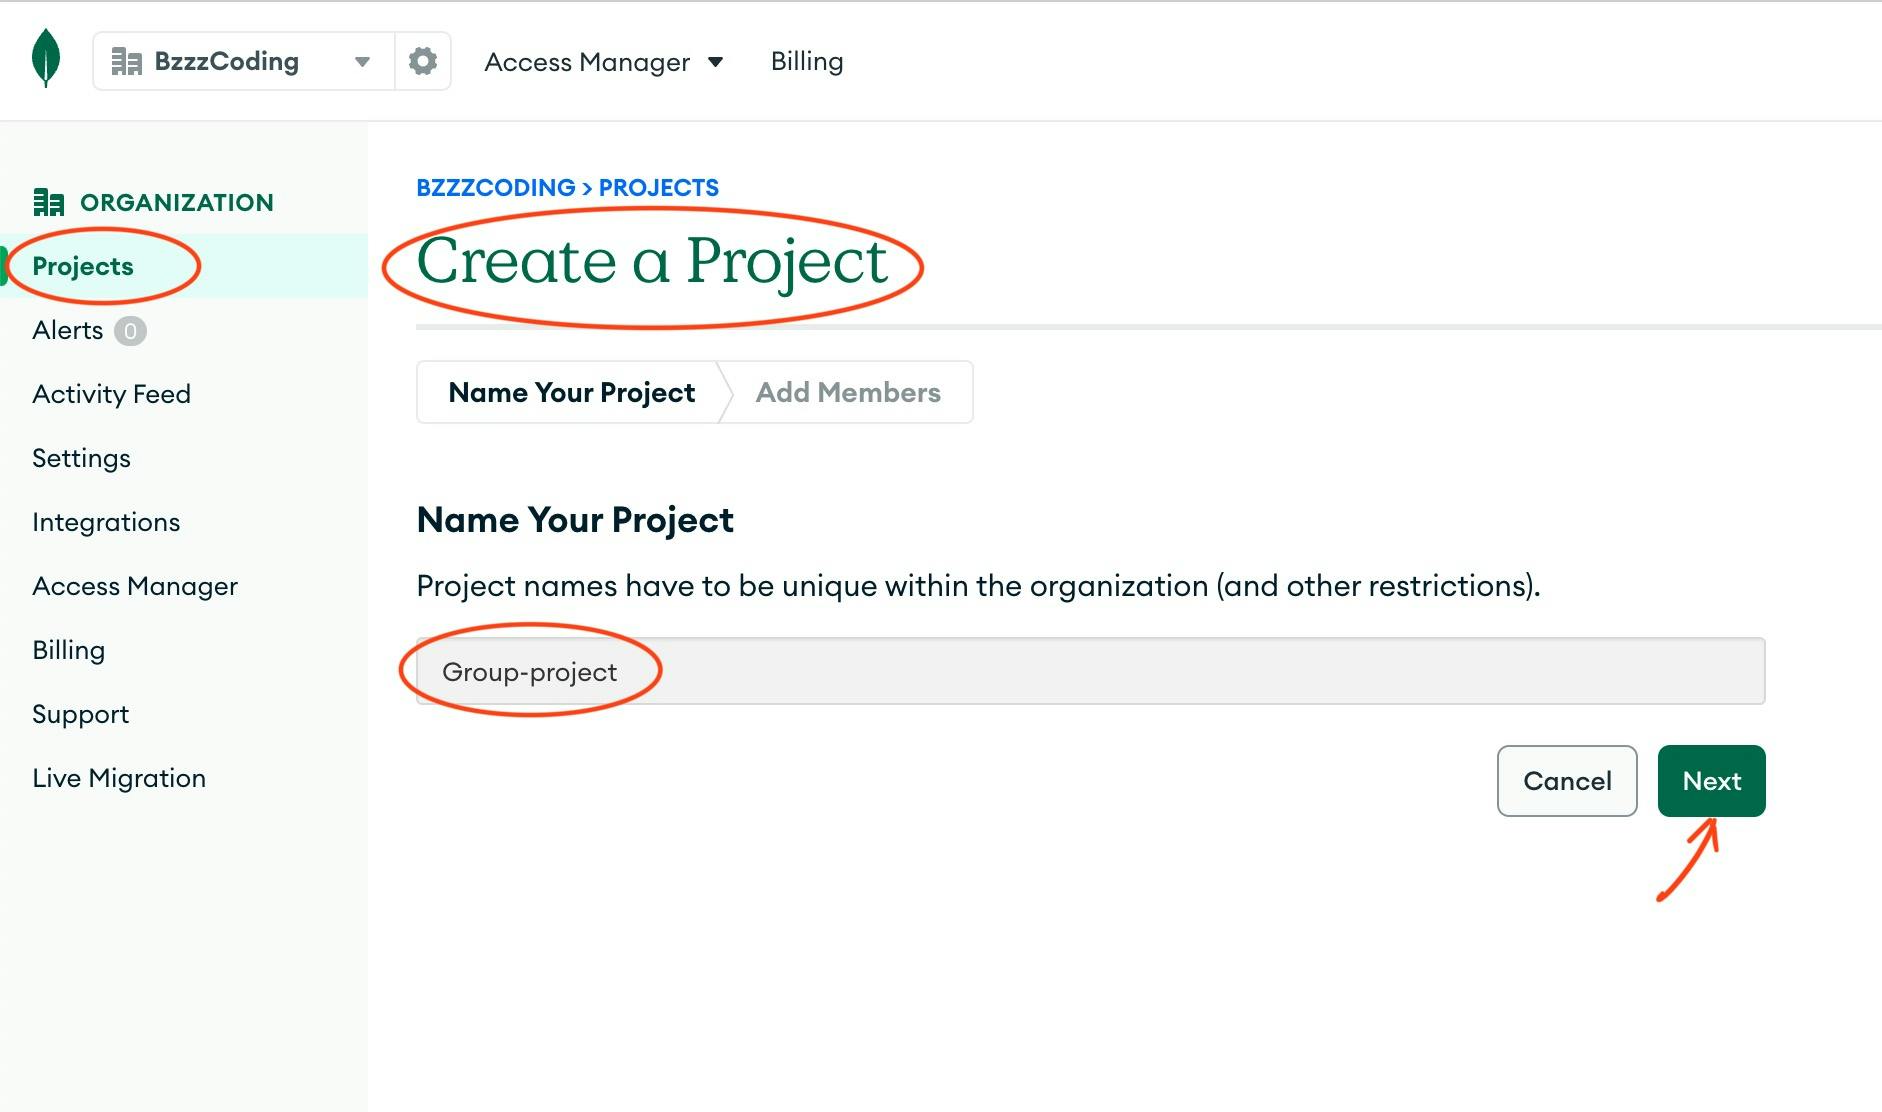
Step 6. Create a project.
Go to Projects -> Create a Project -> name your project (I named mine "Group-project") -> Click "Next"
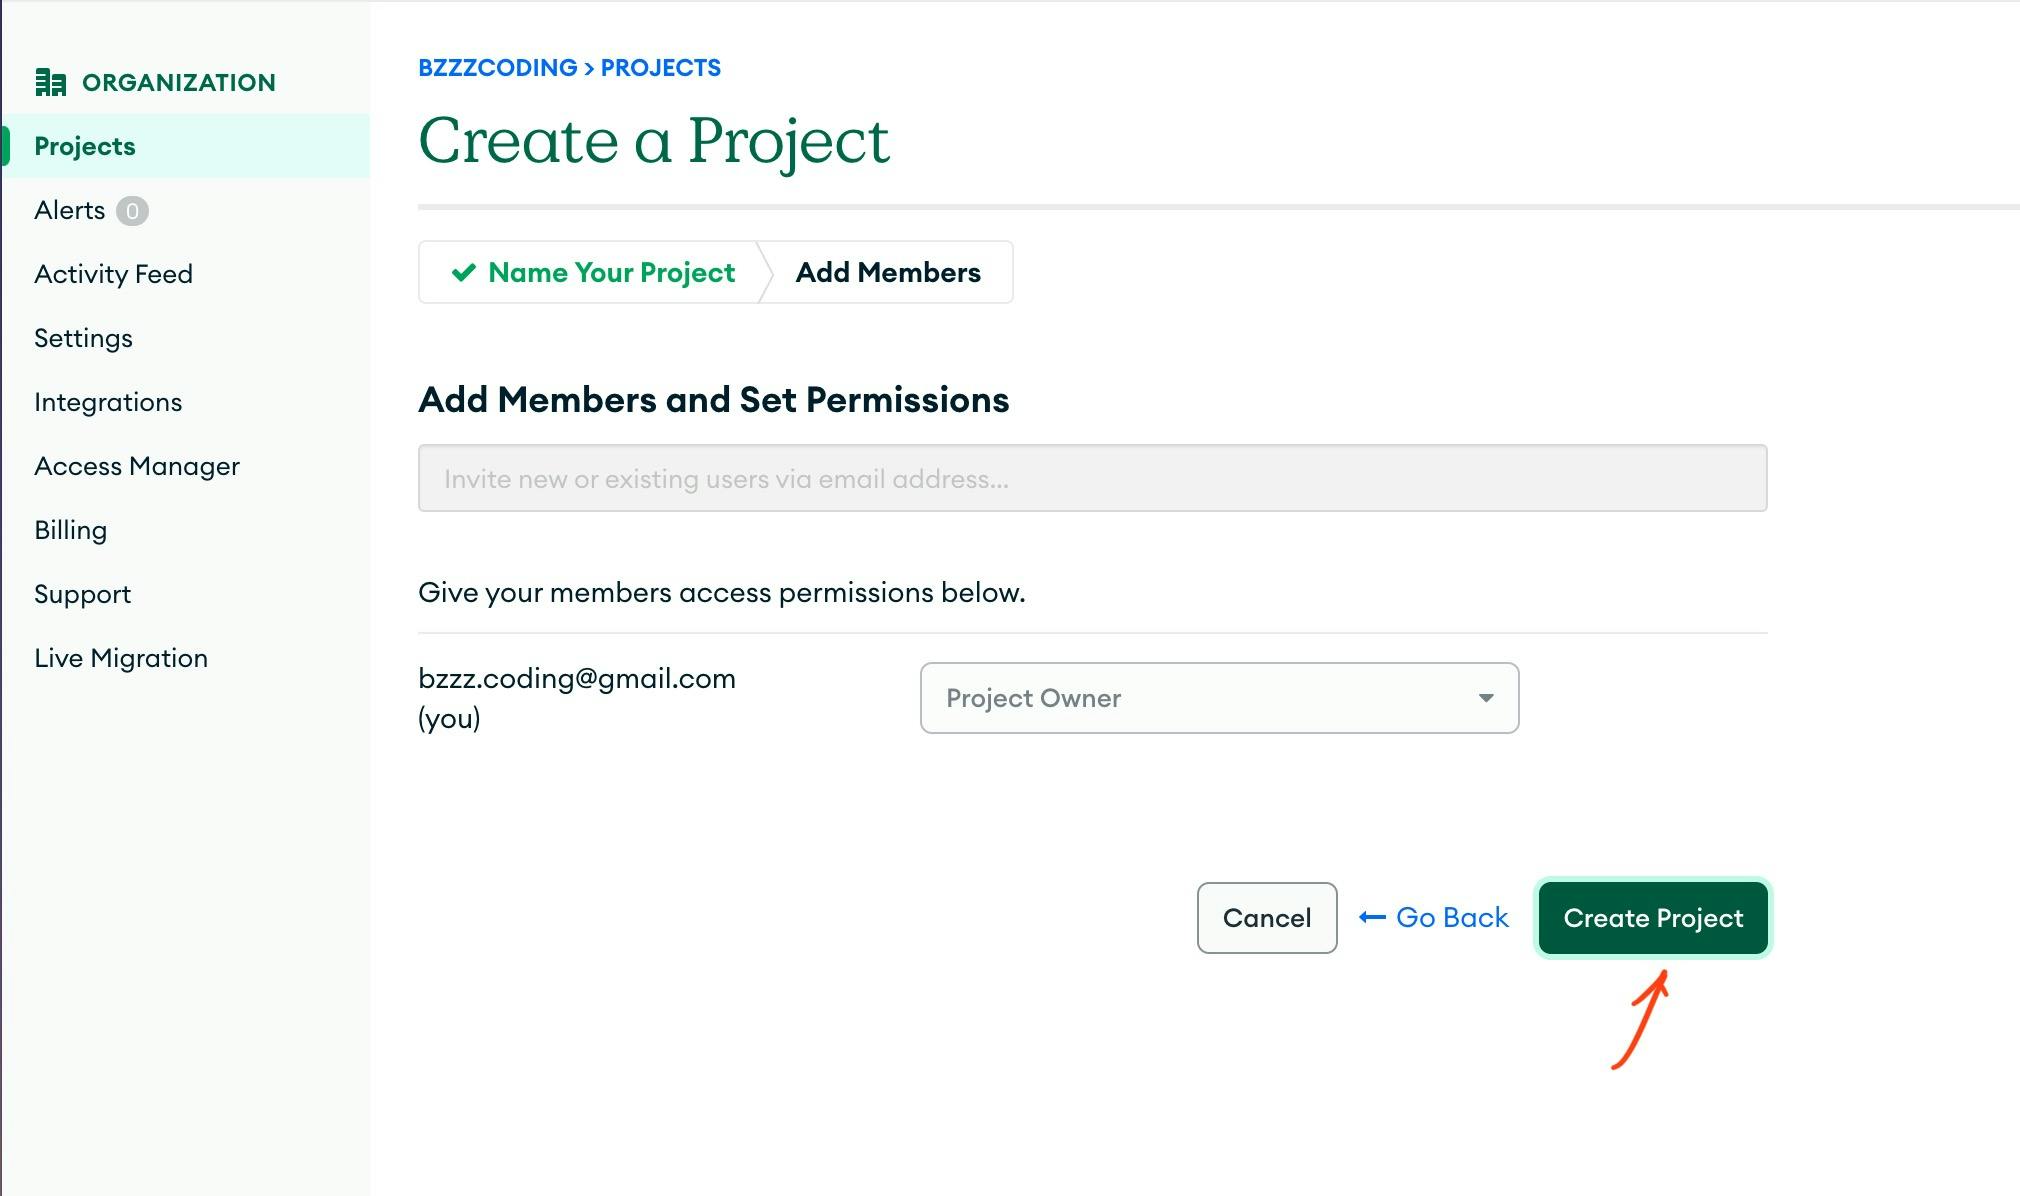
You could add members and set permissions. Or just leave the default and click "Create Project".
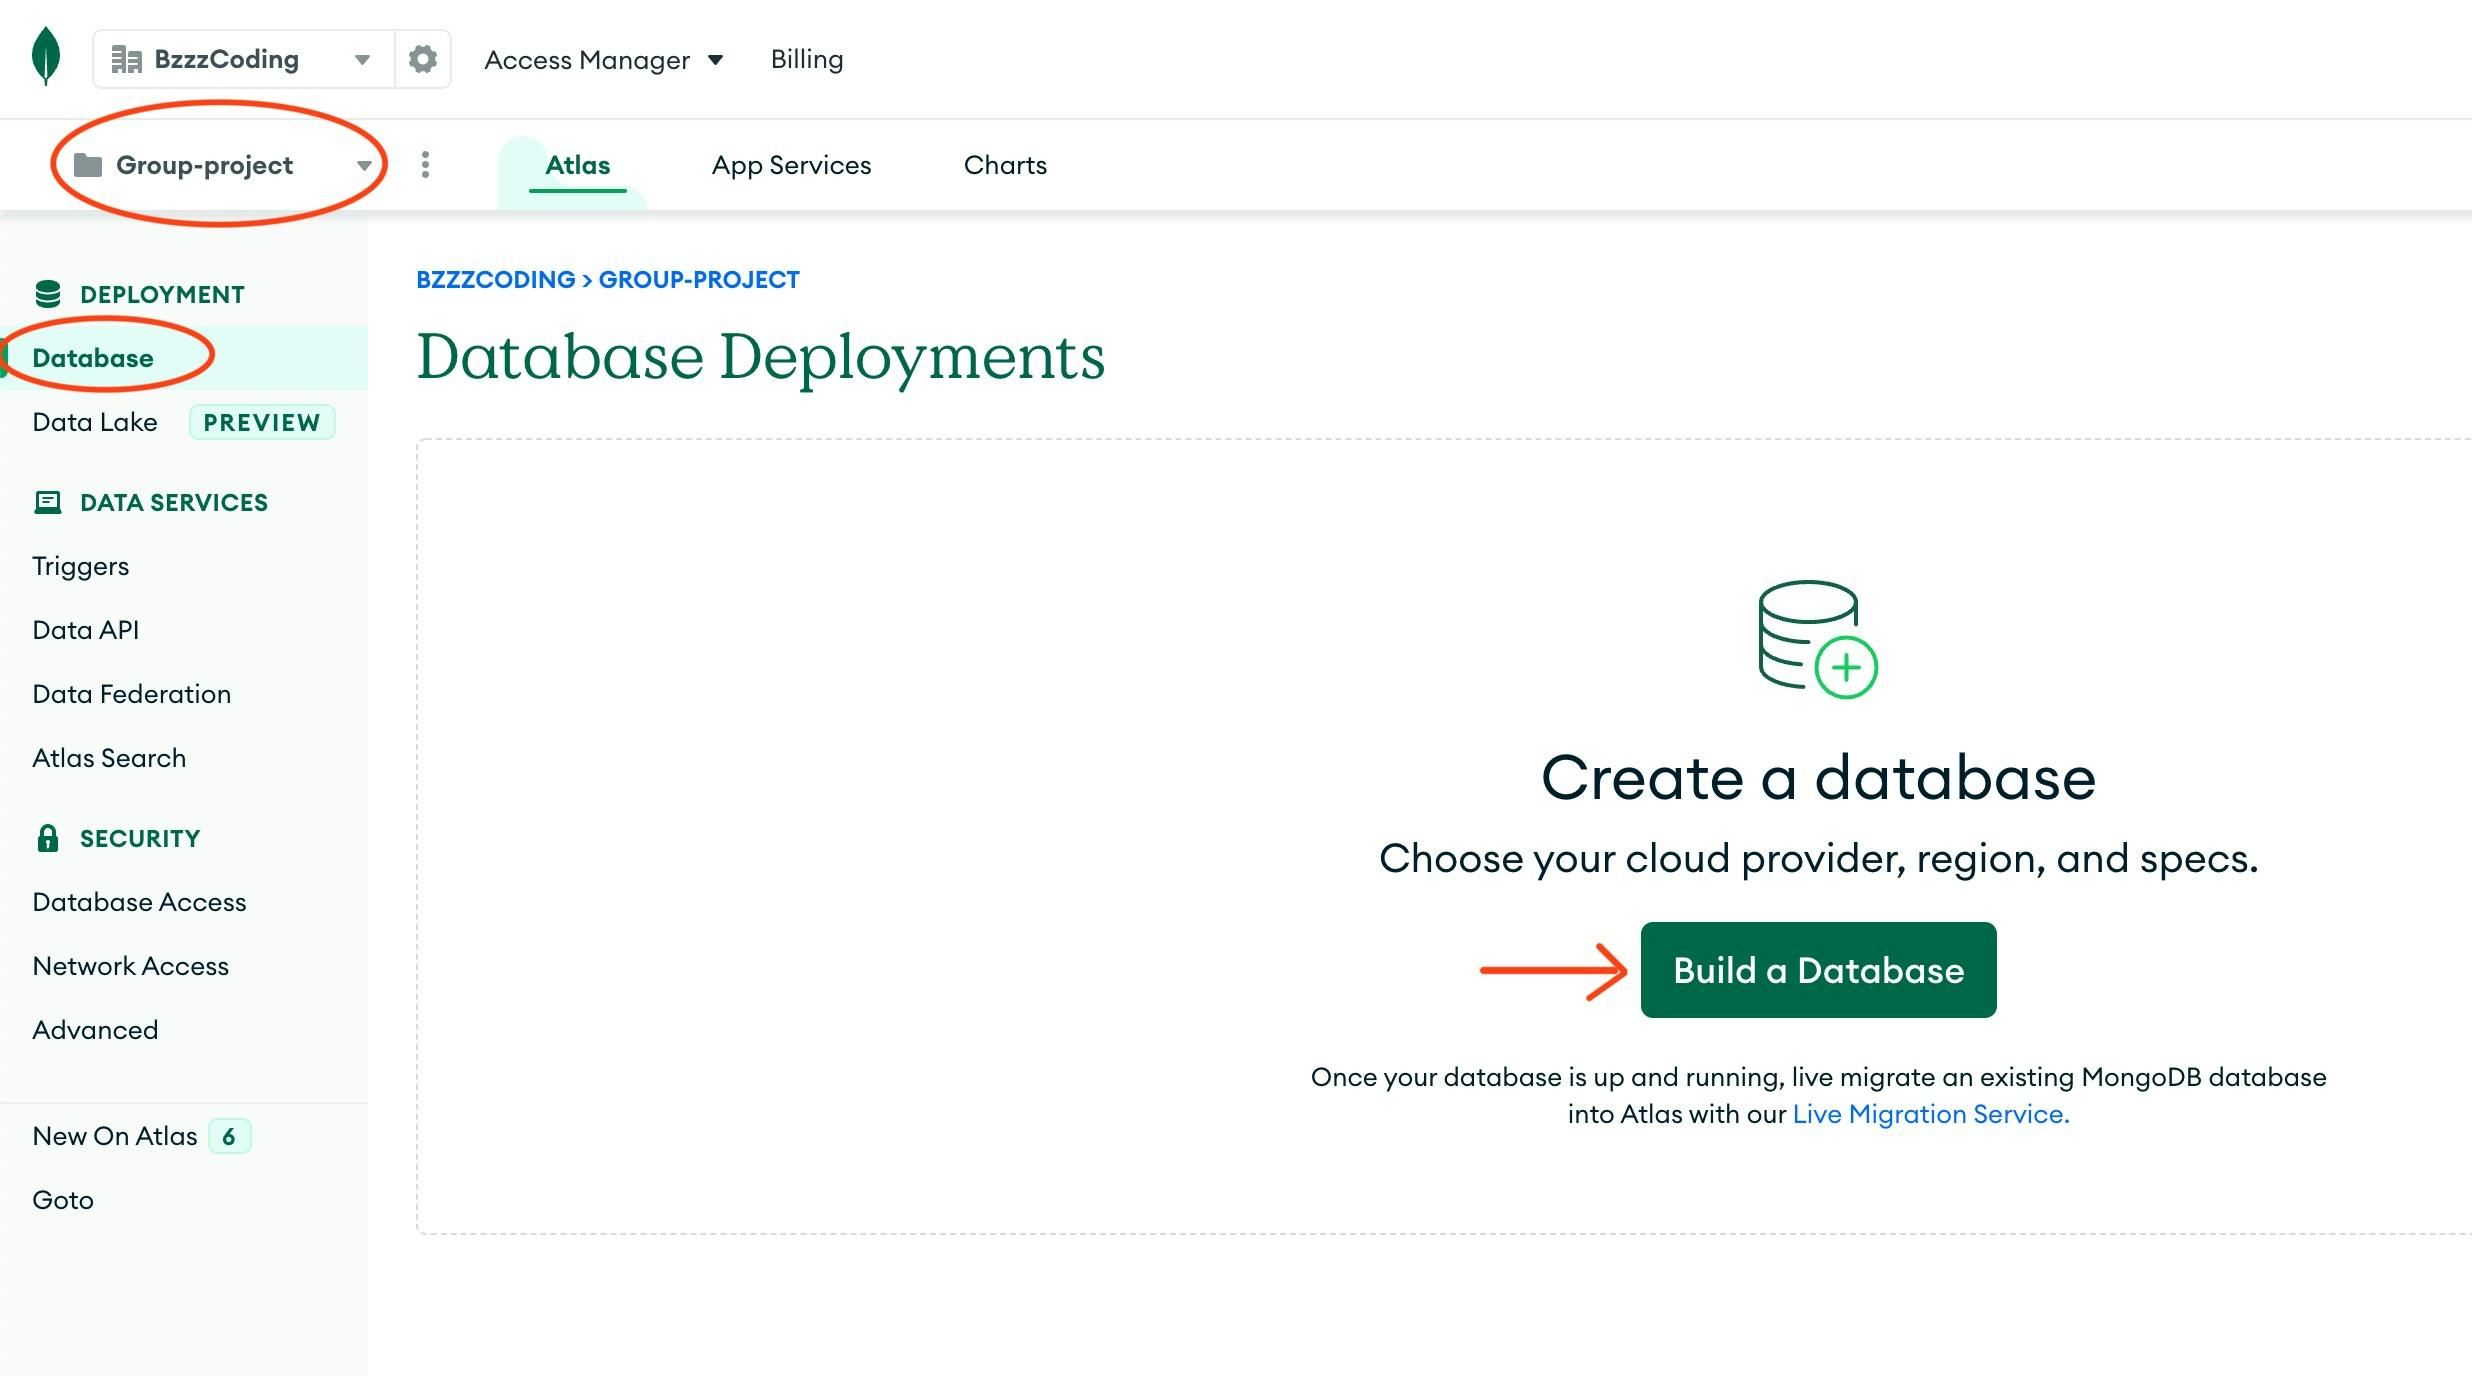
Step 7. Build a Database.
Now go into the project you just created, and click "Build a Database".
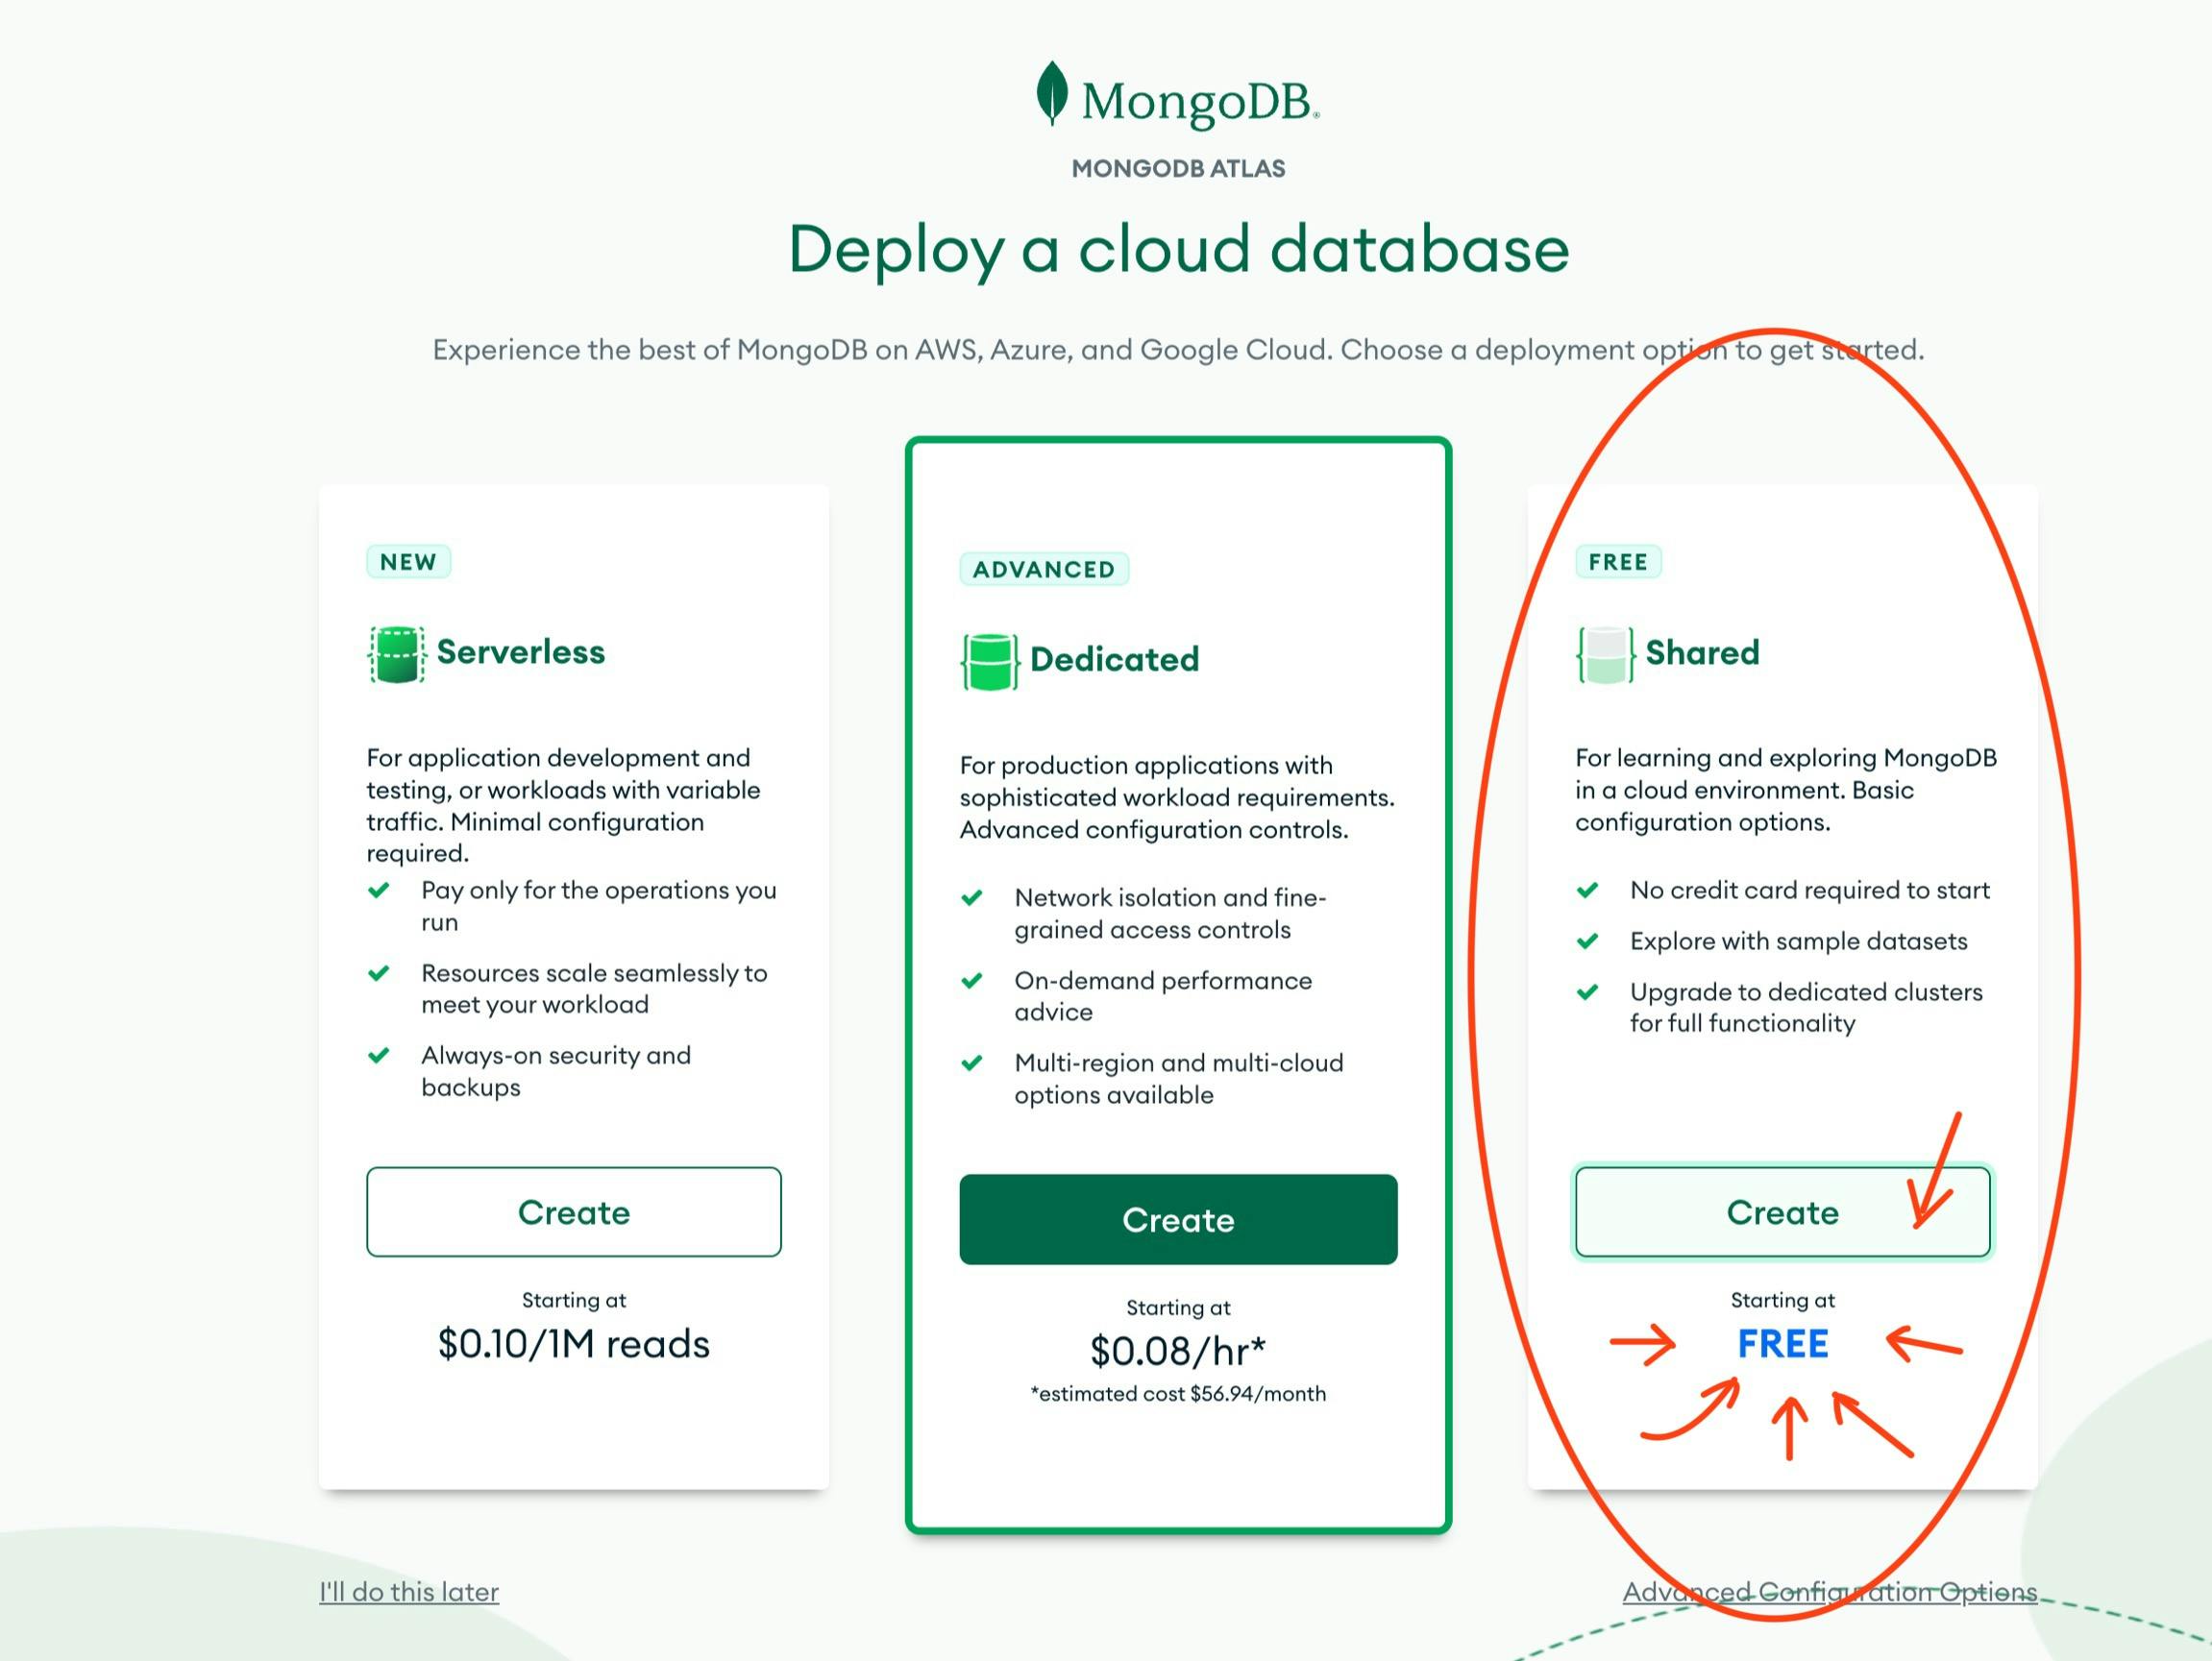
Step 8. Deploy a Database.
Choose the free plan (unless you need a paid plan for your project).
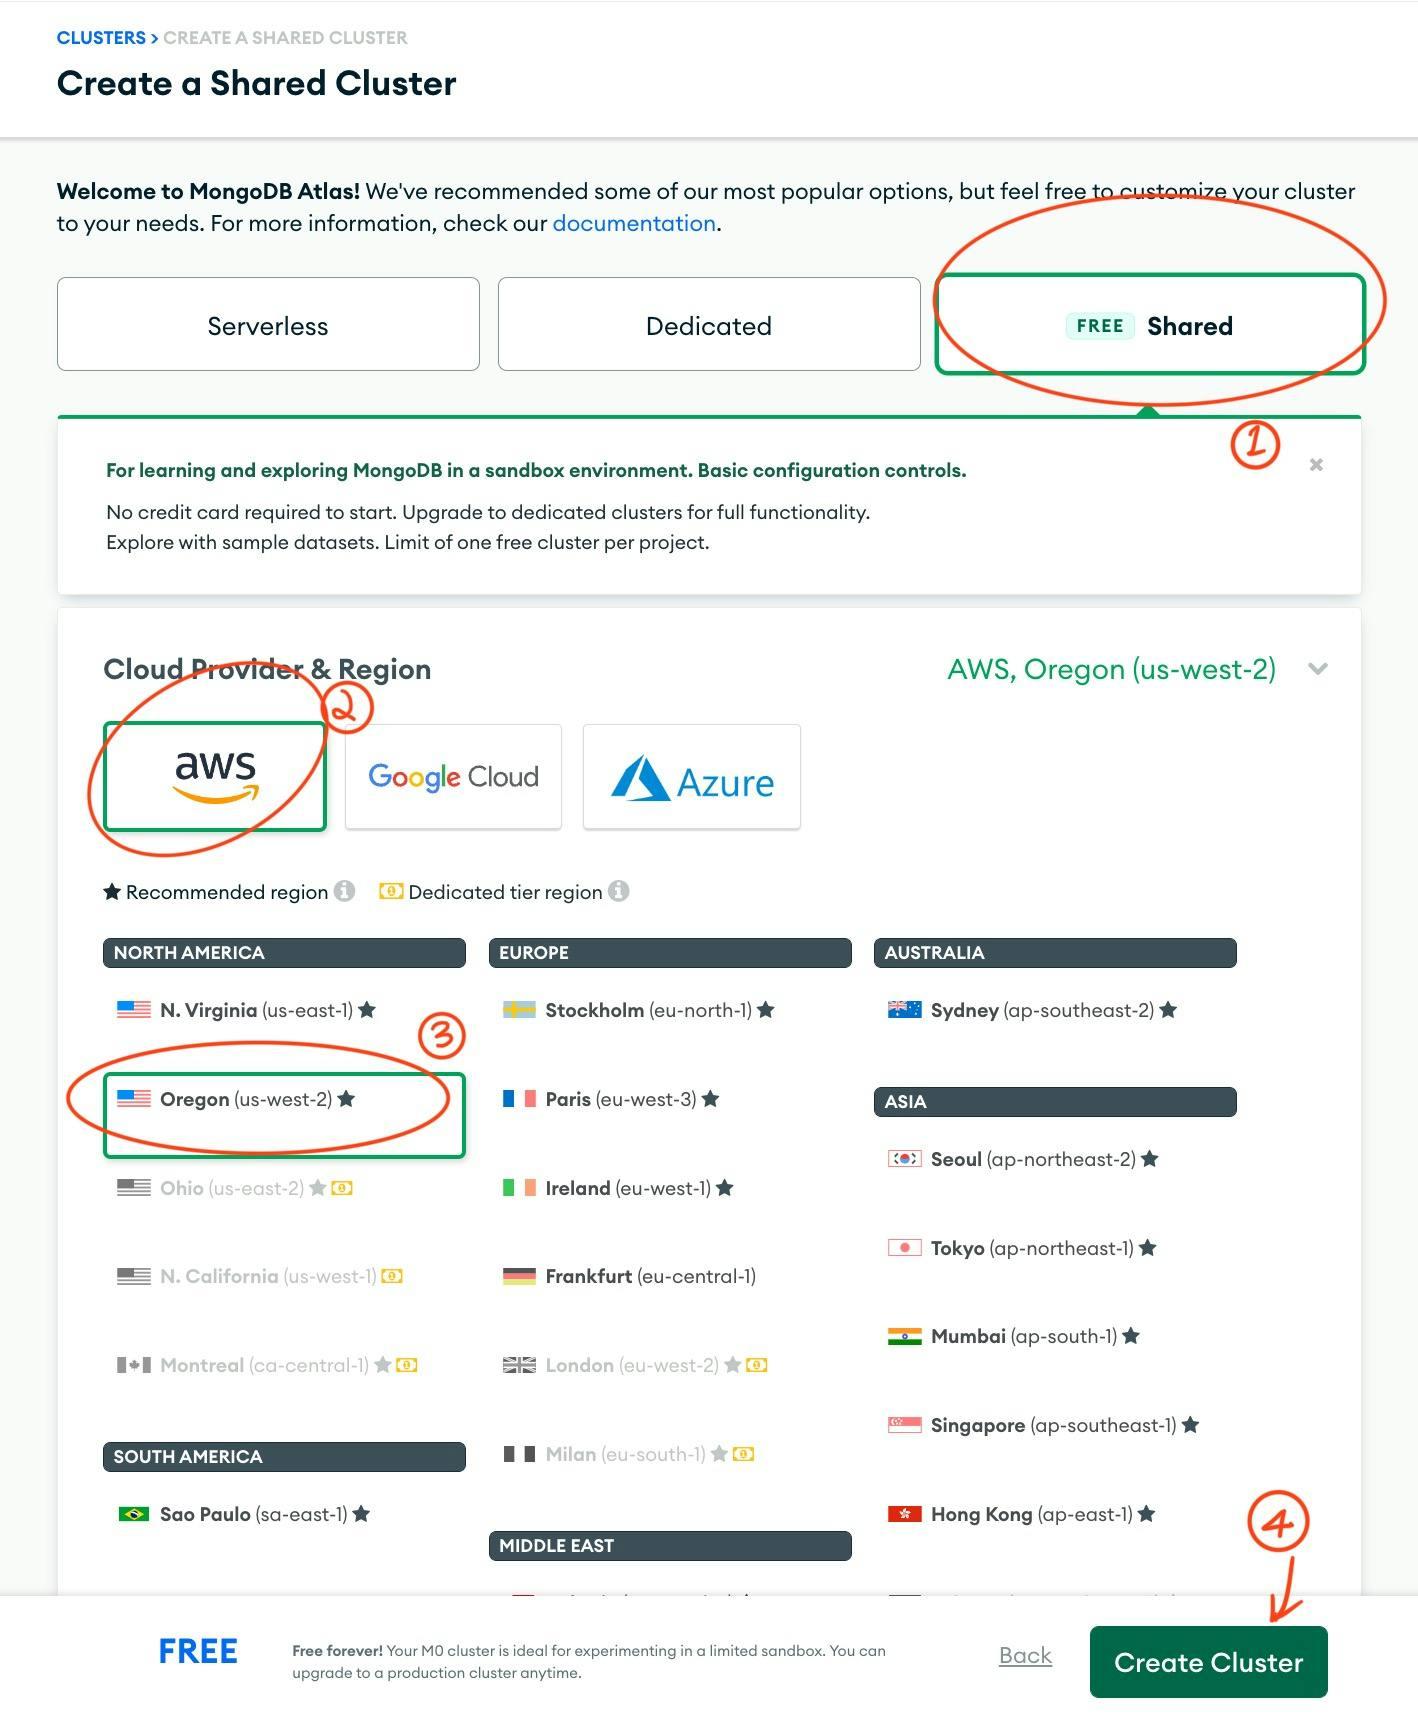
Step 9. Create a Cluster.
Again, make sure it's the free/shared cluster, I chose AWS and Oregon as my region (as I live in California but I don't think it matters that much--if I'm wrong, please enlighten me!), then, click "Create Cluster".
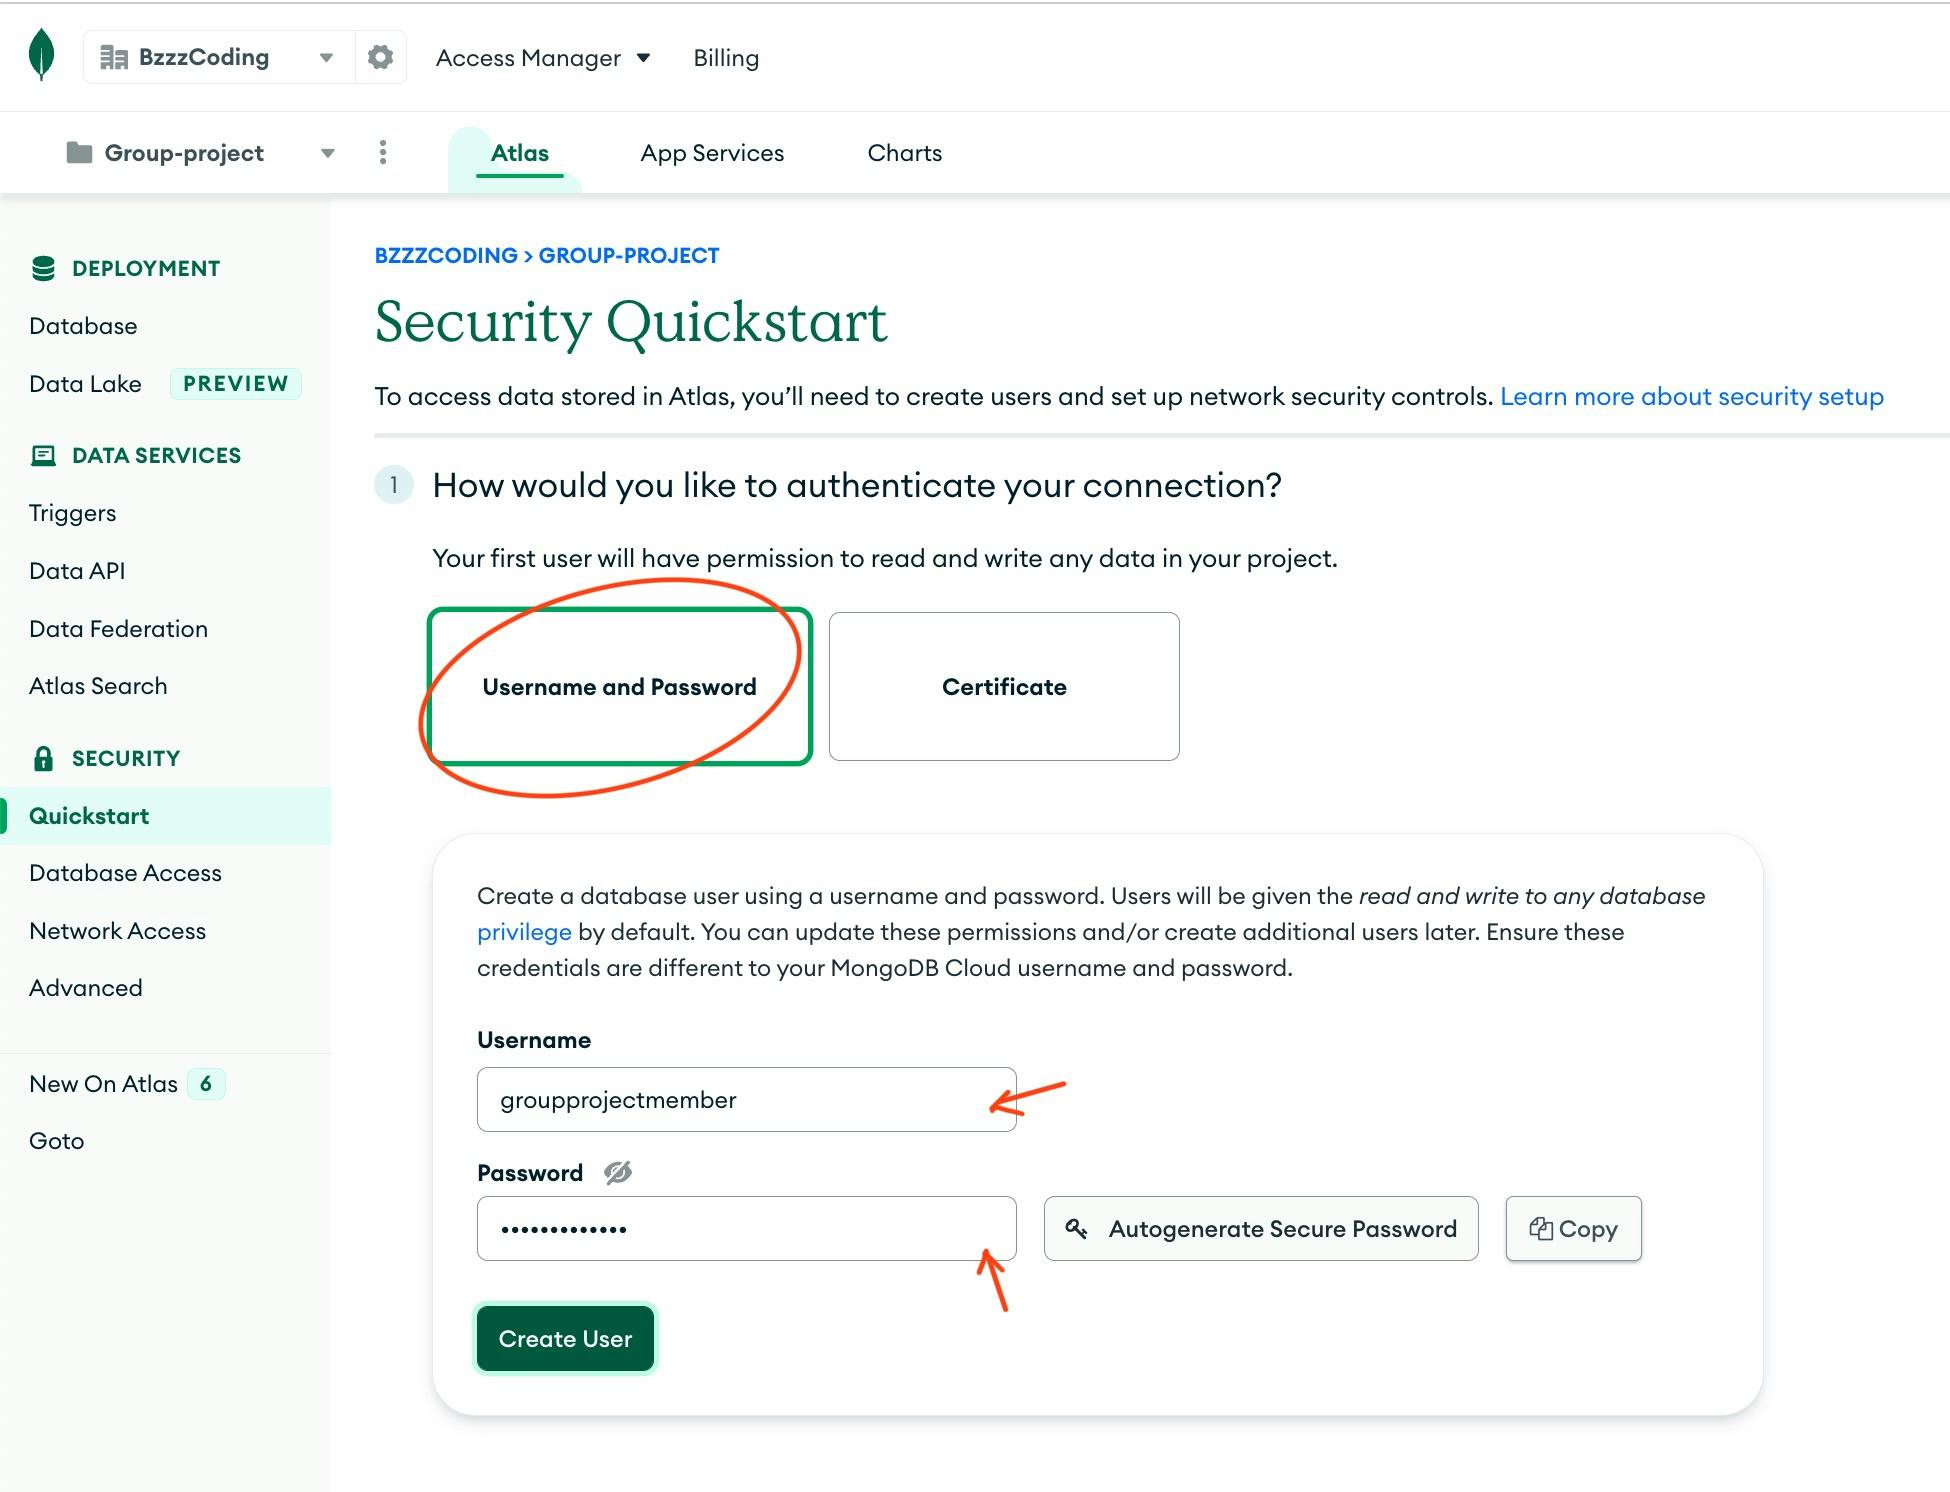
Authenticate your cluster by setting a username and password (save the password somewhere safe), then, click "Create User".
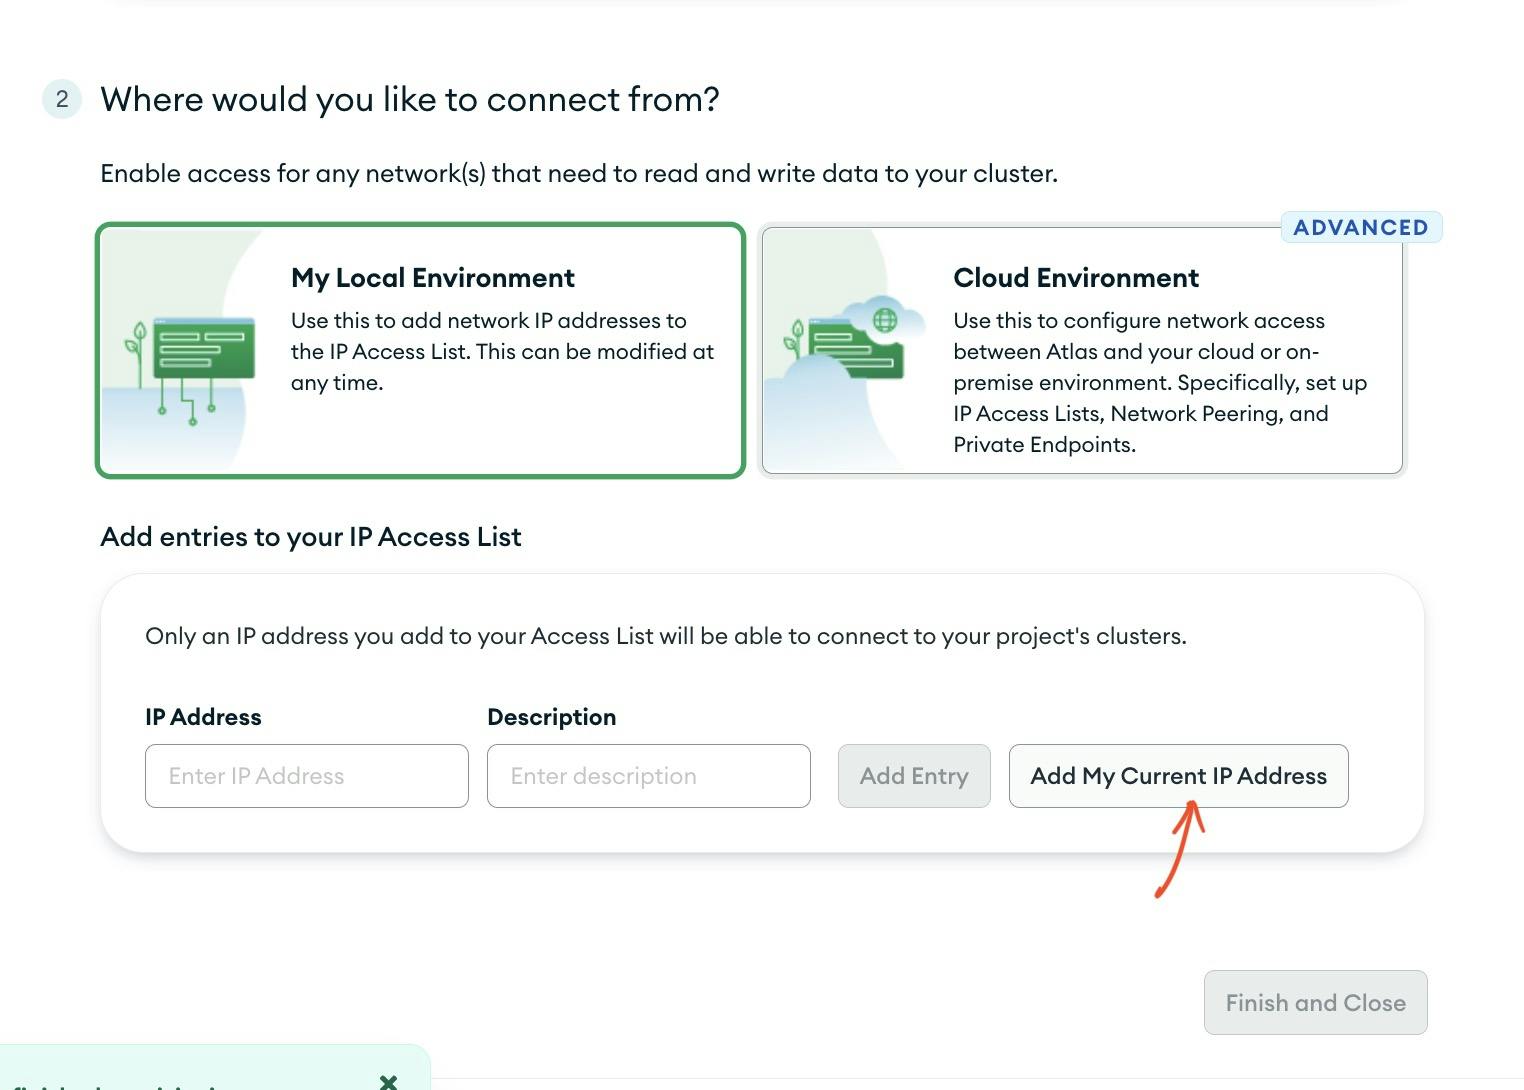
The second step is to set IP Address. Choose "My Local Environment" (should be selected by default) and click on "Add My Current IP Address".
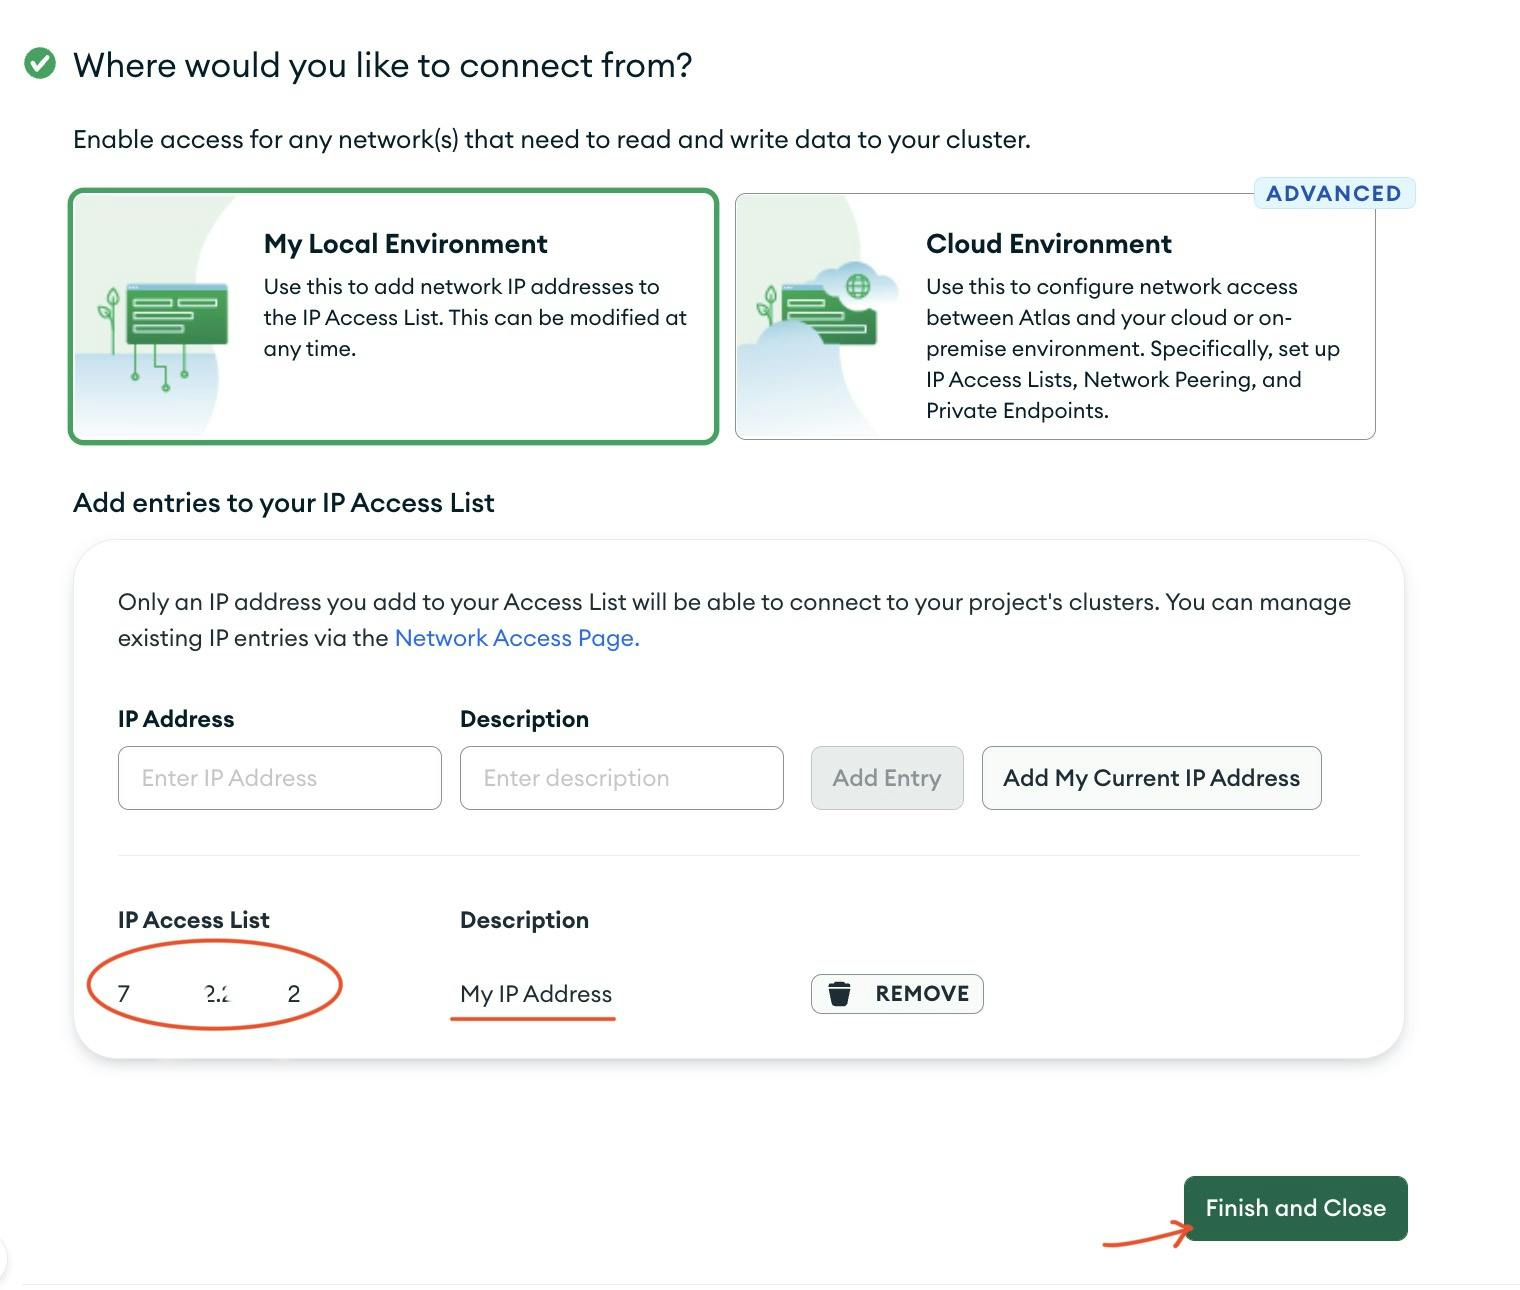
You should now see your IP address listed (I blurred mine). Click "Finish and Close".
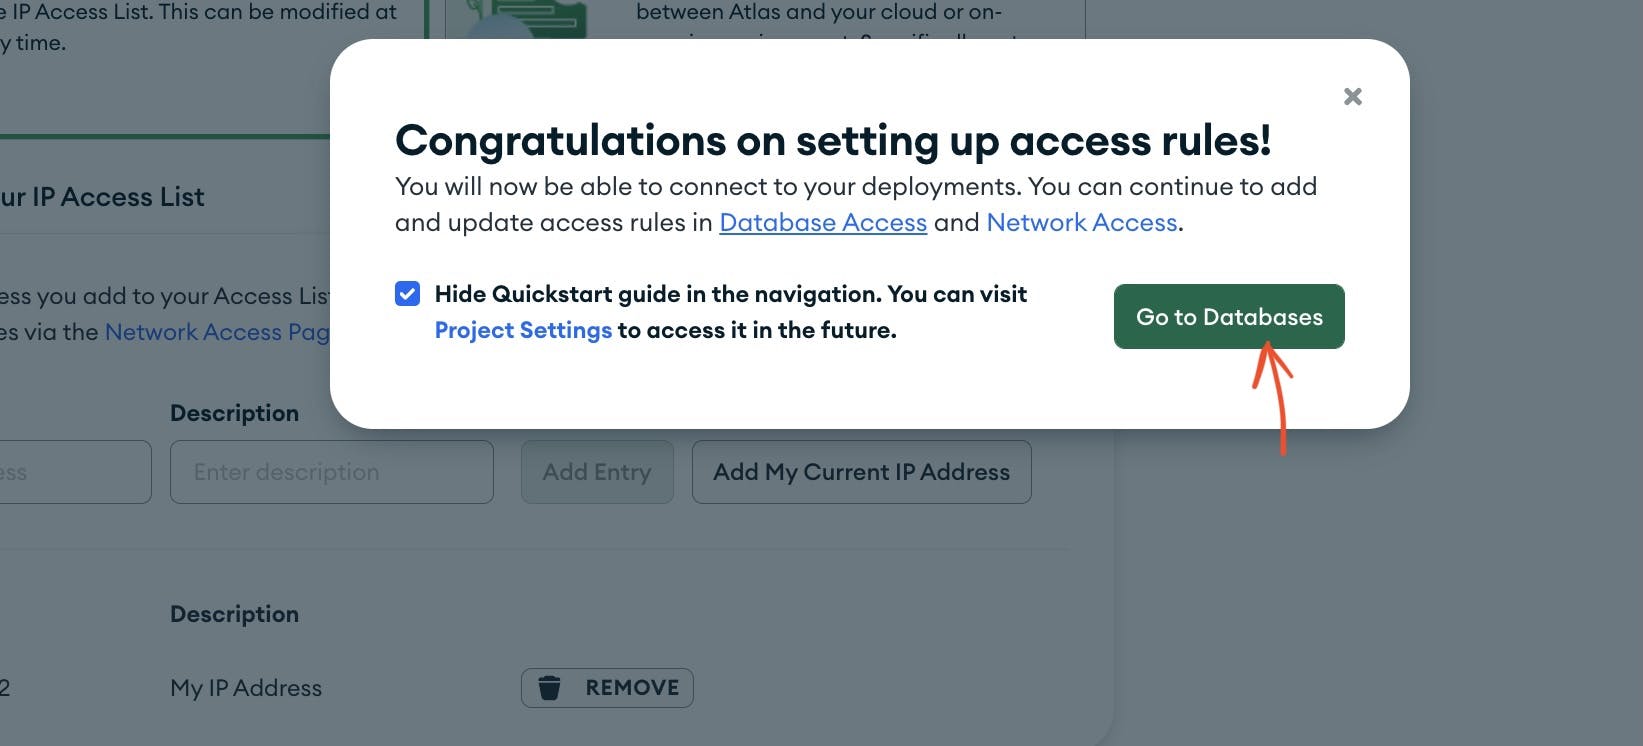
Yay! Click "Go to Database"
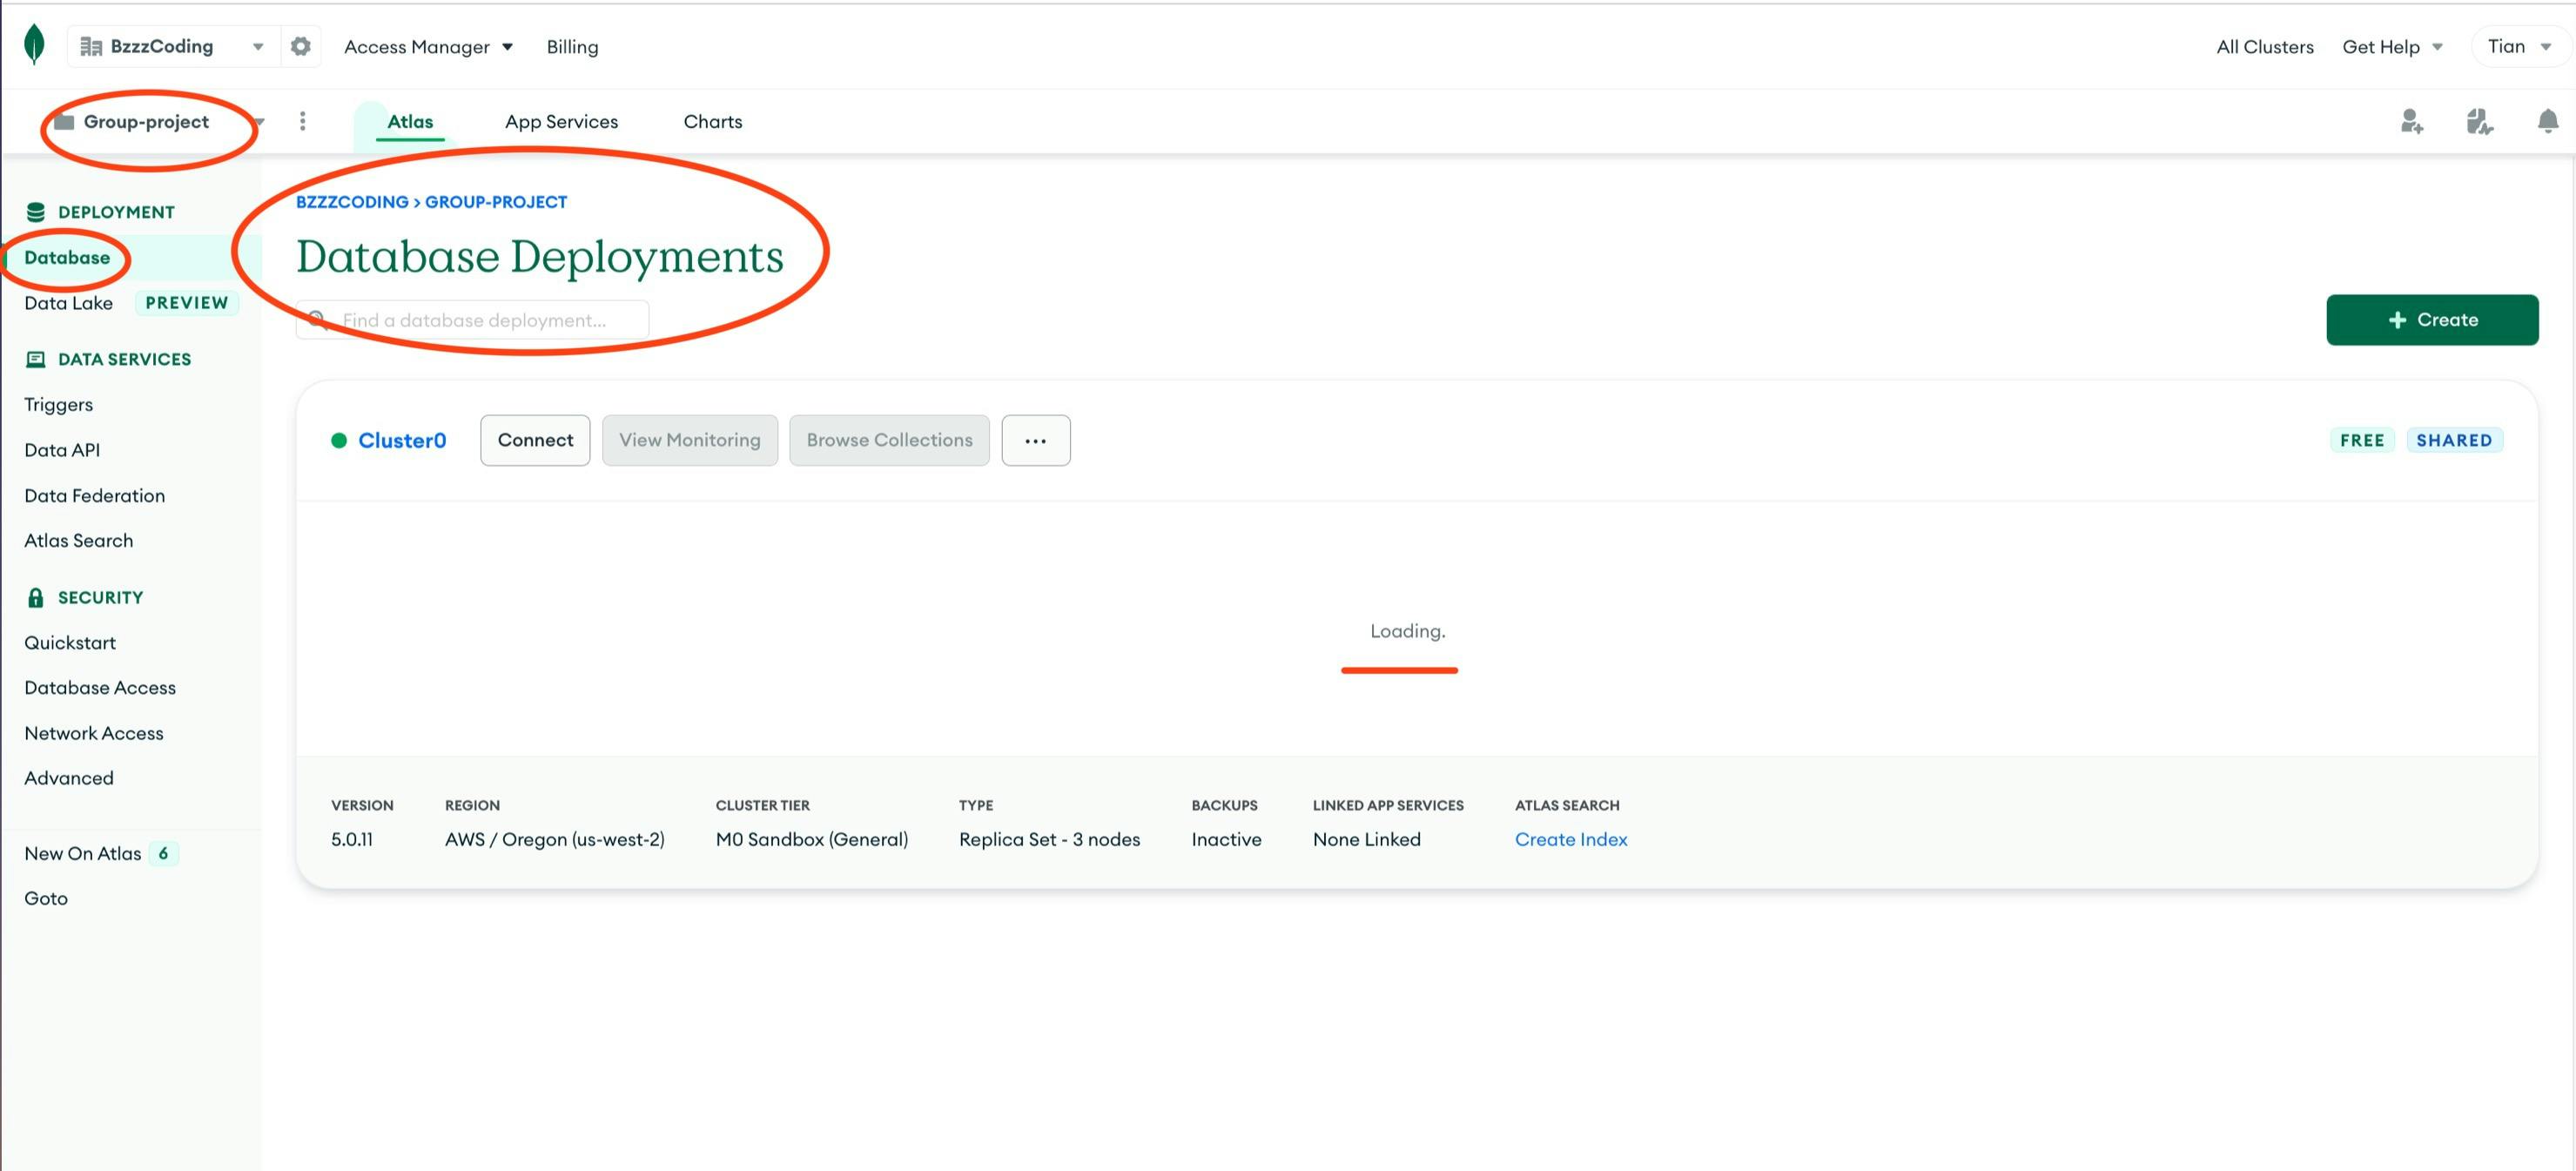
You should be redirected (if not, just go back) to the Database Deployments page, and the "Loading" may take a while.
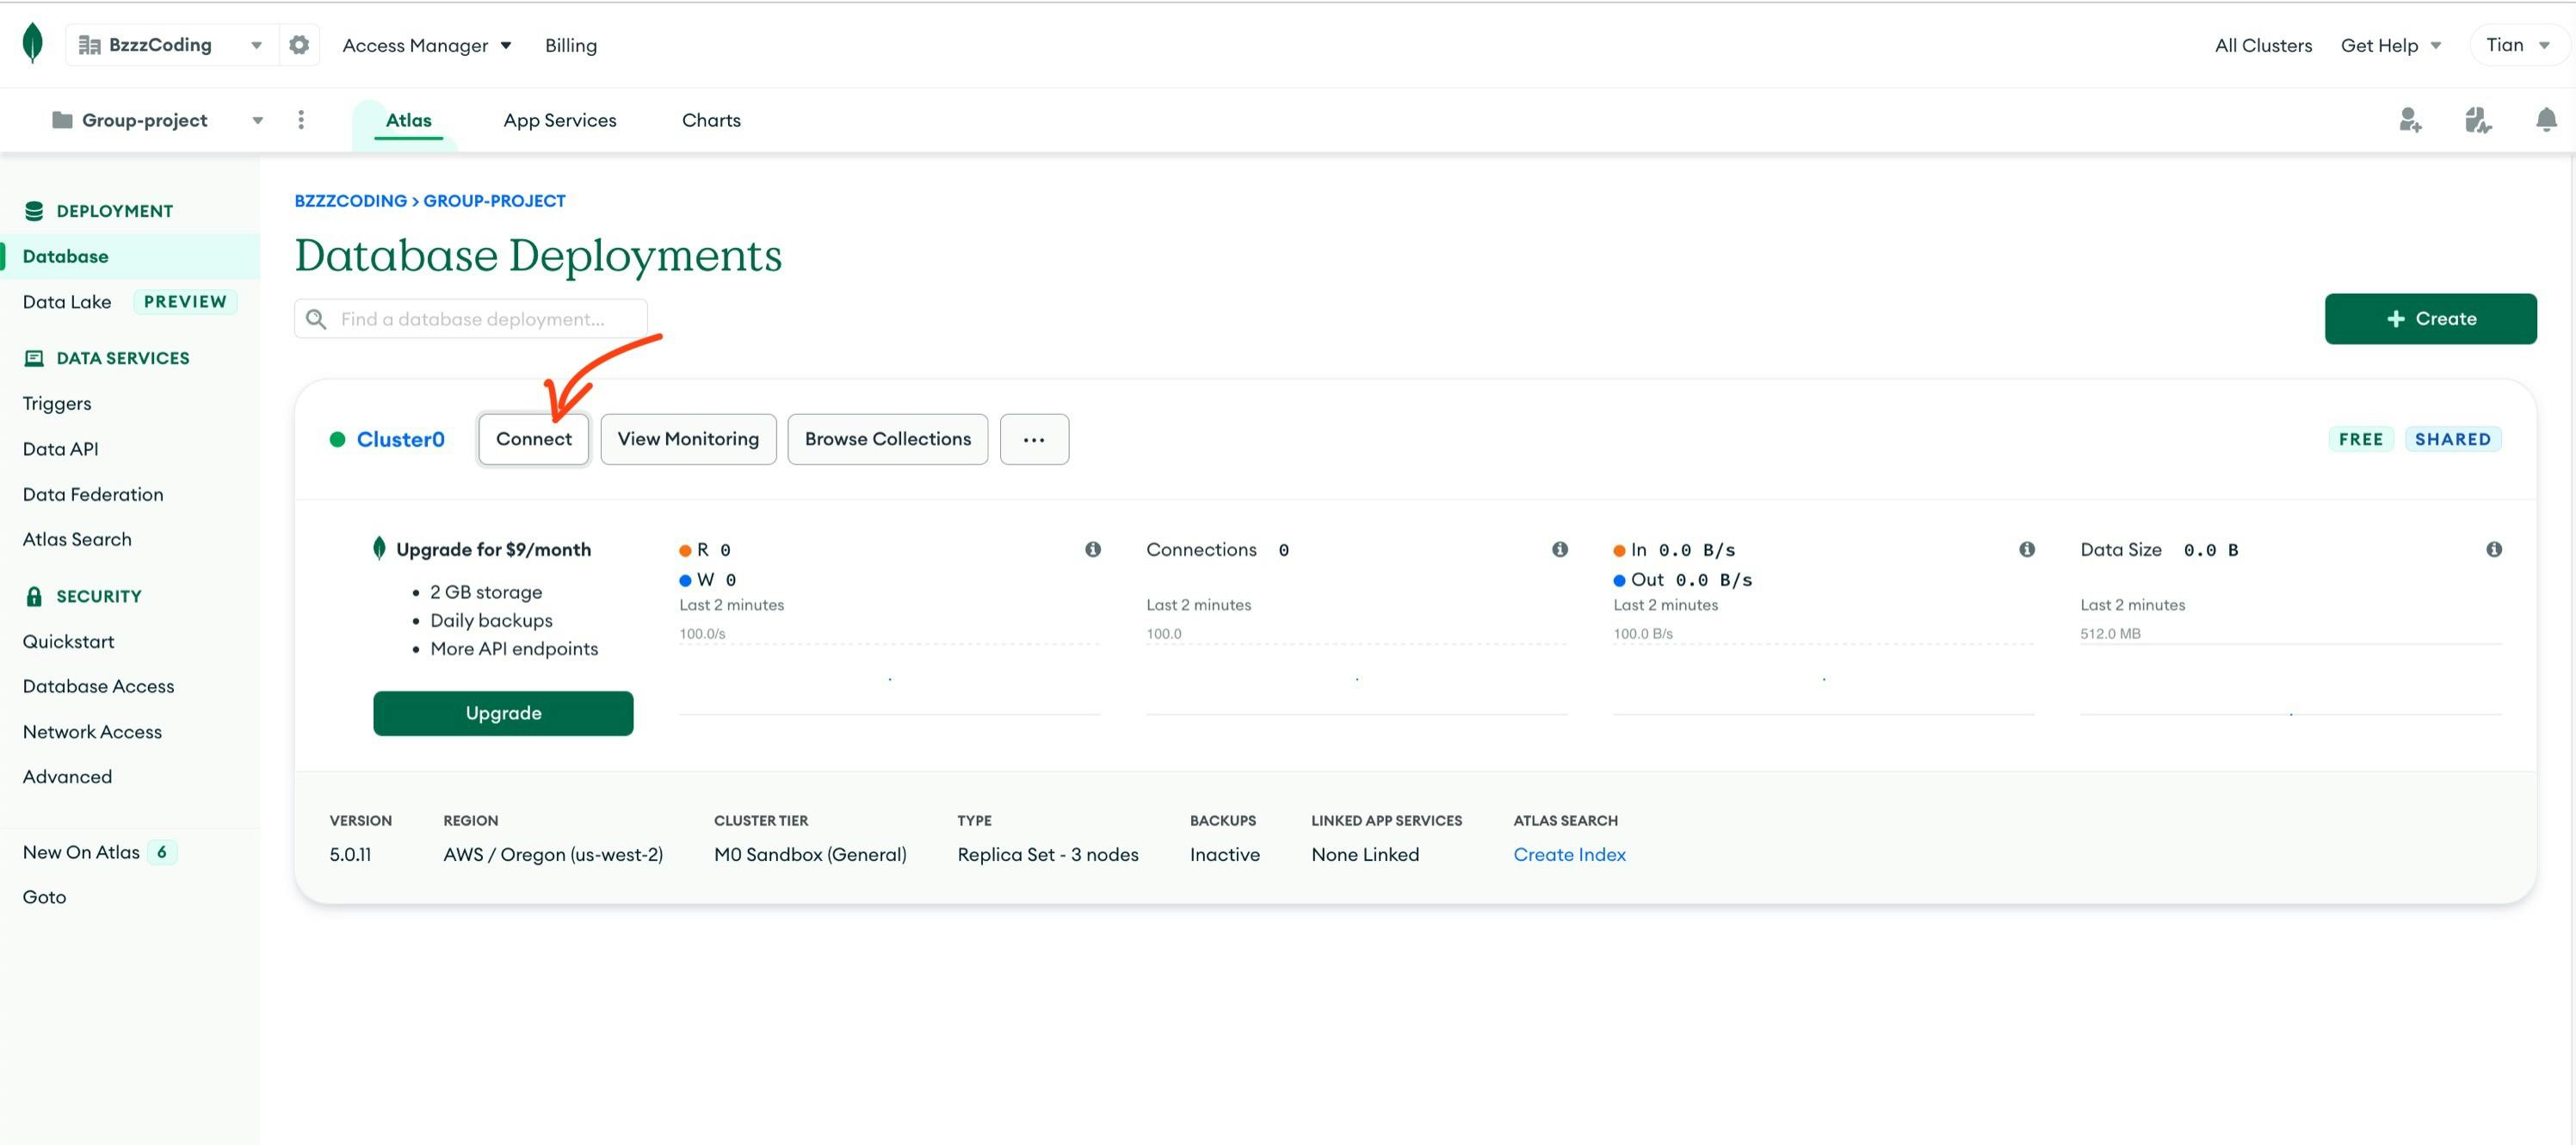
Step 10. Connect.
When it finishes loading, click "Connect".
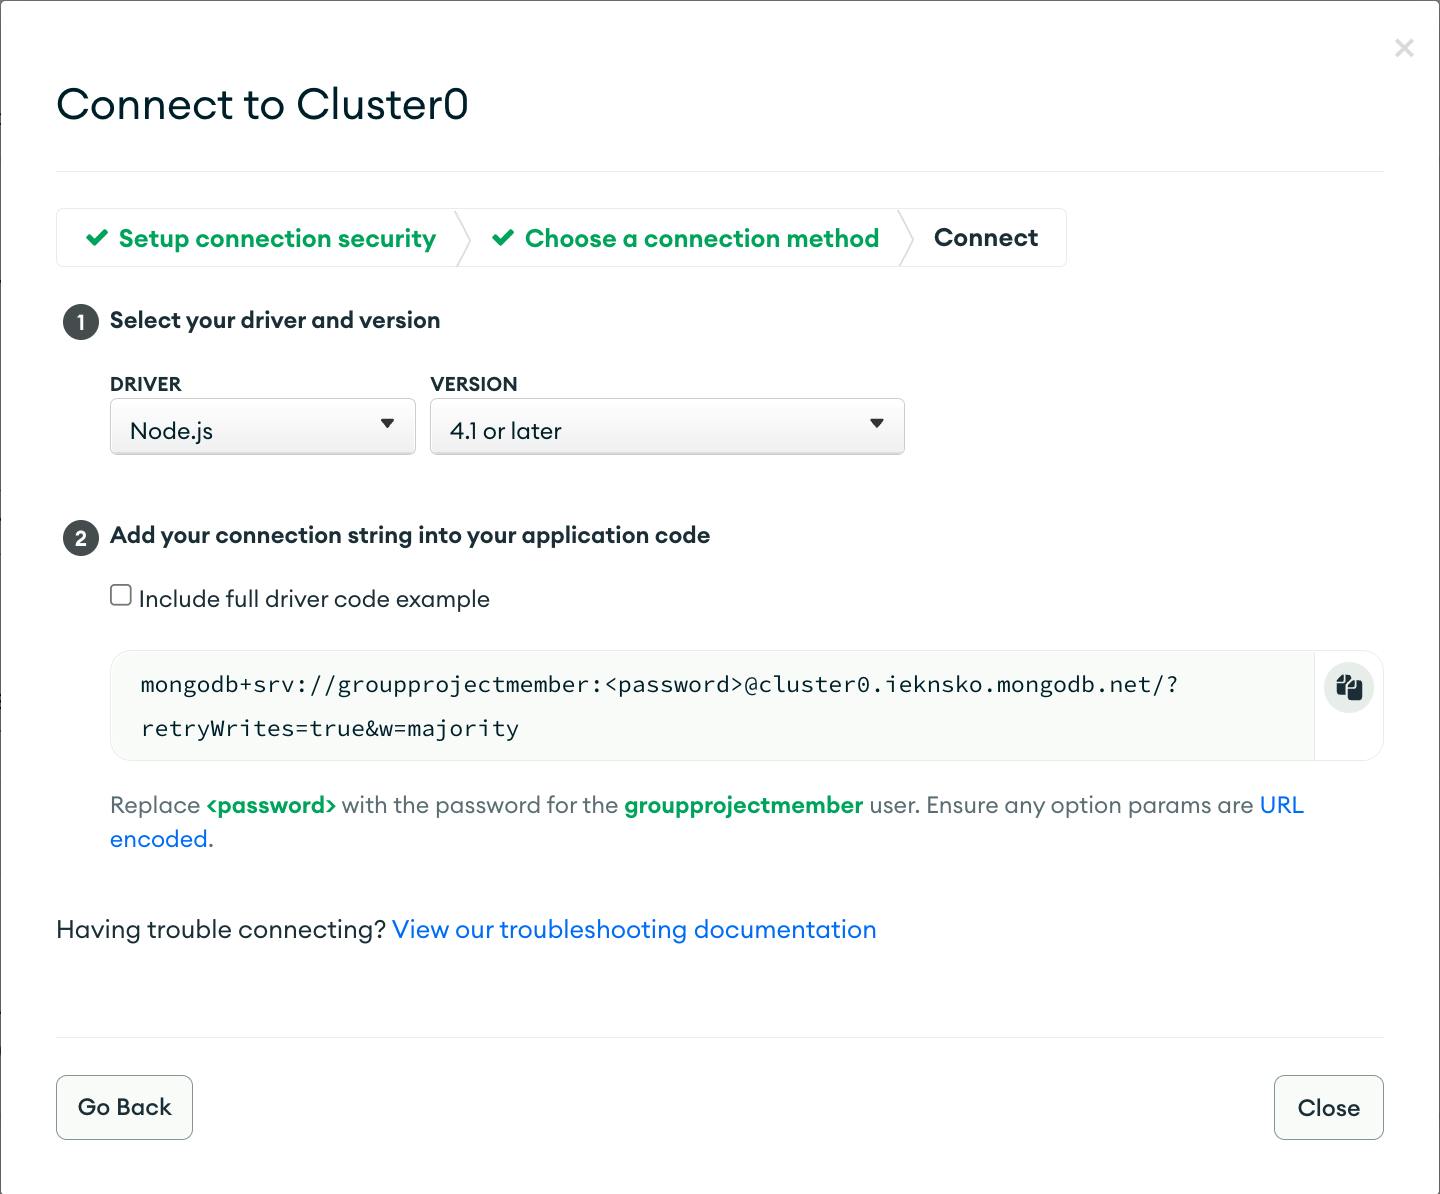
Click "Connect your application".
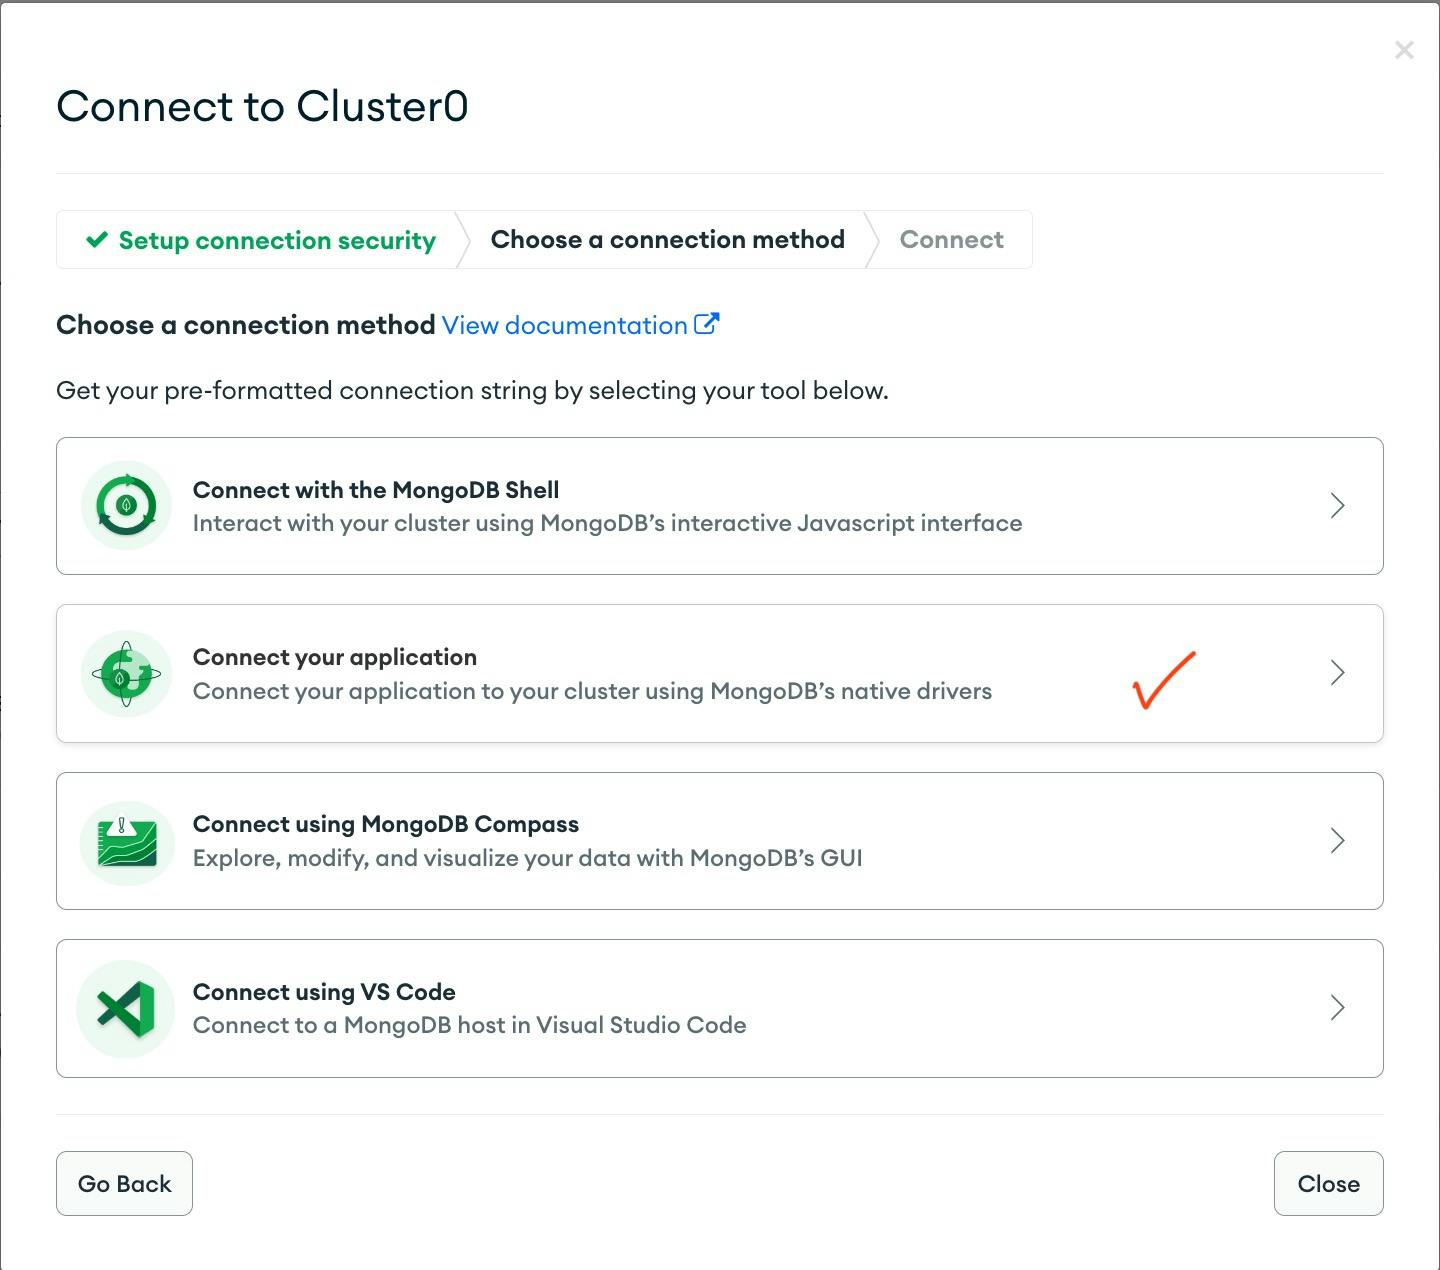
Copy the connection string and click "Close".
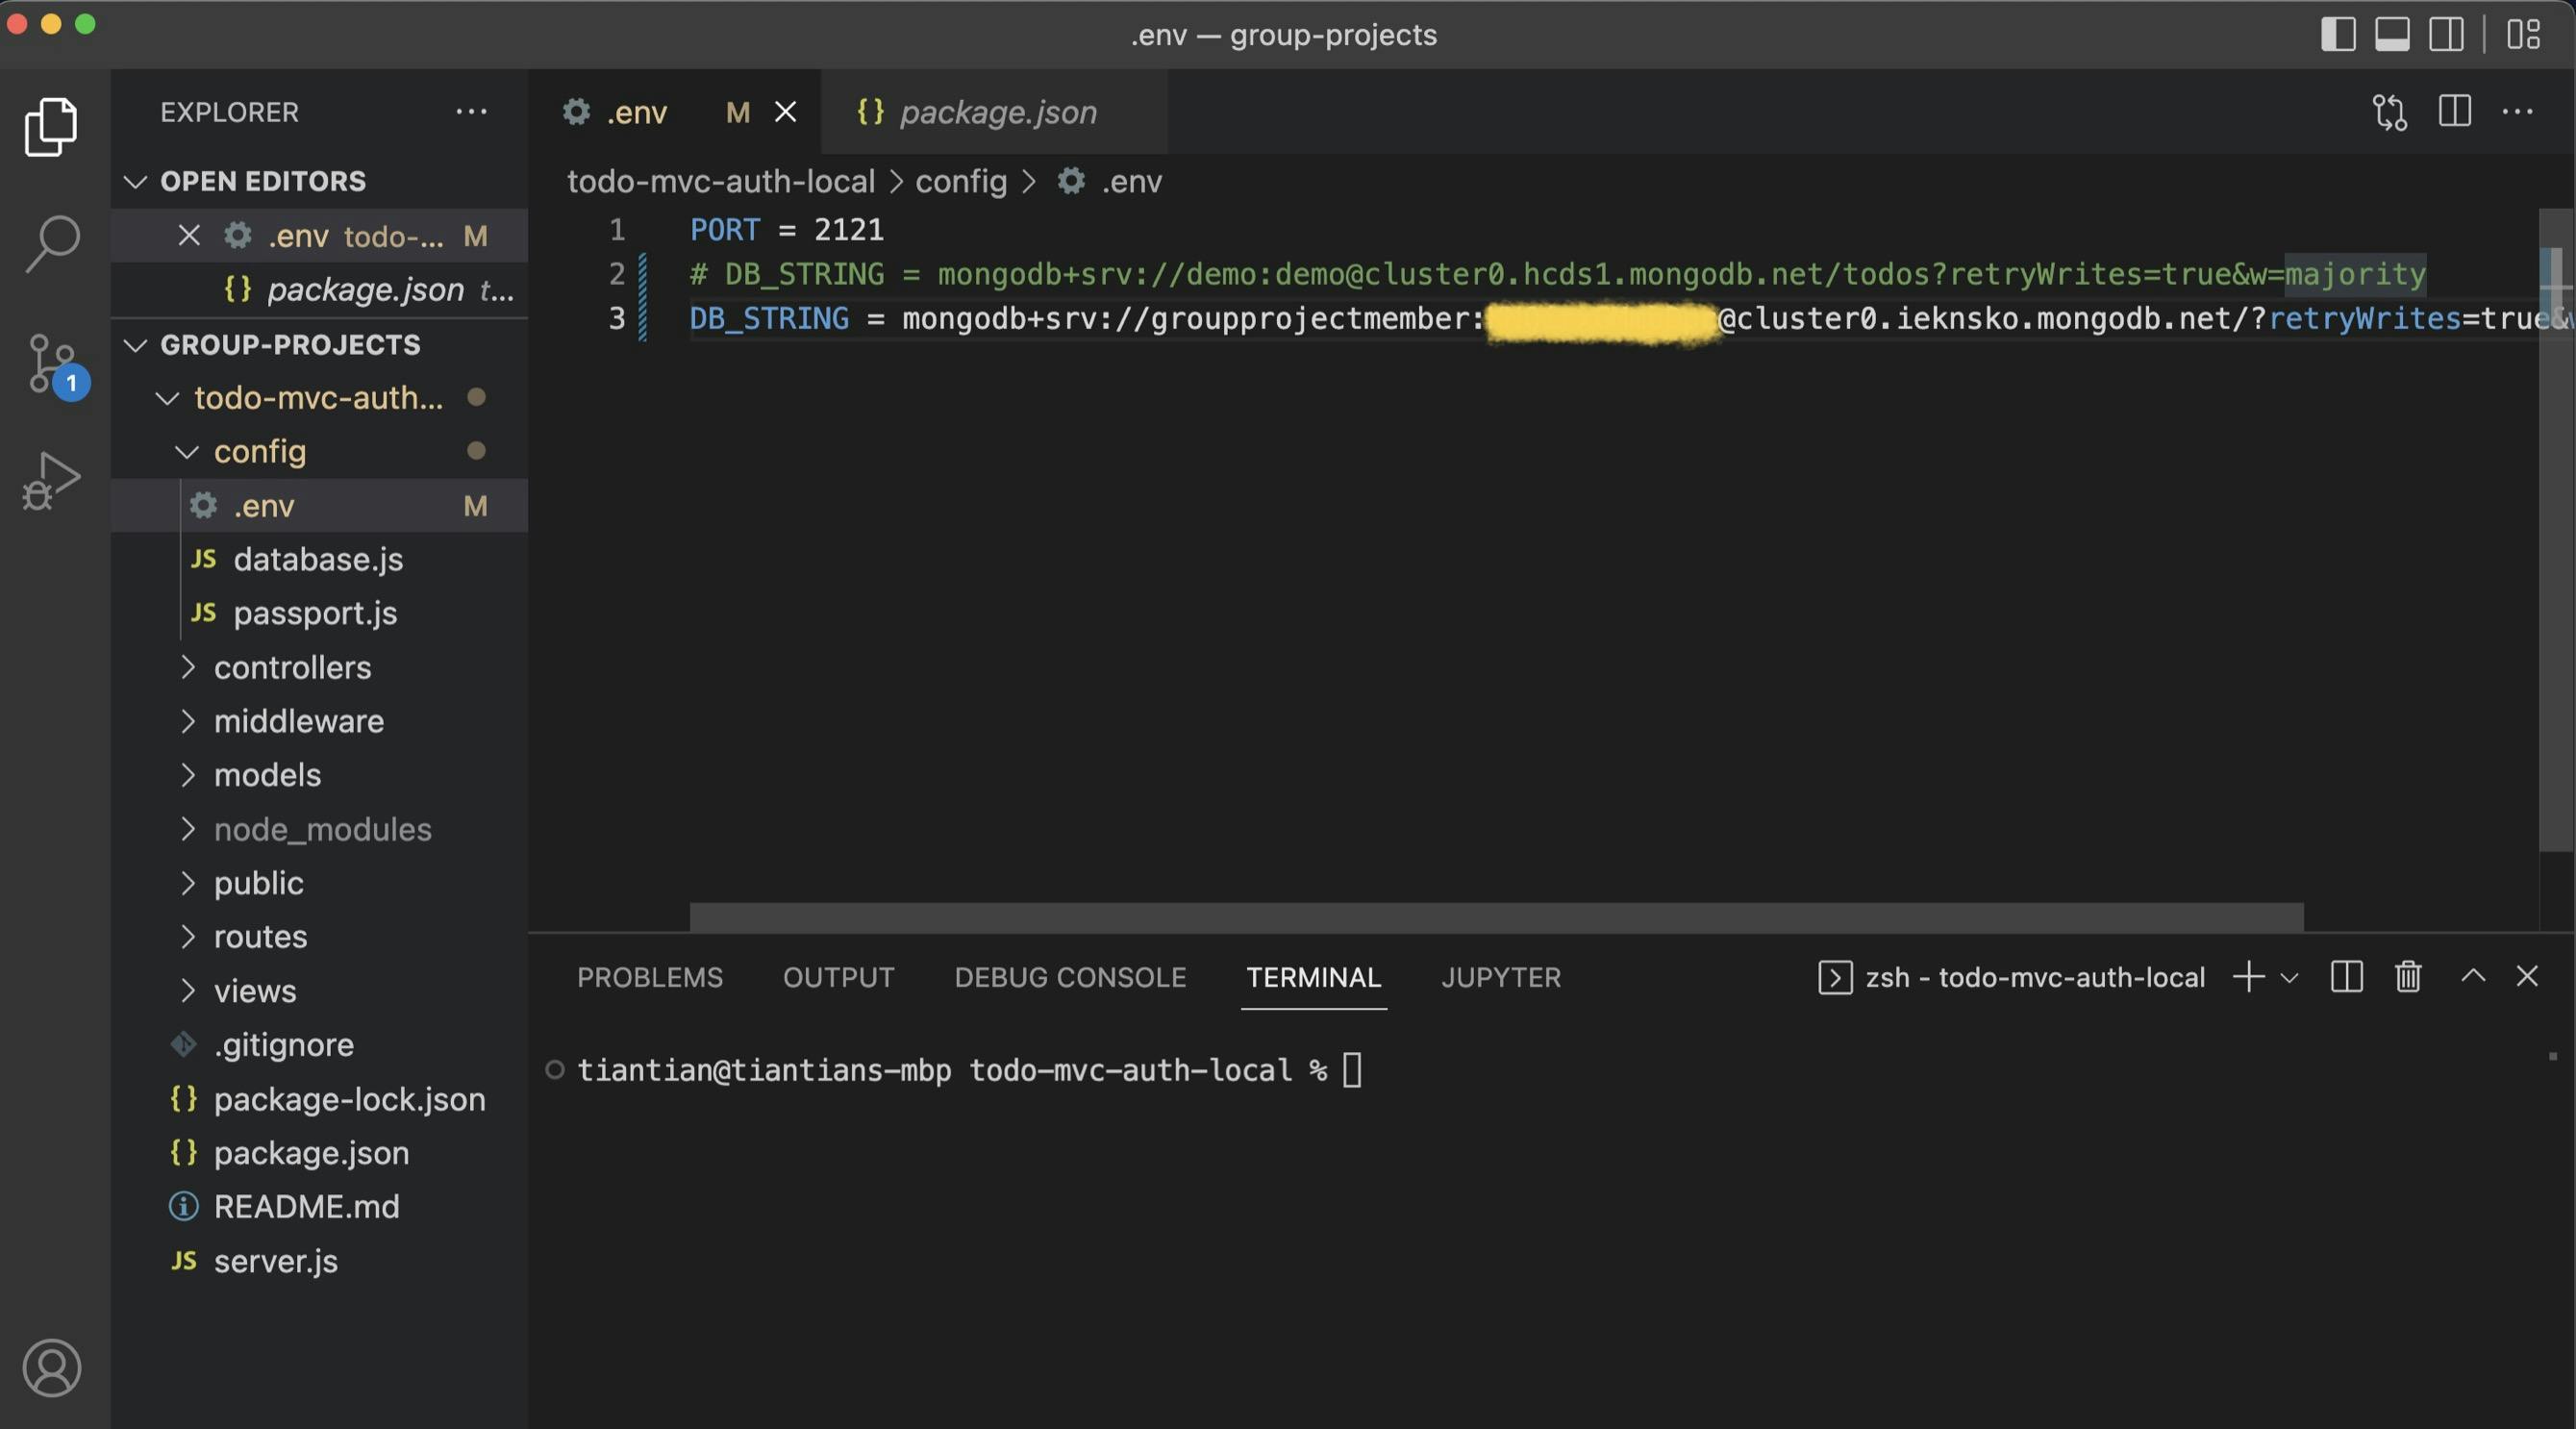
Step 11. Paste your connection string in the .env file.
Comment out or just replace the DB_STRING in the .env file in the config folder. Replace "" with the password you set and saved earlier in Step 9. update: #100devs, you can add 'todo' right before the '?' as Leon did to name the database. Remember the PORT number in this .env file. You can change it if you want to.
Step 12. Let's run the app!
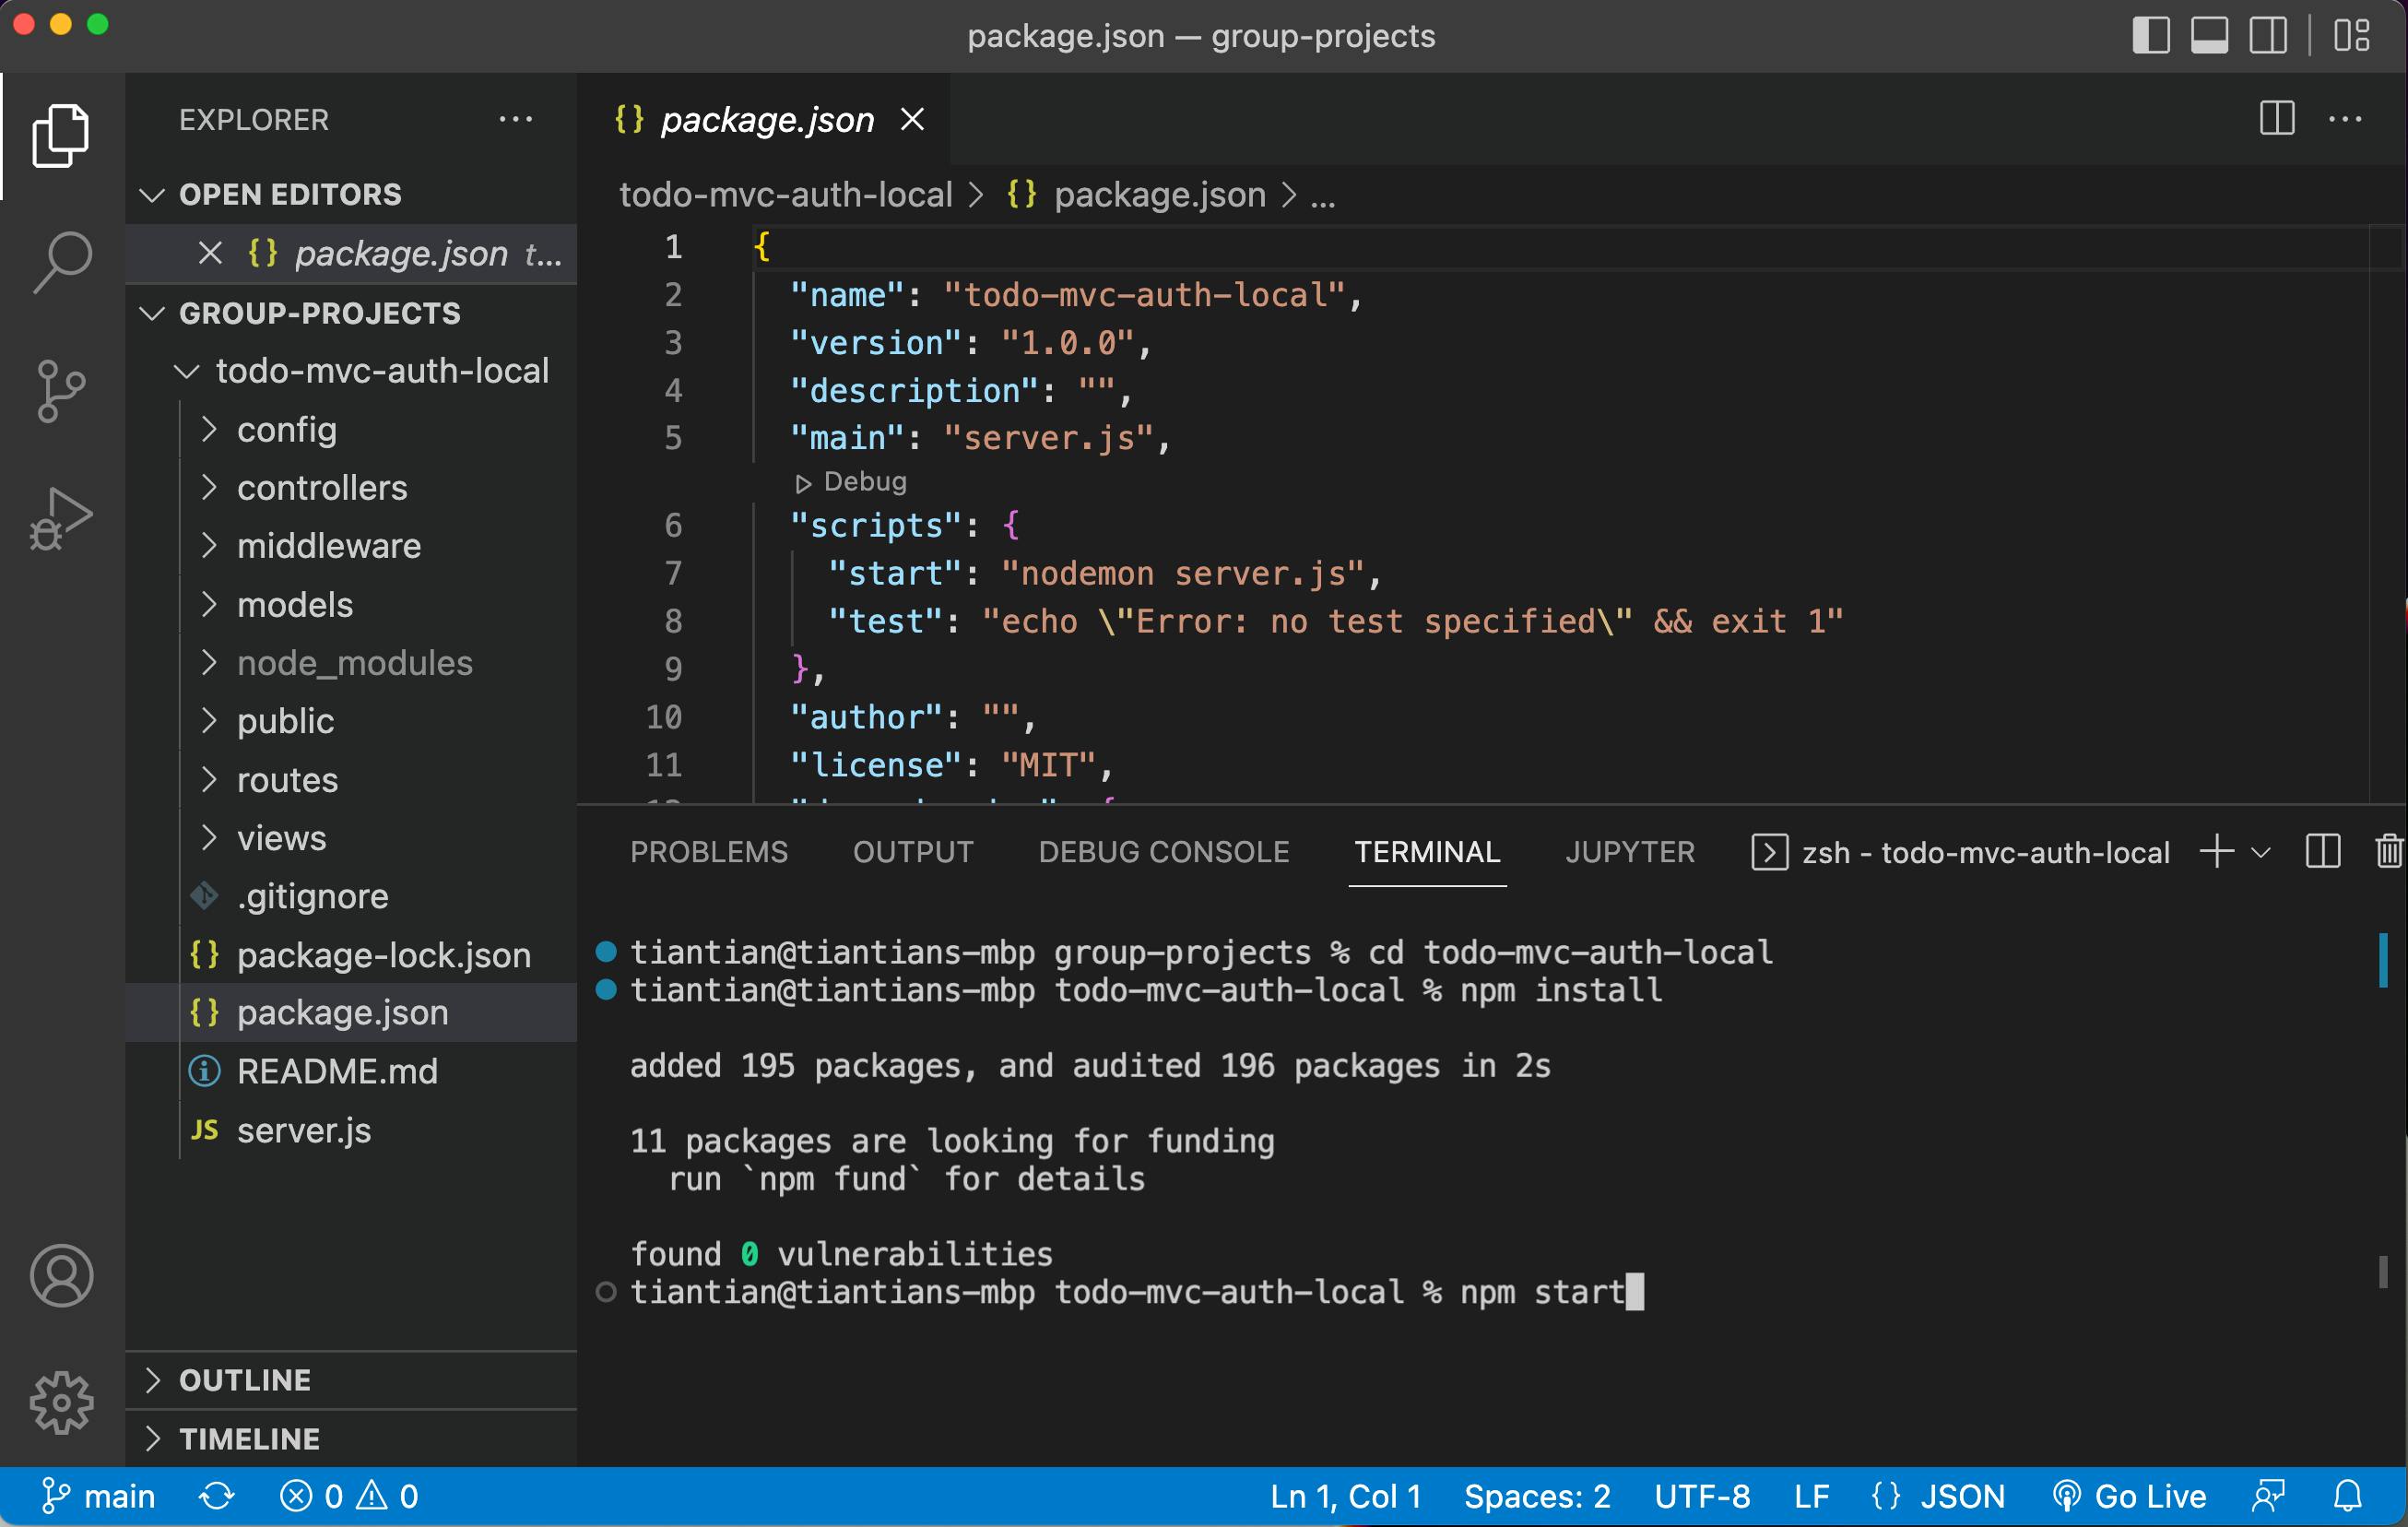
If you go to package.json, you'll notice in the "scripts", nodemon server.js is set to "start". This means that for us to run nodemon, we simply need to write in the terminal the comman "npm start" (make sure you cd'ed into the correct directory, in my example, the todo-mvc-auth-local directory).
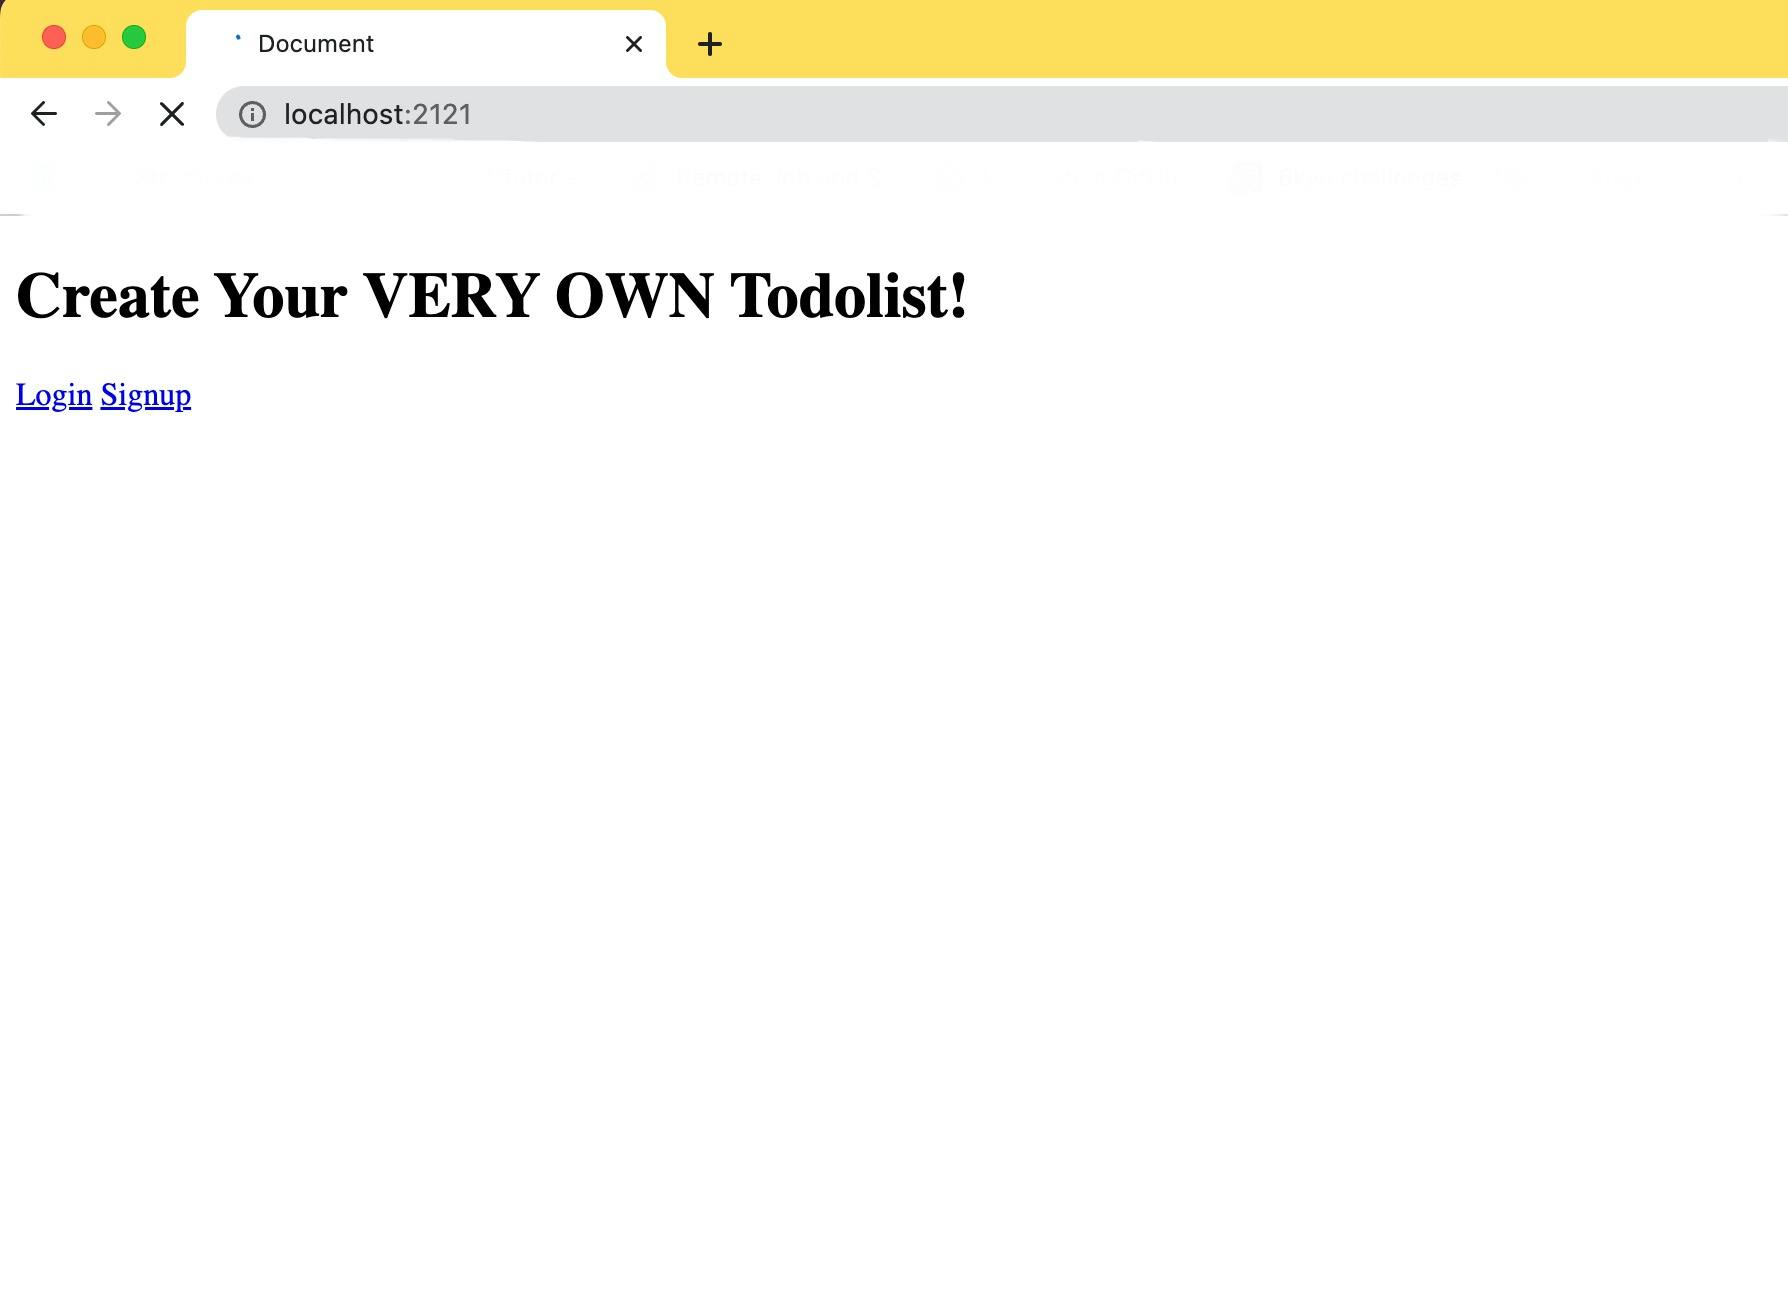
Step 13. Now check the port!
If your nodemon started, server is running, and DB got connected, open the browser and check "localhost: 2121" (or, the number you changed to), you'll be able to view and use the app locally! Have fun testing and playing with the code and database! All data will be saved in your own DB collection.
All code can be found here and thanks to Leon Noel (twitter @leonnoel) and 100Devs.