


If you're like me--you like using a spreadsheet to take and organize your notes but decide it's time to create Anki cards for spaced repetition but are either too lazy (nothing wrong with it!) or don't have the time to enter the front and back of each card by hand, one by one, I hope you'll find this article helpful--I will show you how I was able to import my notes from a Google sheet (you can use Excel or other tools that can generate .csv files) to Anki and automatically create dozens and hundred of cards.
I will use my notes for prepping the Bank (a set of questions frequently asked during technical interviews for software engineer positions) as an example for this tutorial. For those of you who are interested in learning web development for free, check out the best ever 100Devs led by Leon Noel.
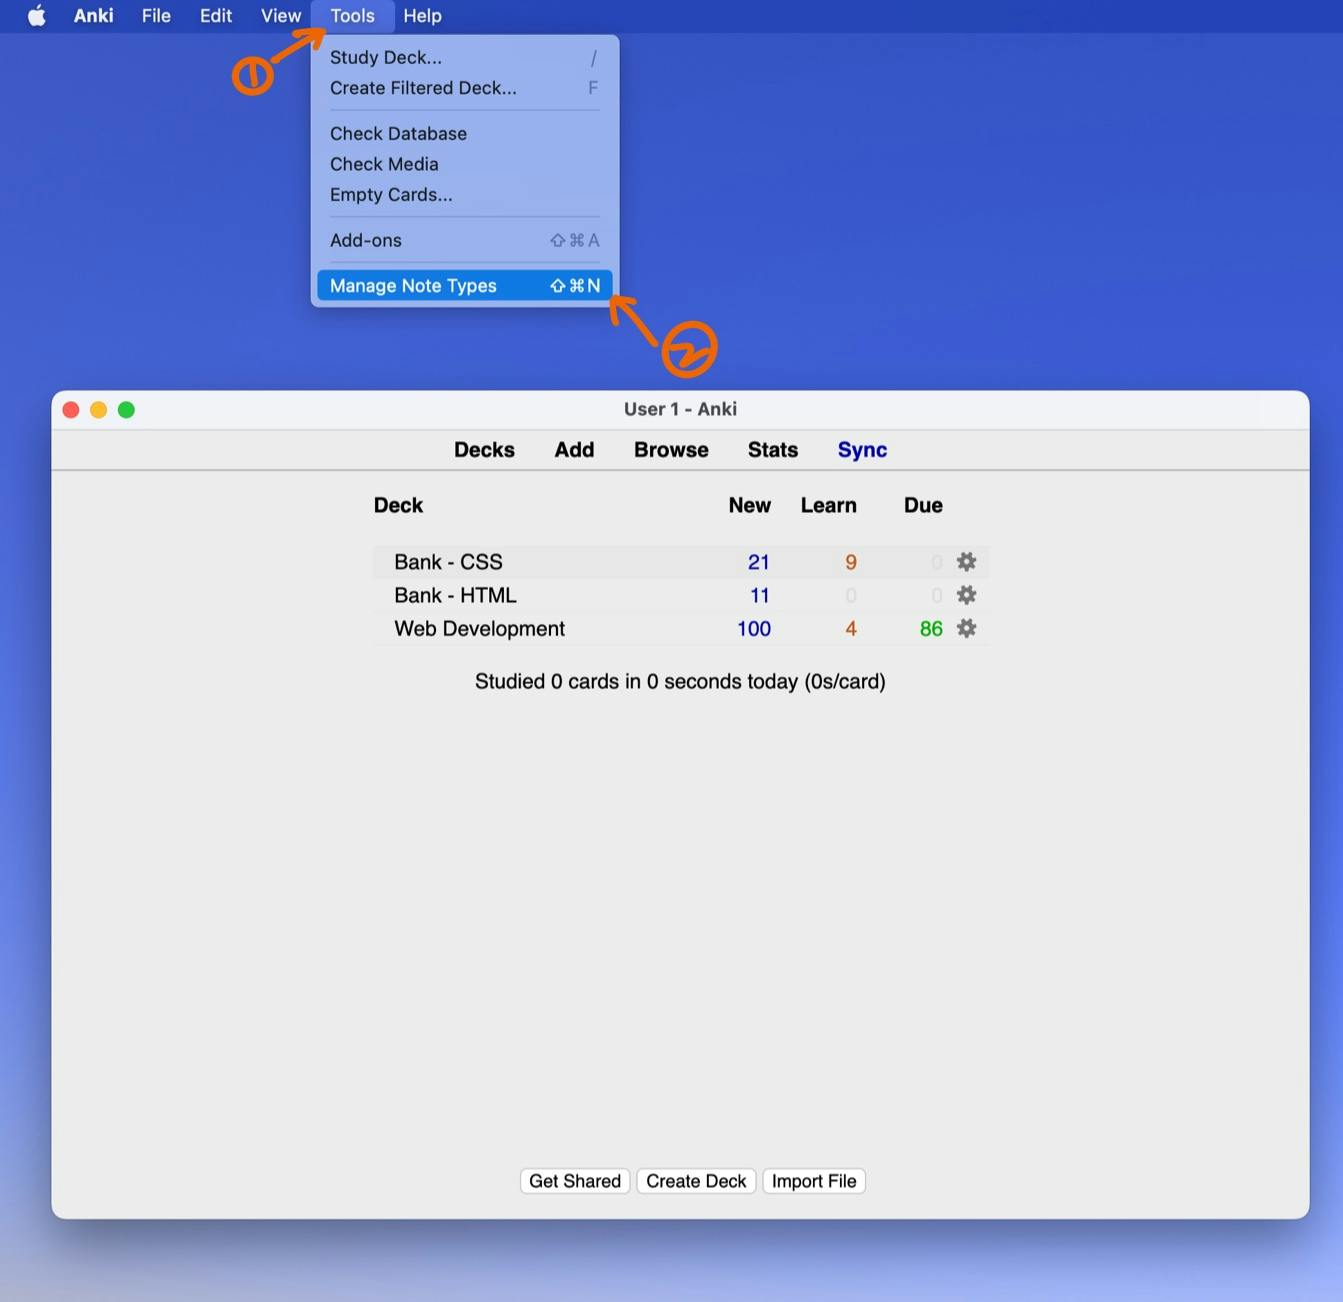
Step 1: Open your Anki desktop application, go to "Tools" and select "Manage Note Types"
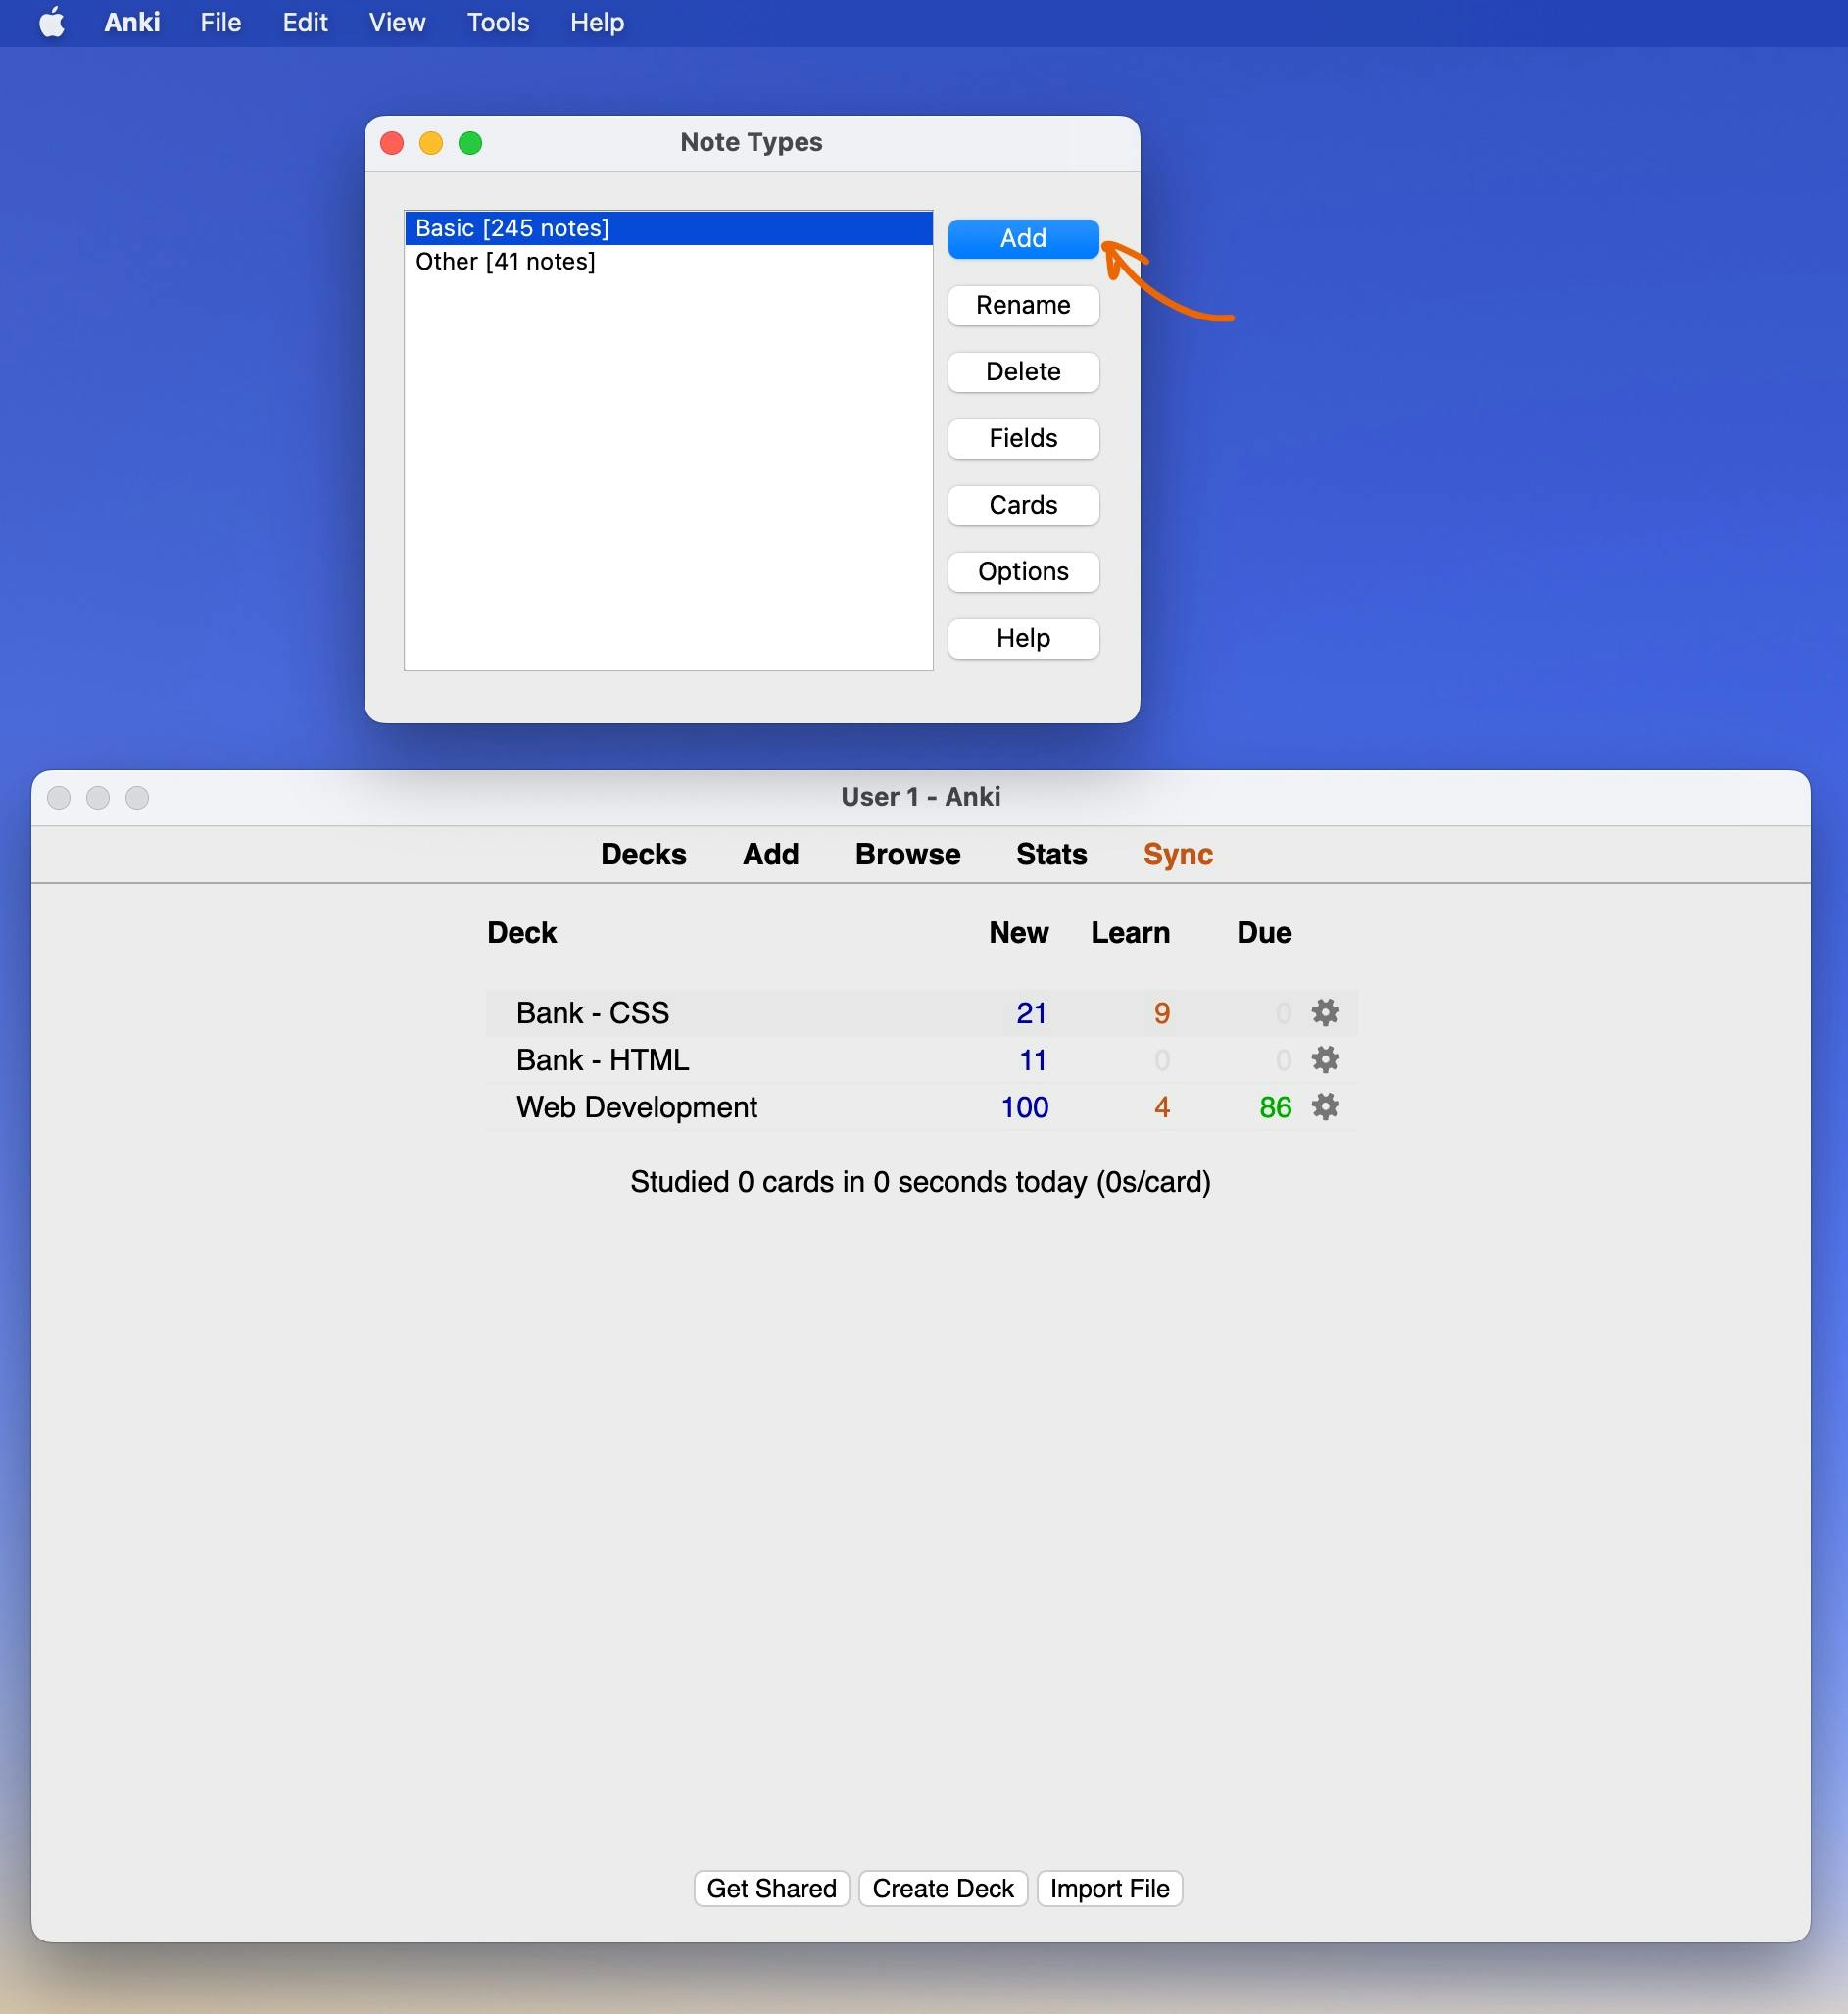
Step 2: You might see some existing note types--just ignore them and click "Add"
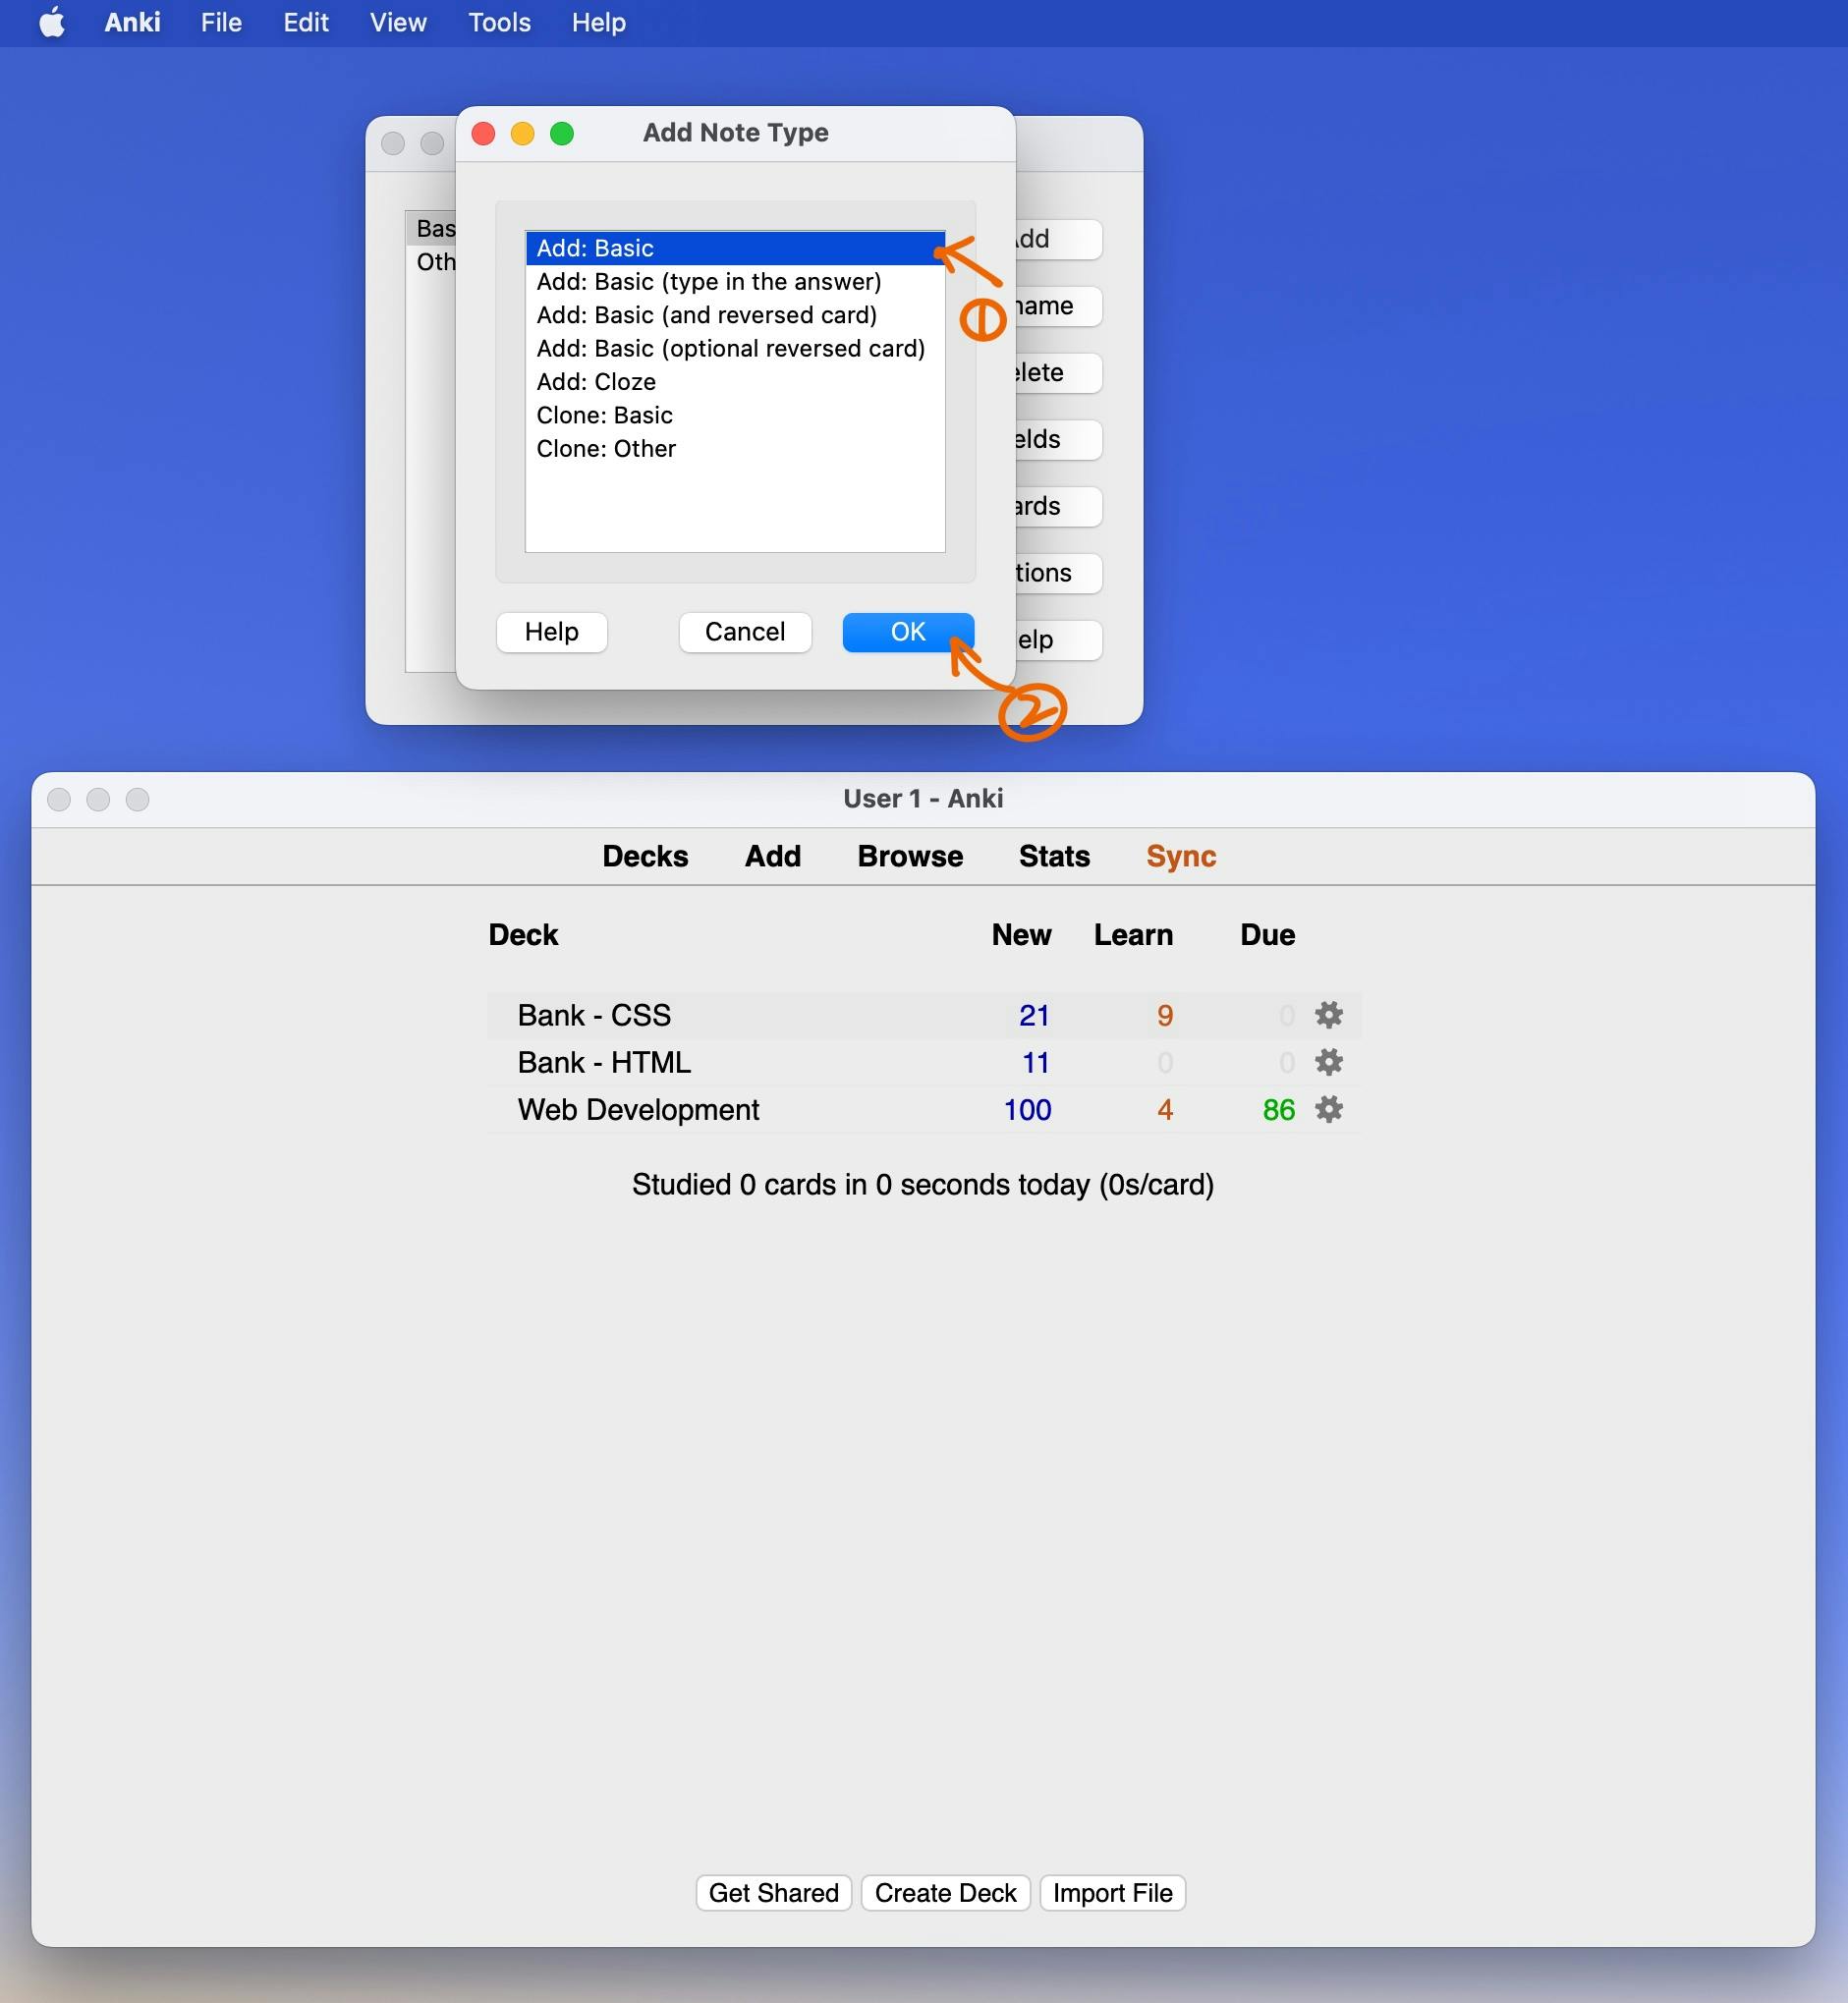
Step 3: Select Add: Basic, then click "OK" *I selected Basic because even though I have several fields in each answer, I still want my flashcard to use the basic note type which has the question in the front, and answer in the back.
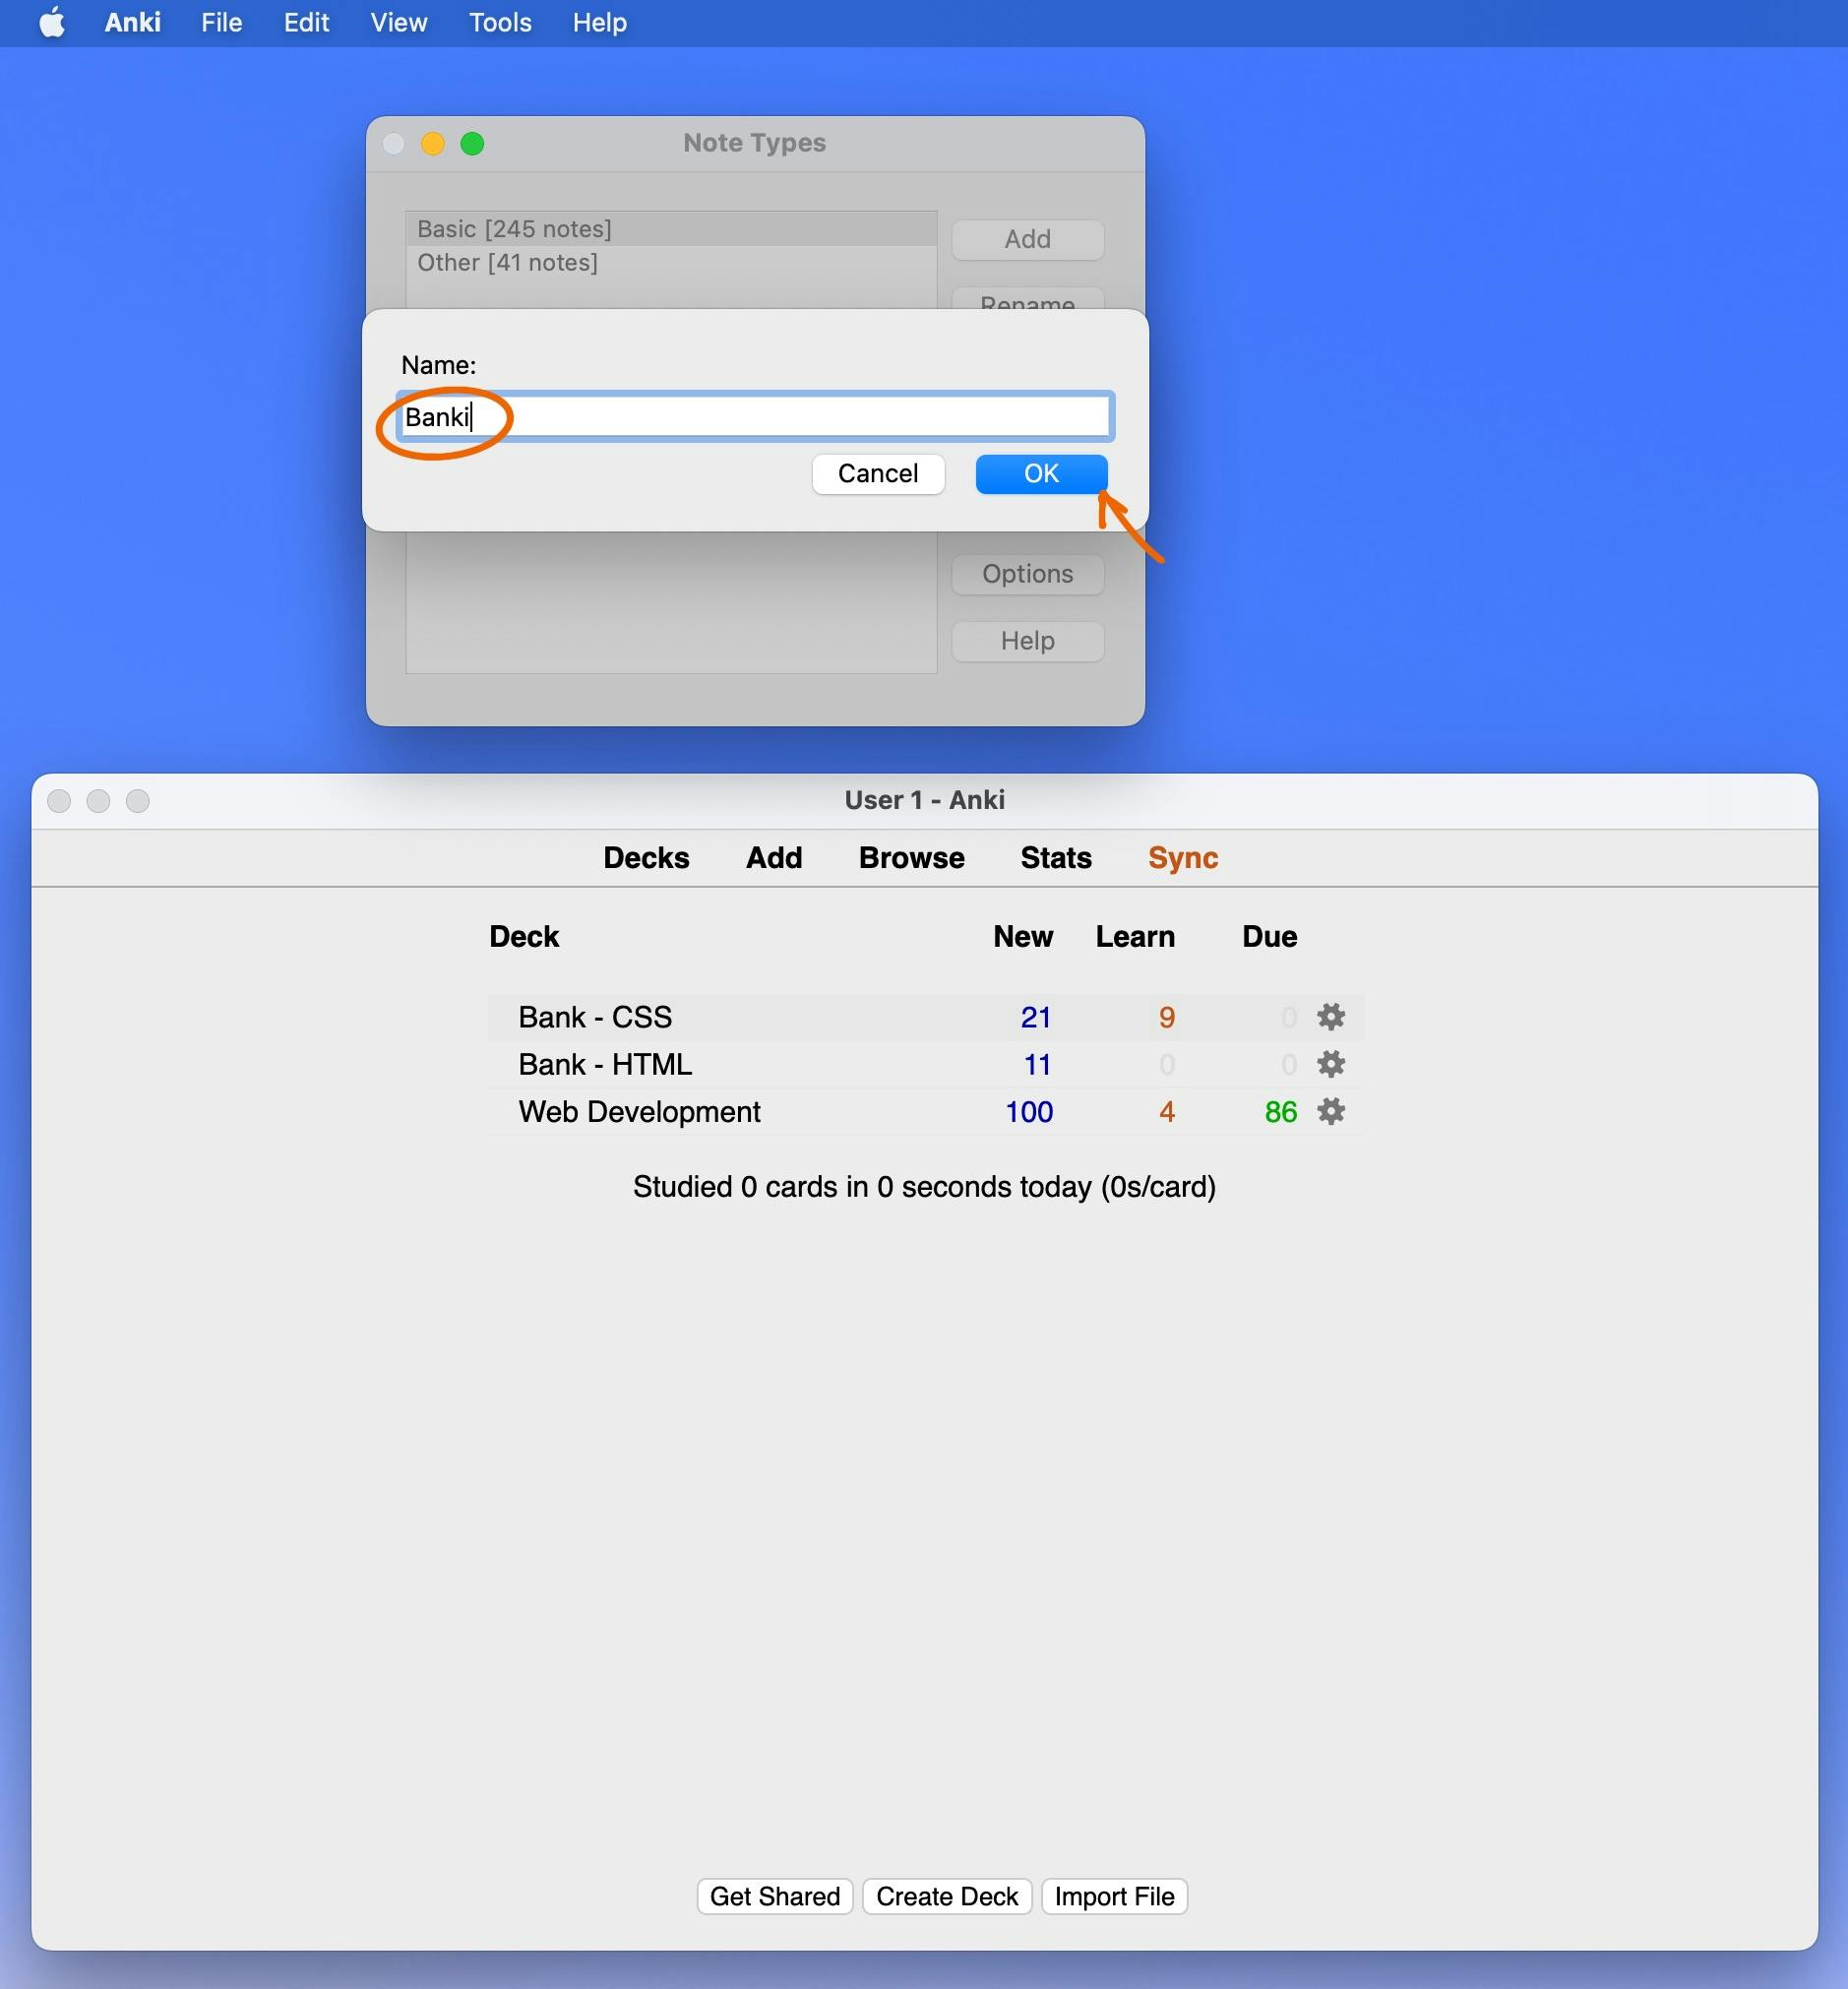
Step 4: Now you'll be prompted to name your new note type. I'm calling it "Banki" (wink wink, 100Devs). Click "OK".
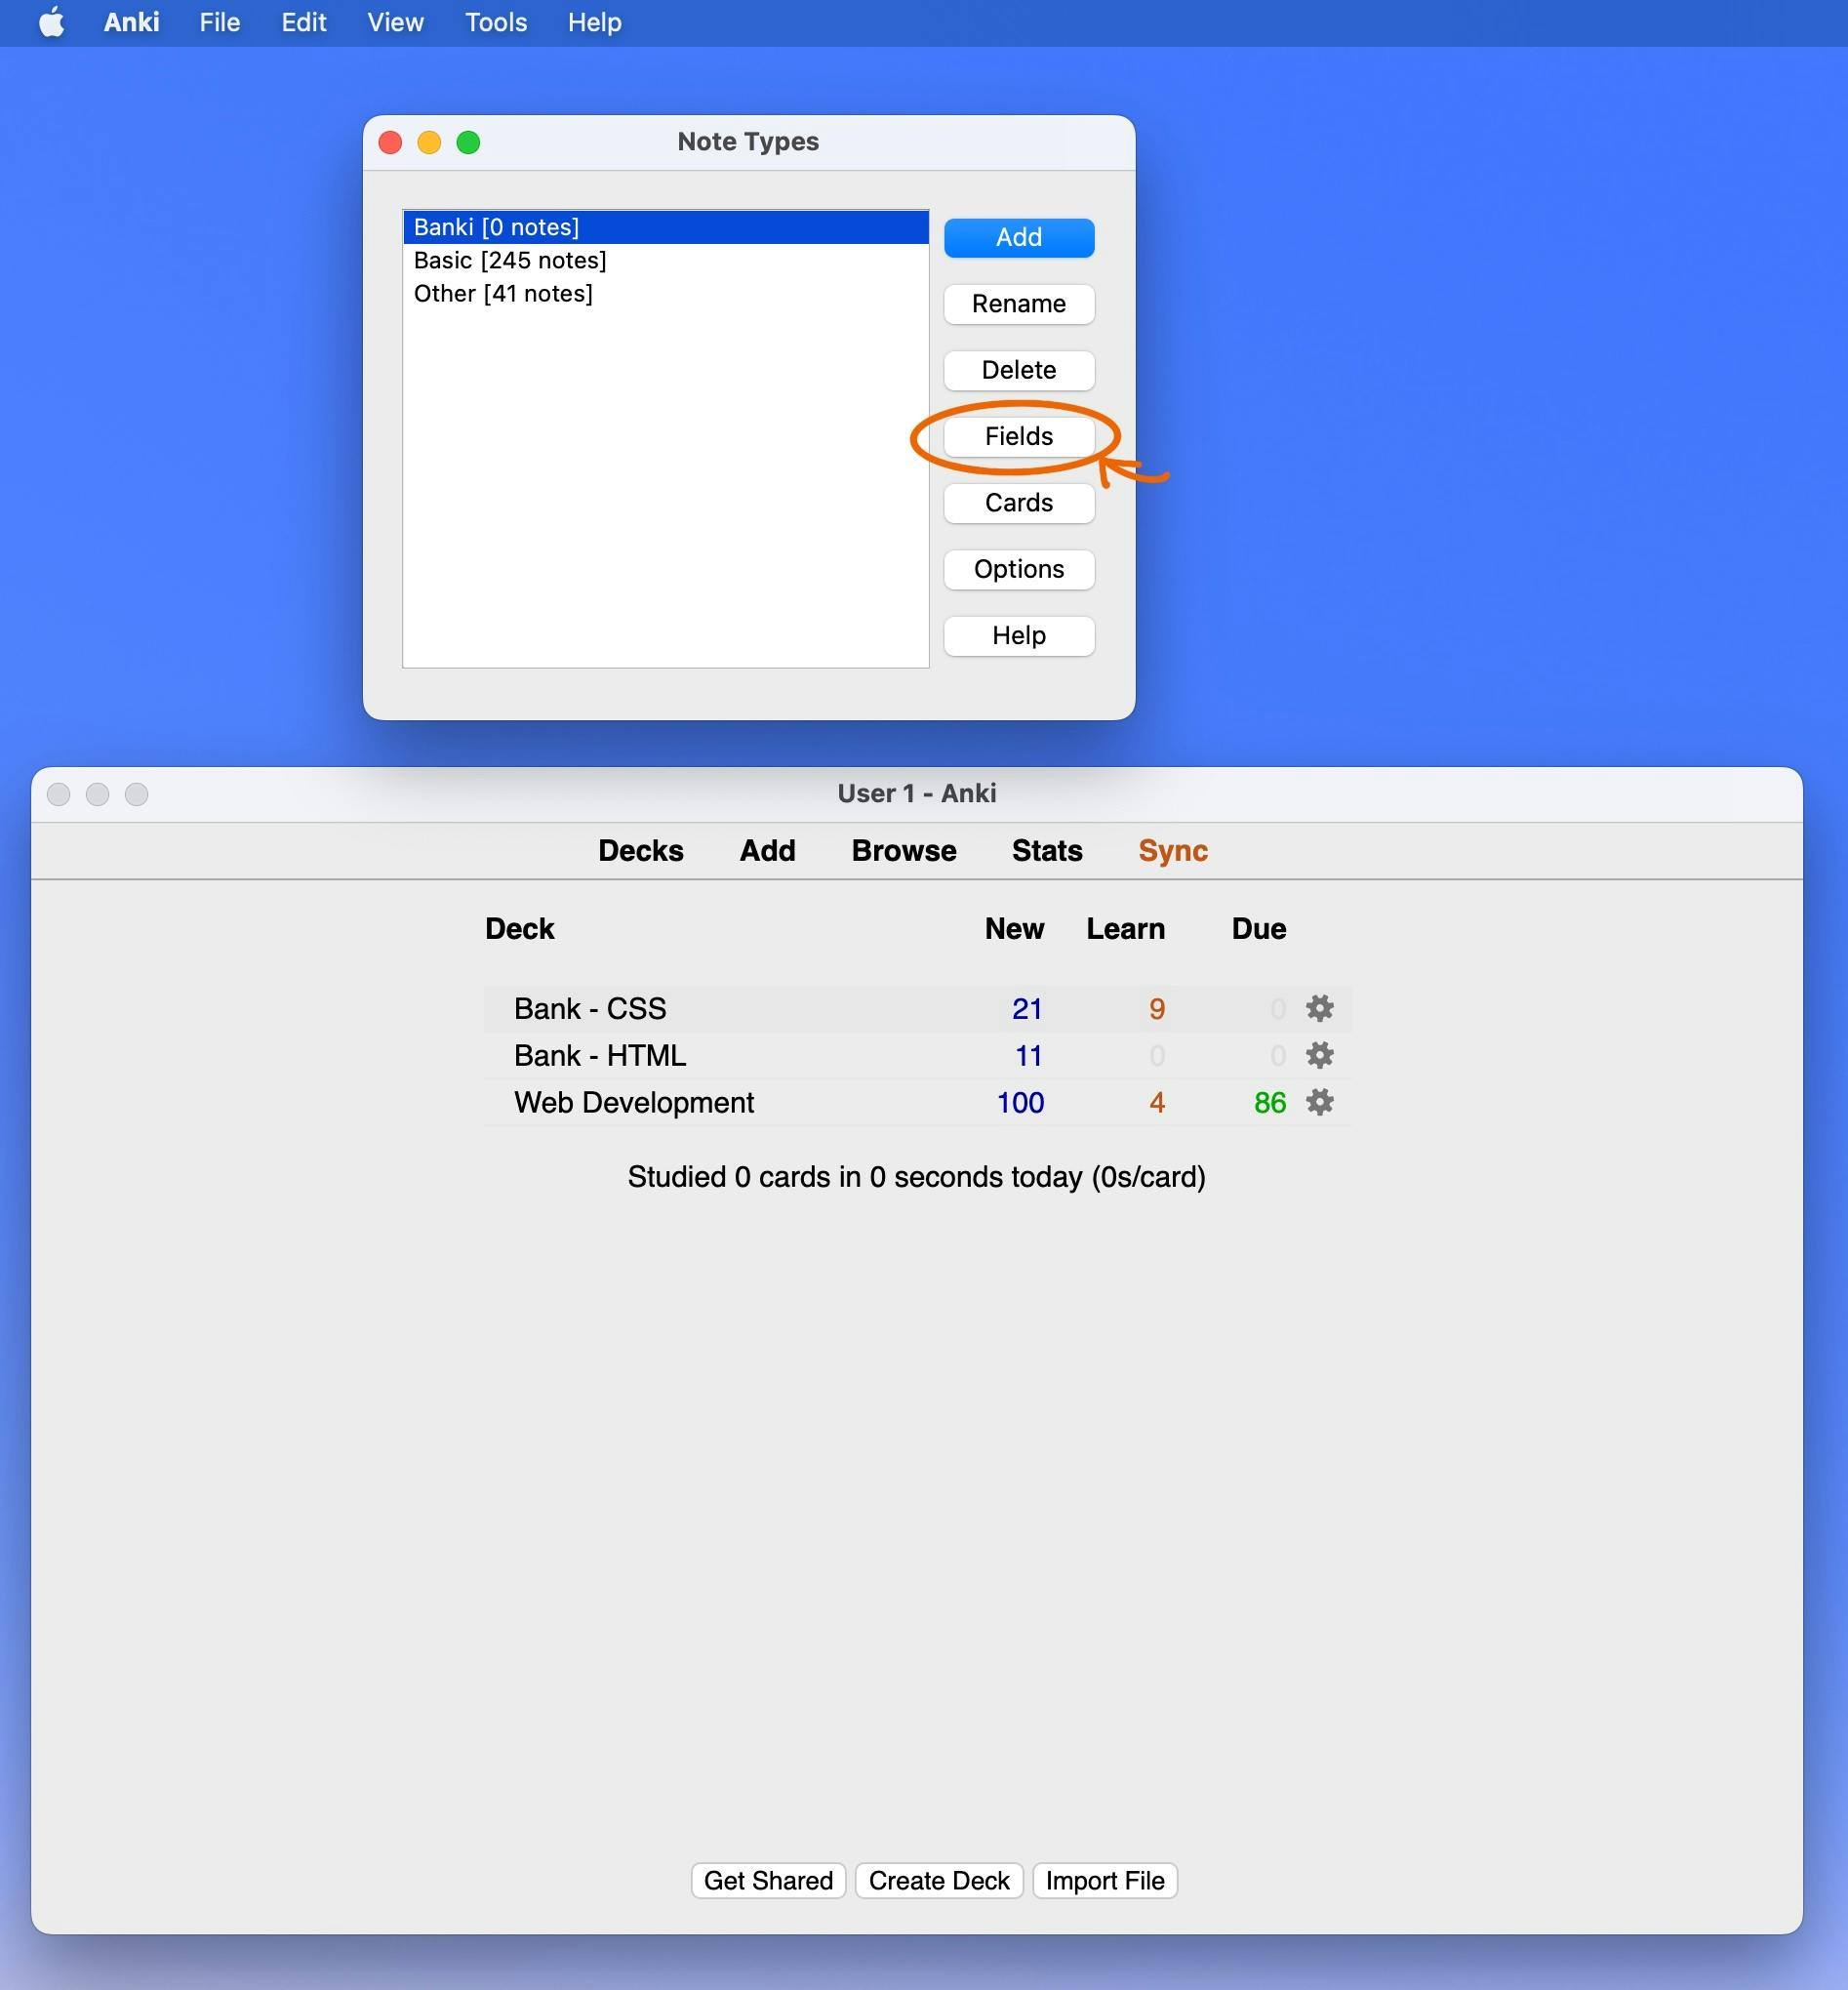
Step 5: Select your new note type ("Banki" in my example), then click "Fields".
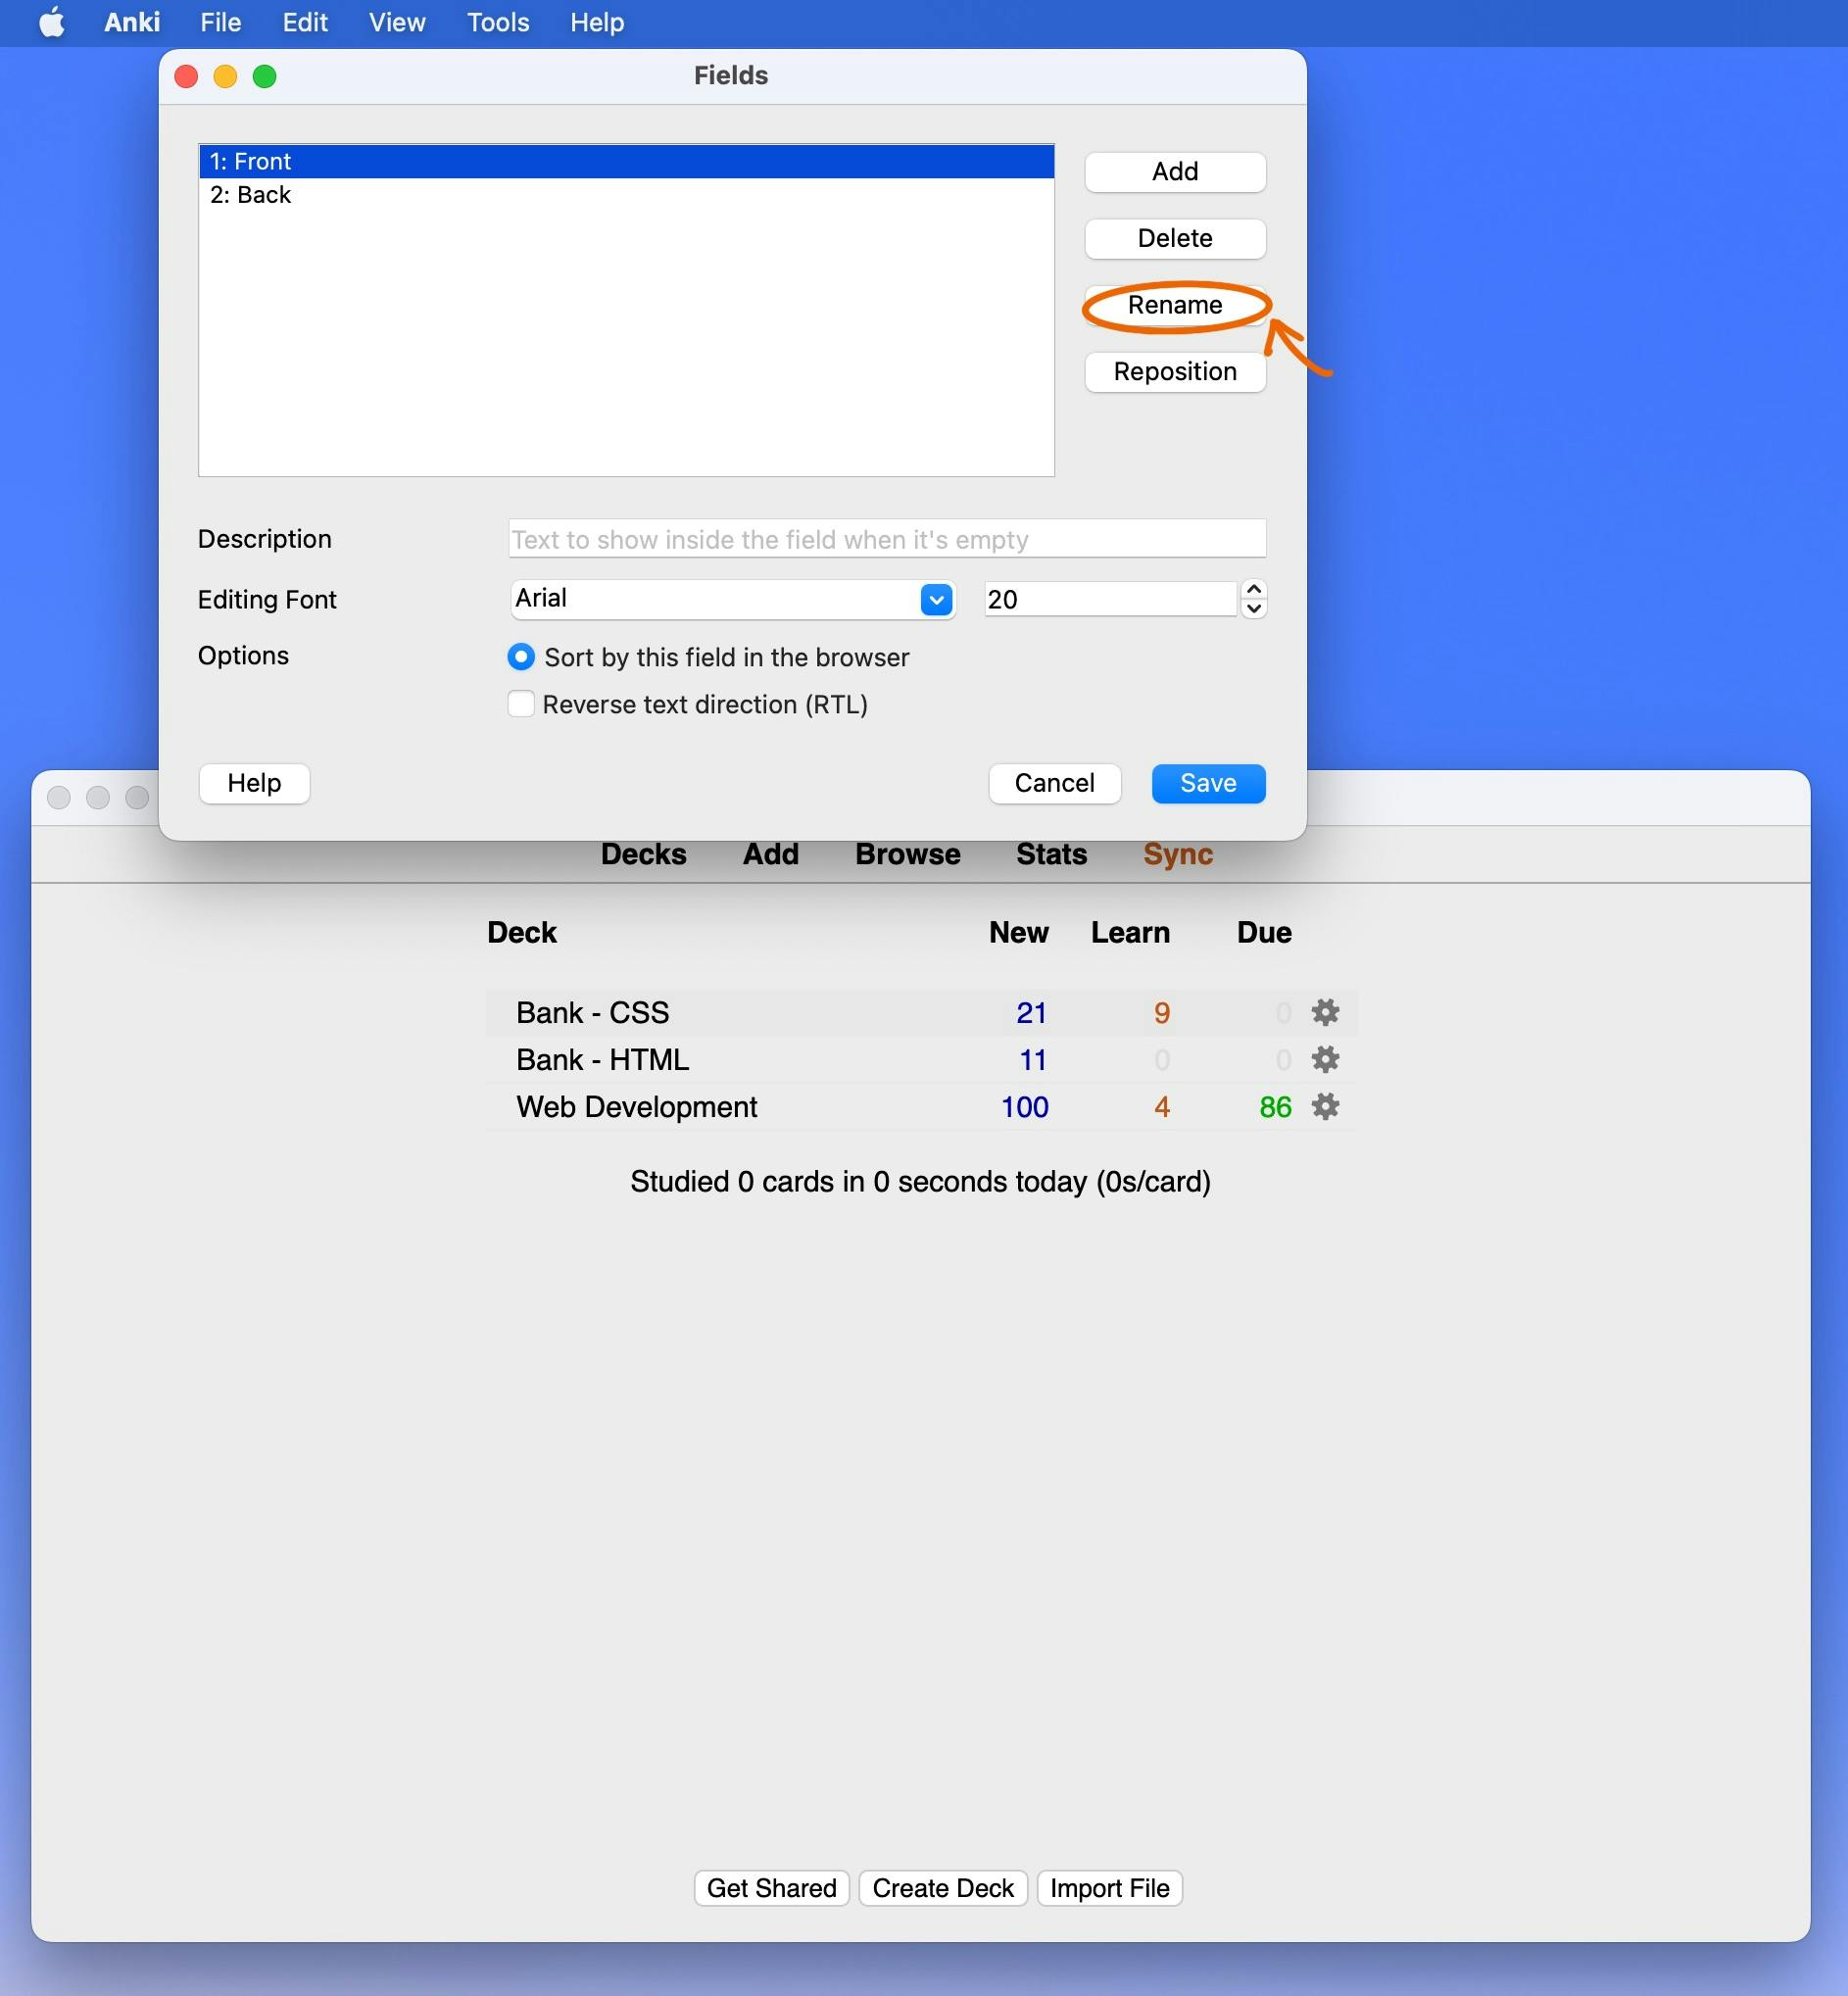
Step 6: For basic note type, you'll see "1: Front; 2: Back" already in the textbox. Select the first line, and click "Rename" if you don't want your front field to be called "Front". I renamed it "Question". The back of my card will have 4 sections: Explanation, Use, Example and Reference, so I renamed "2: Explanation".
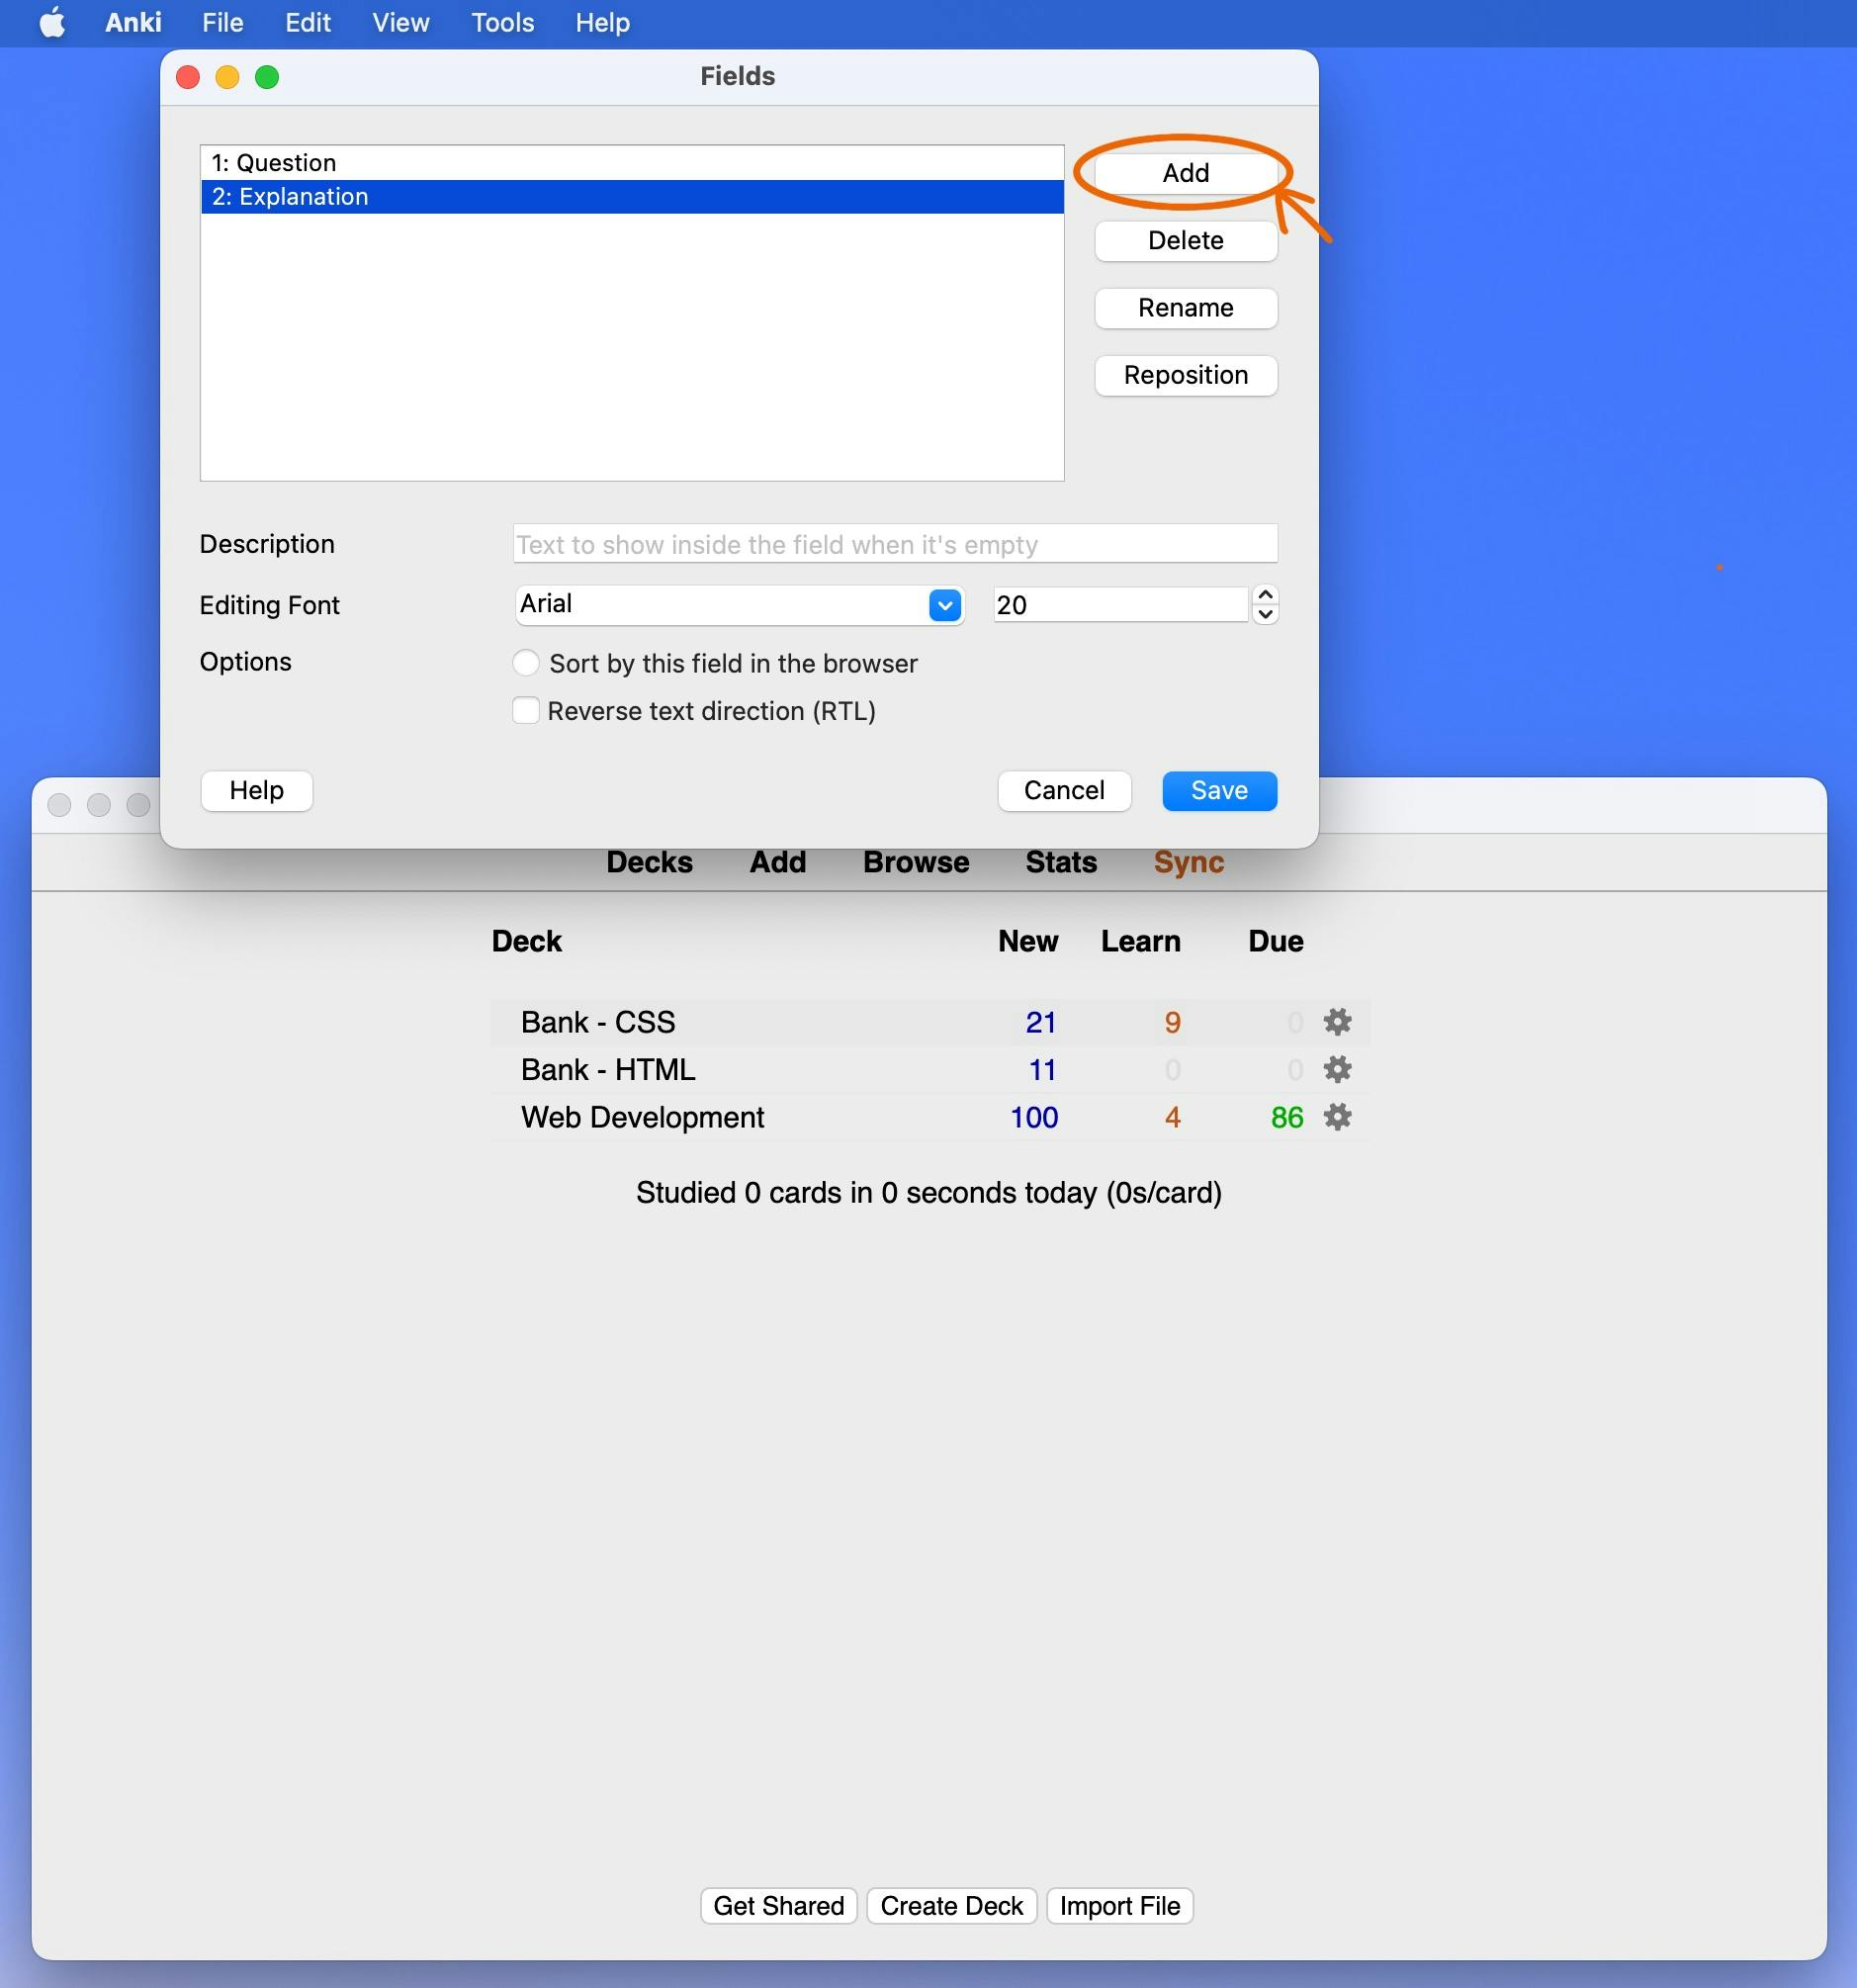
Step 7: Now that we renamed the first two lines/fields, to add more sections/fields to the back of card, click "Add".
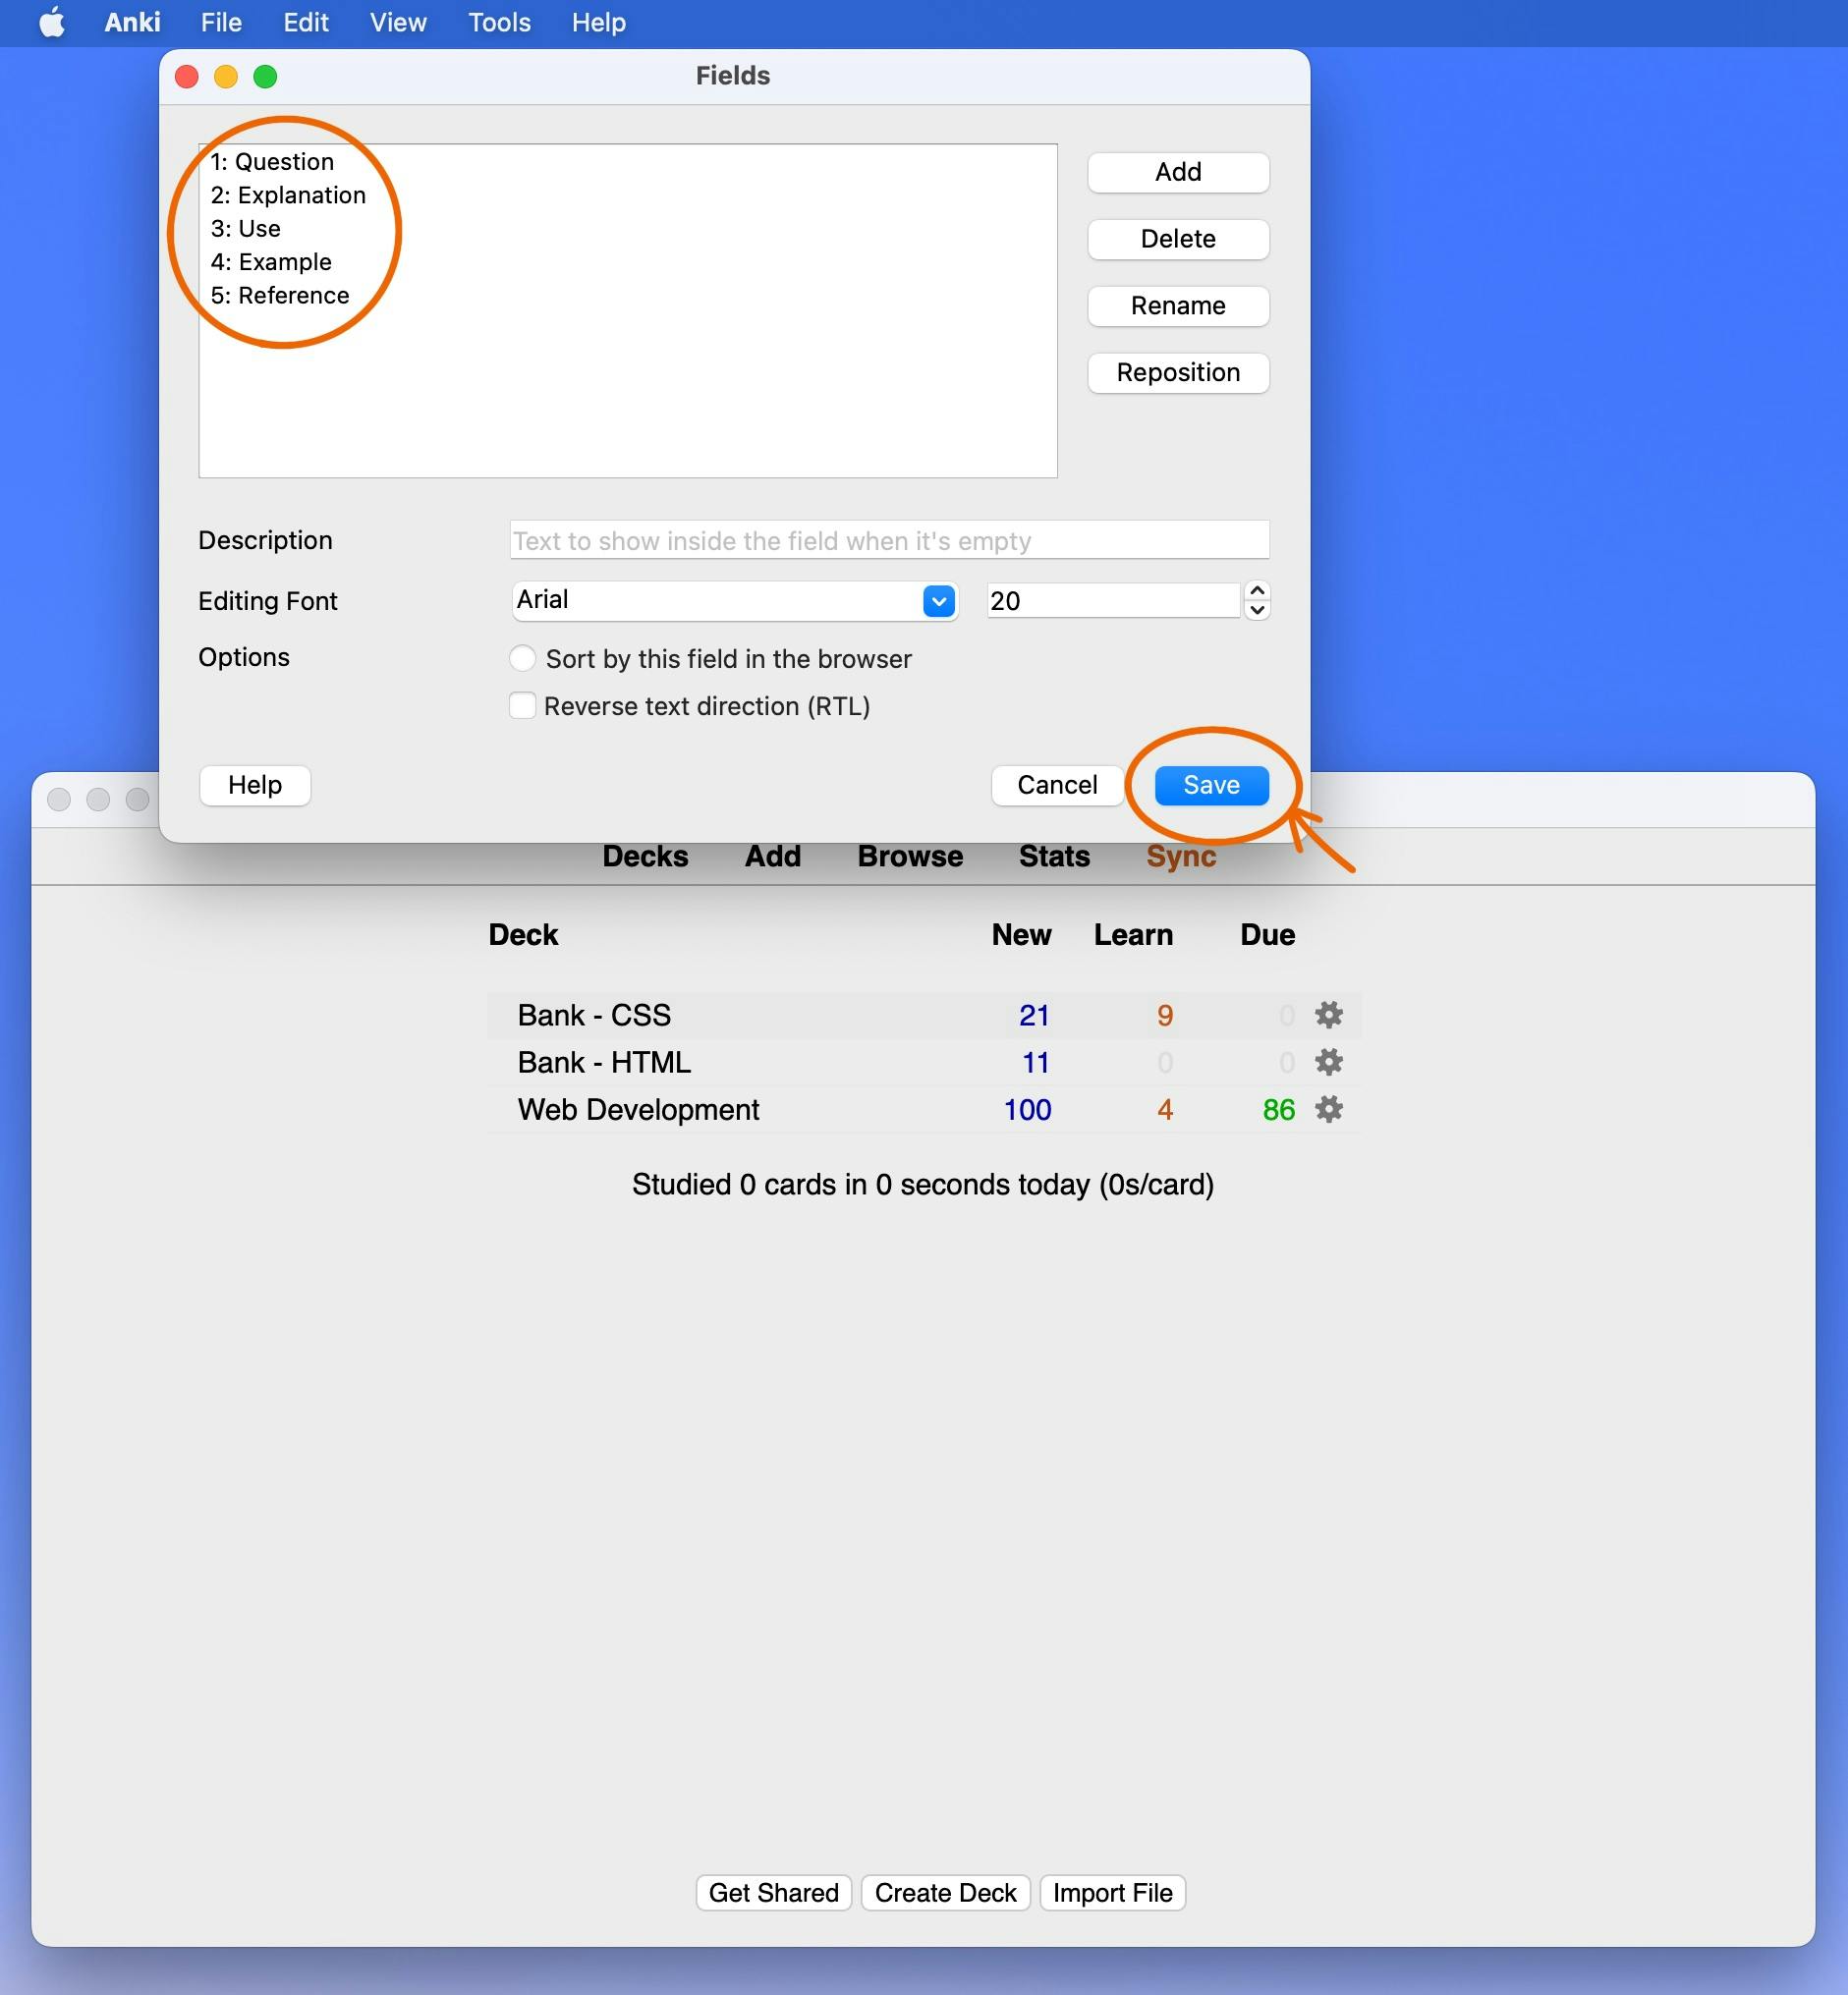
Step 8: Once all desired fields are added, click "Save".
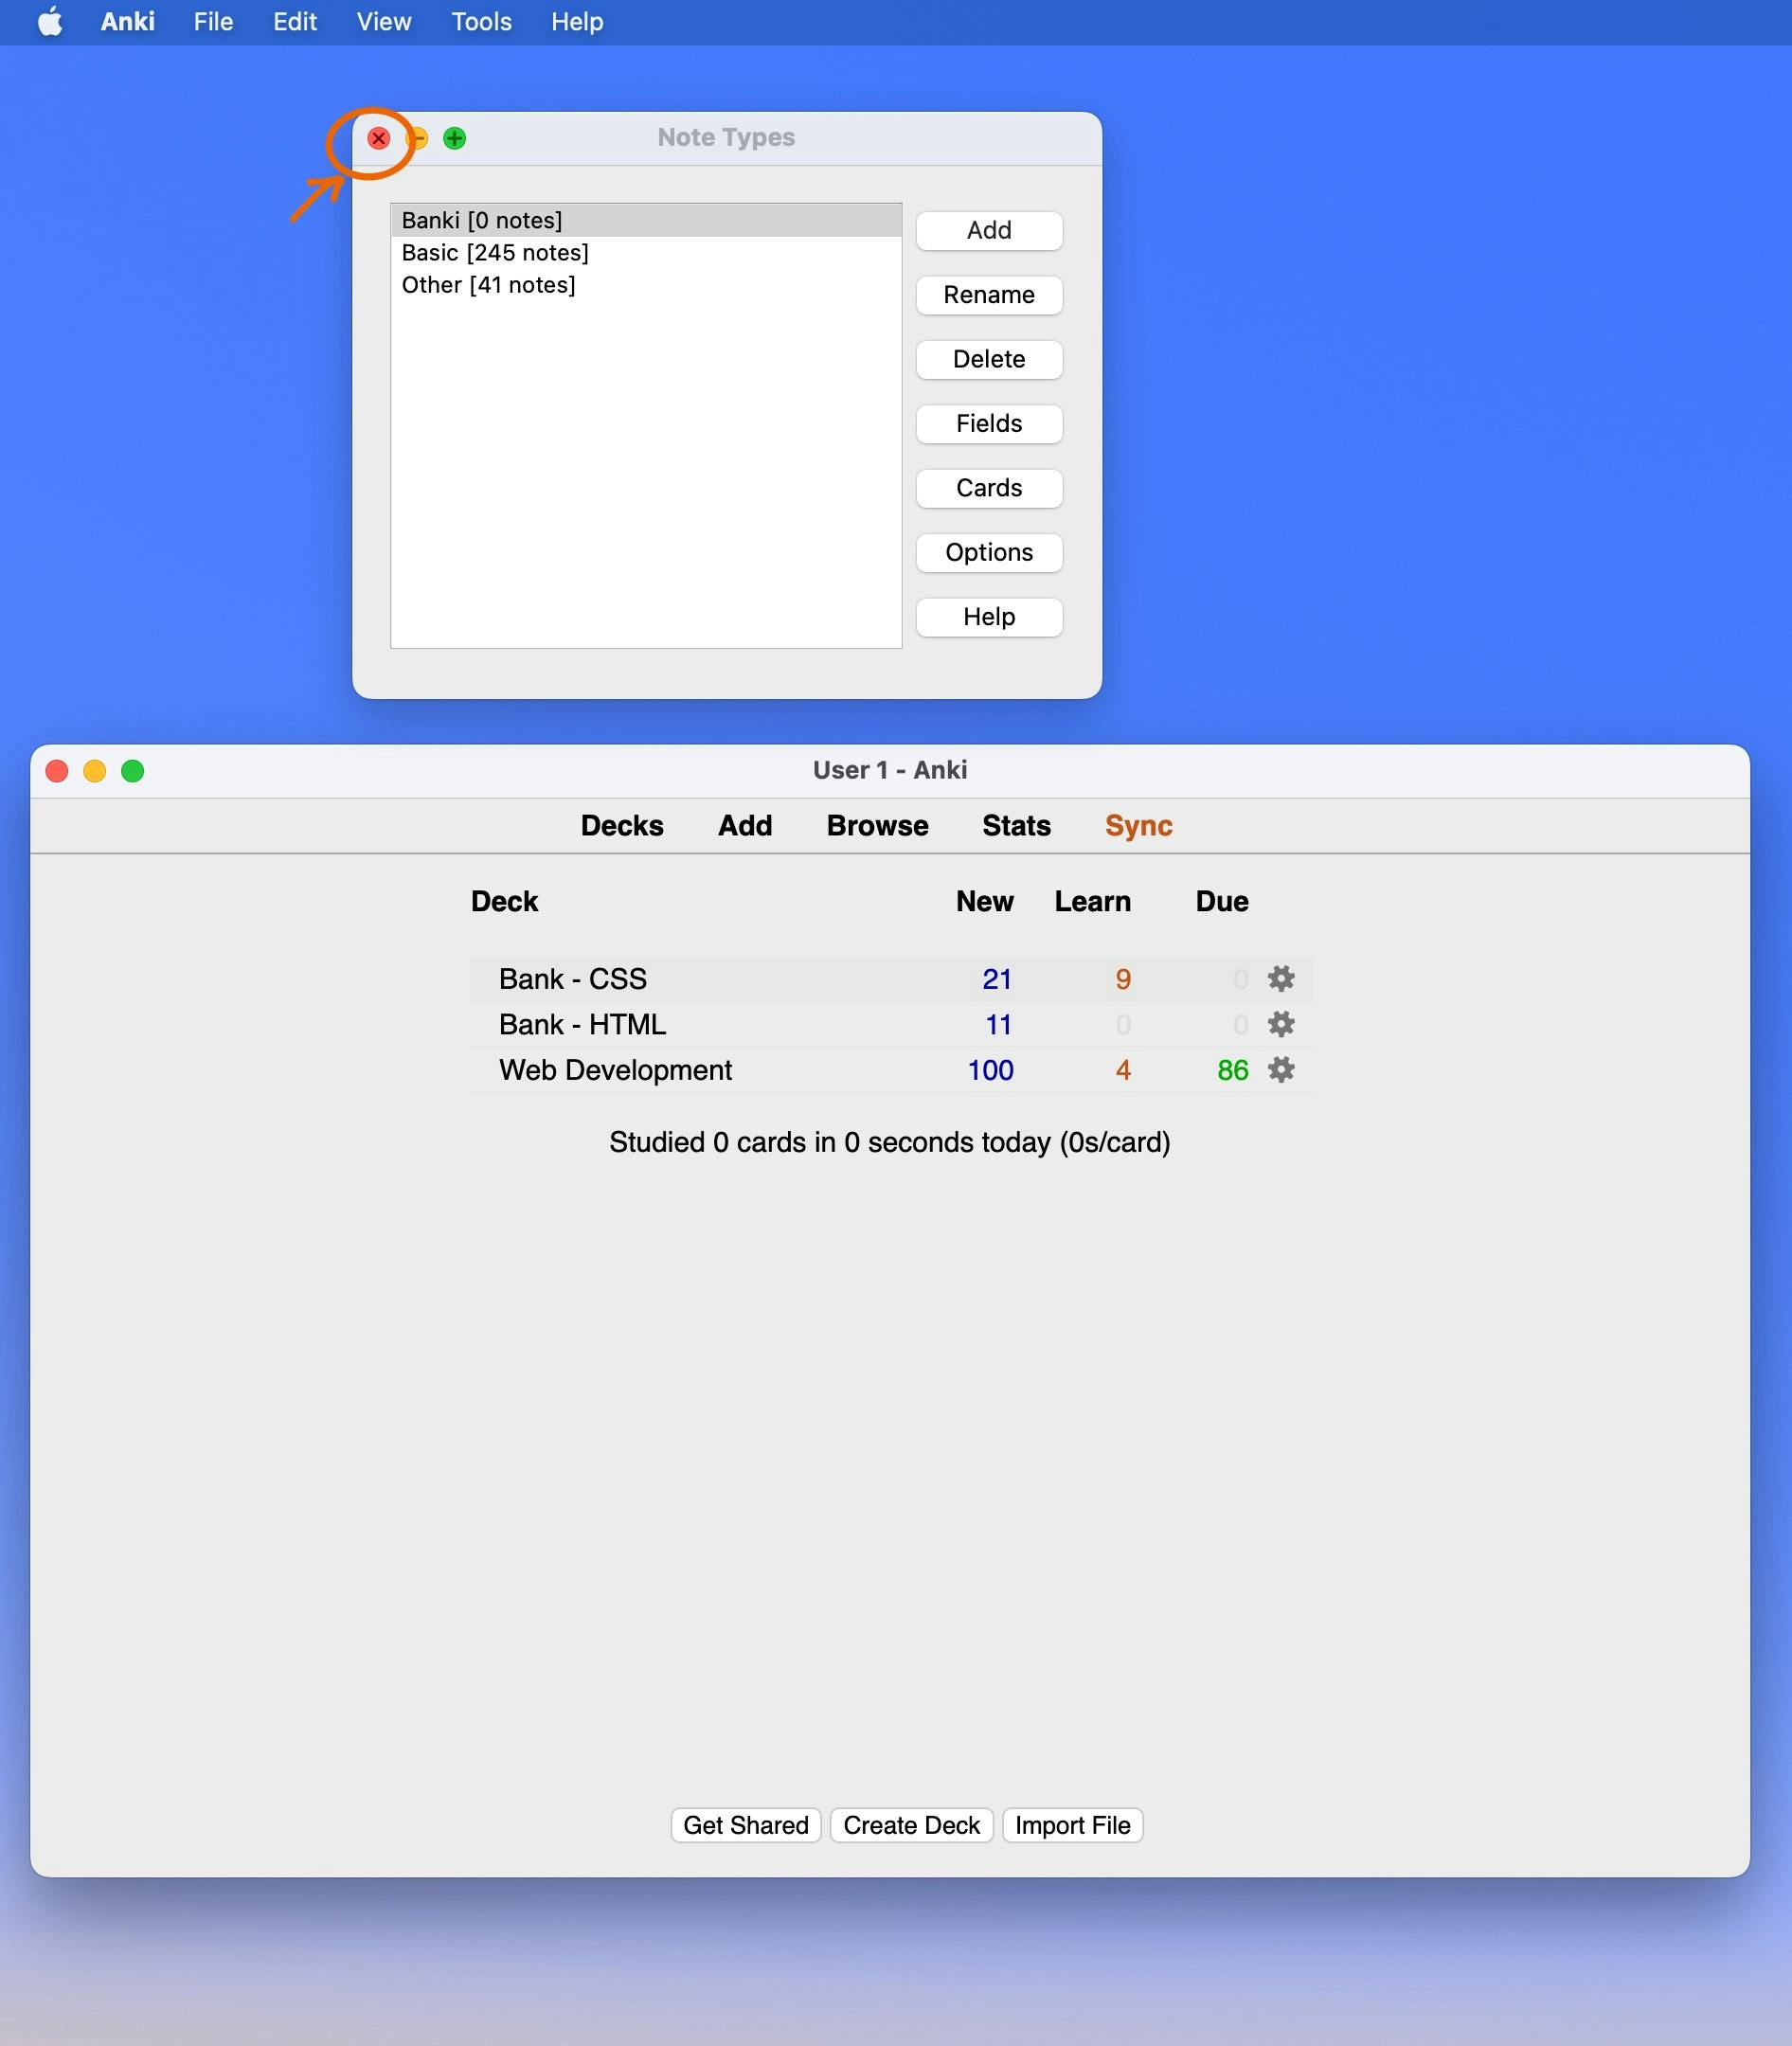
Step 9: Now we can close the "Note Types" window.
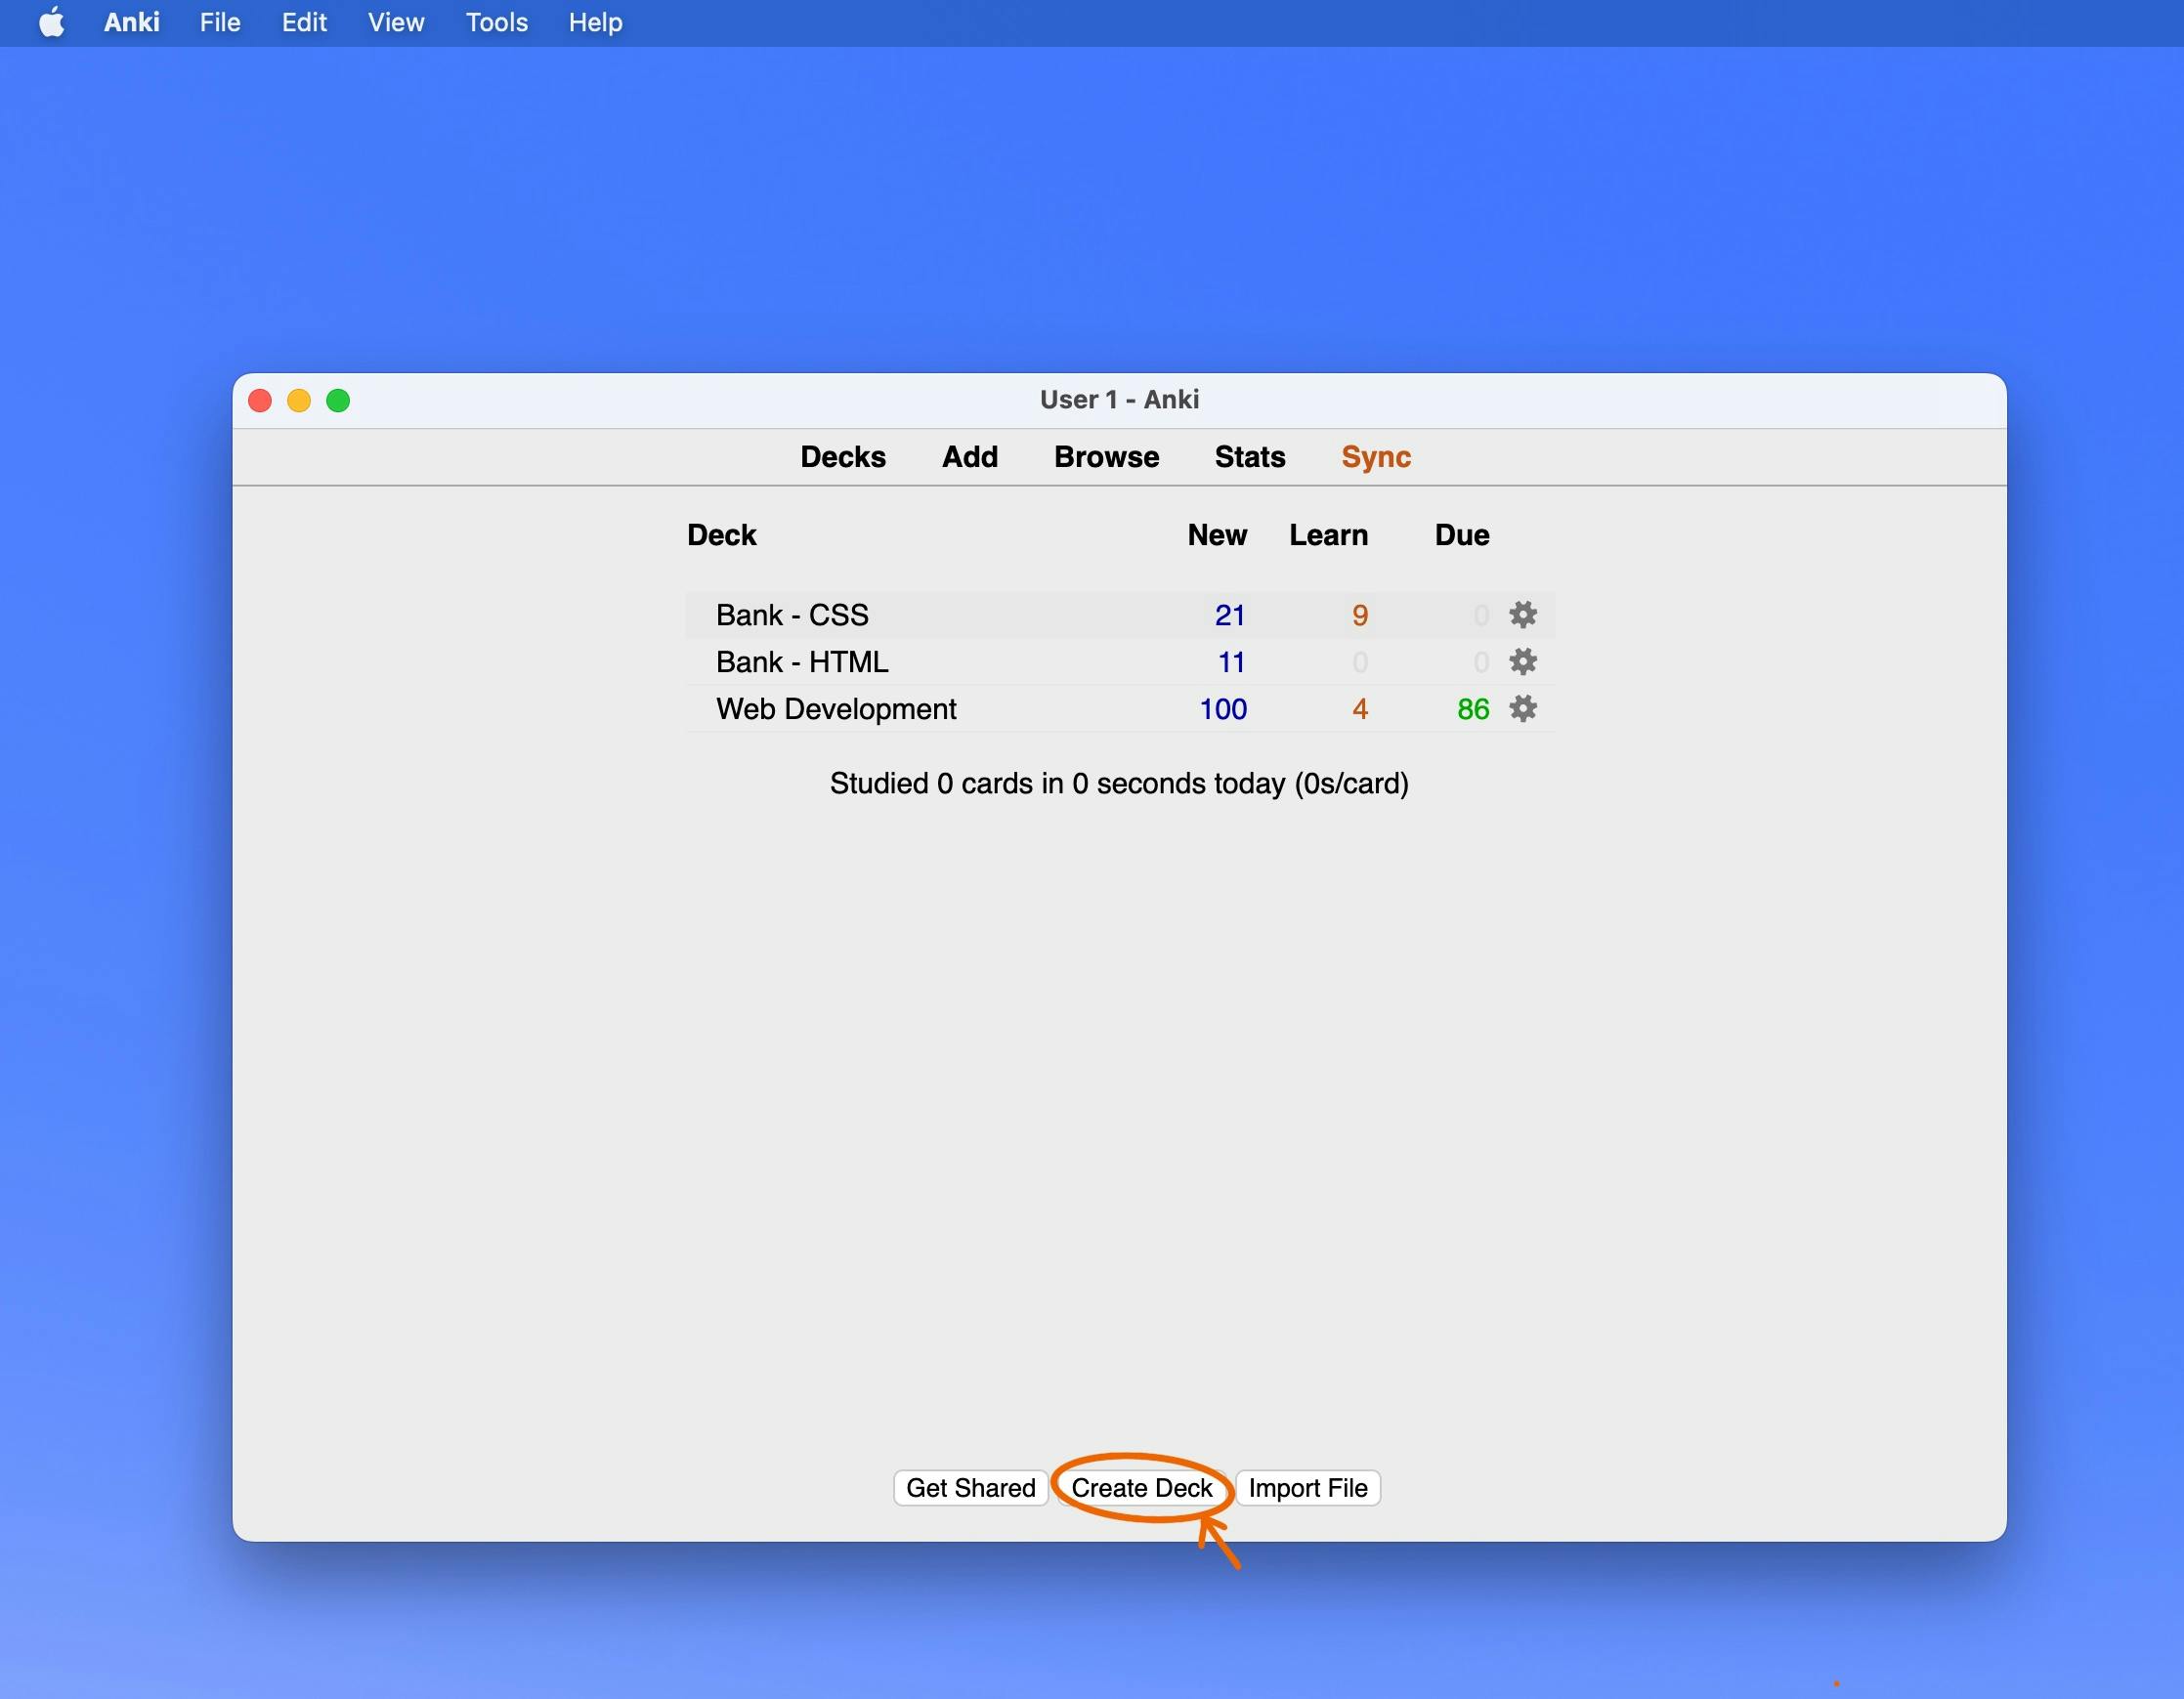
Step 10: Create a new Deck.
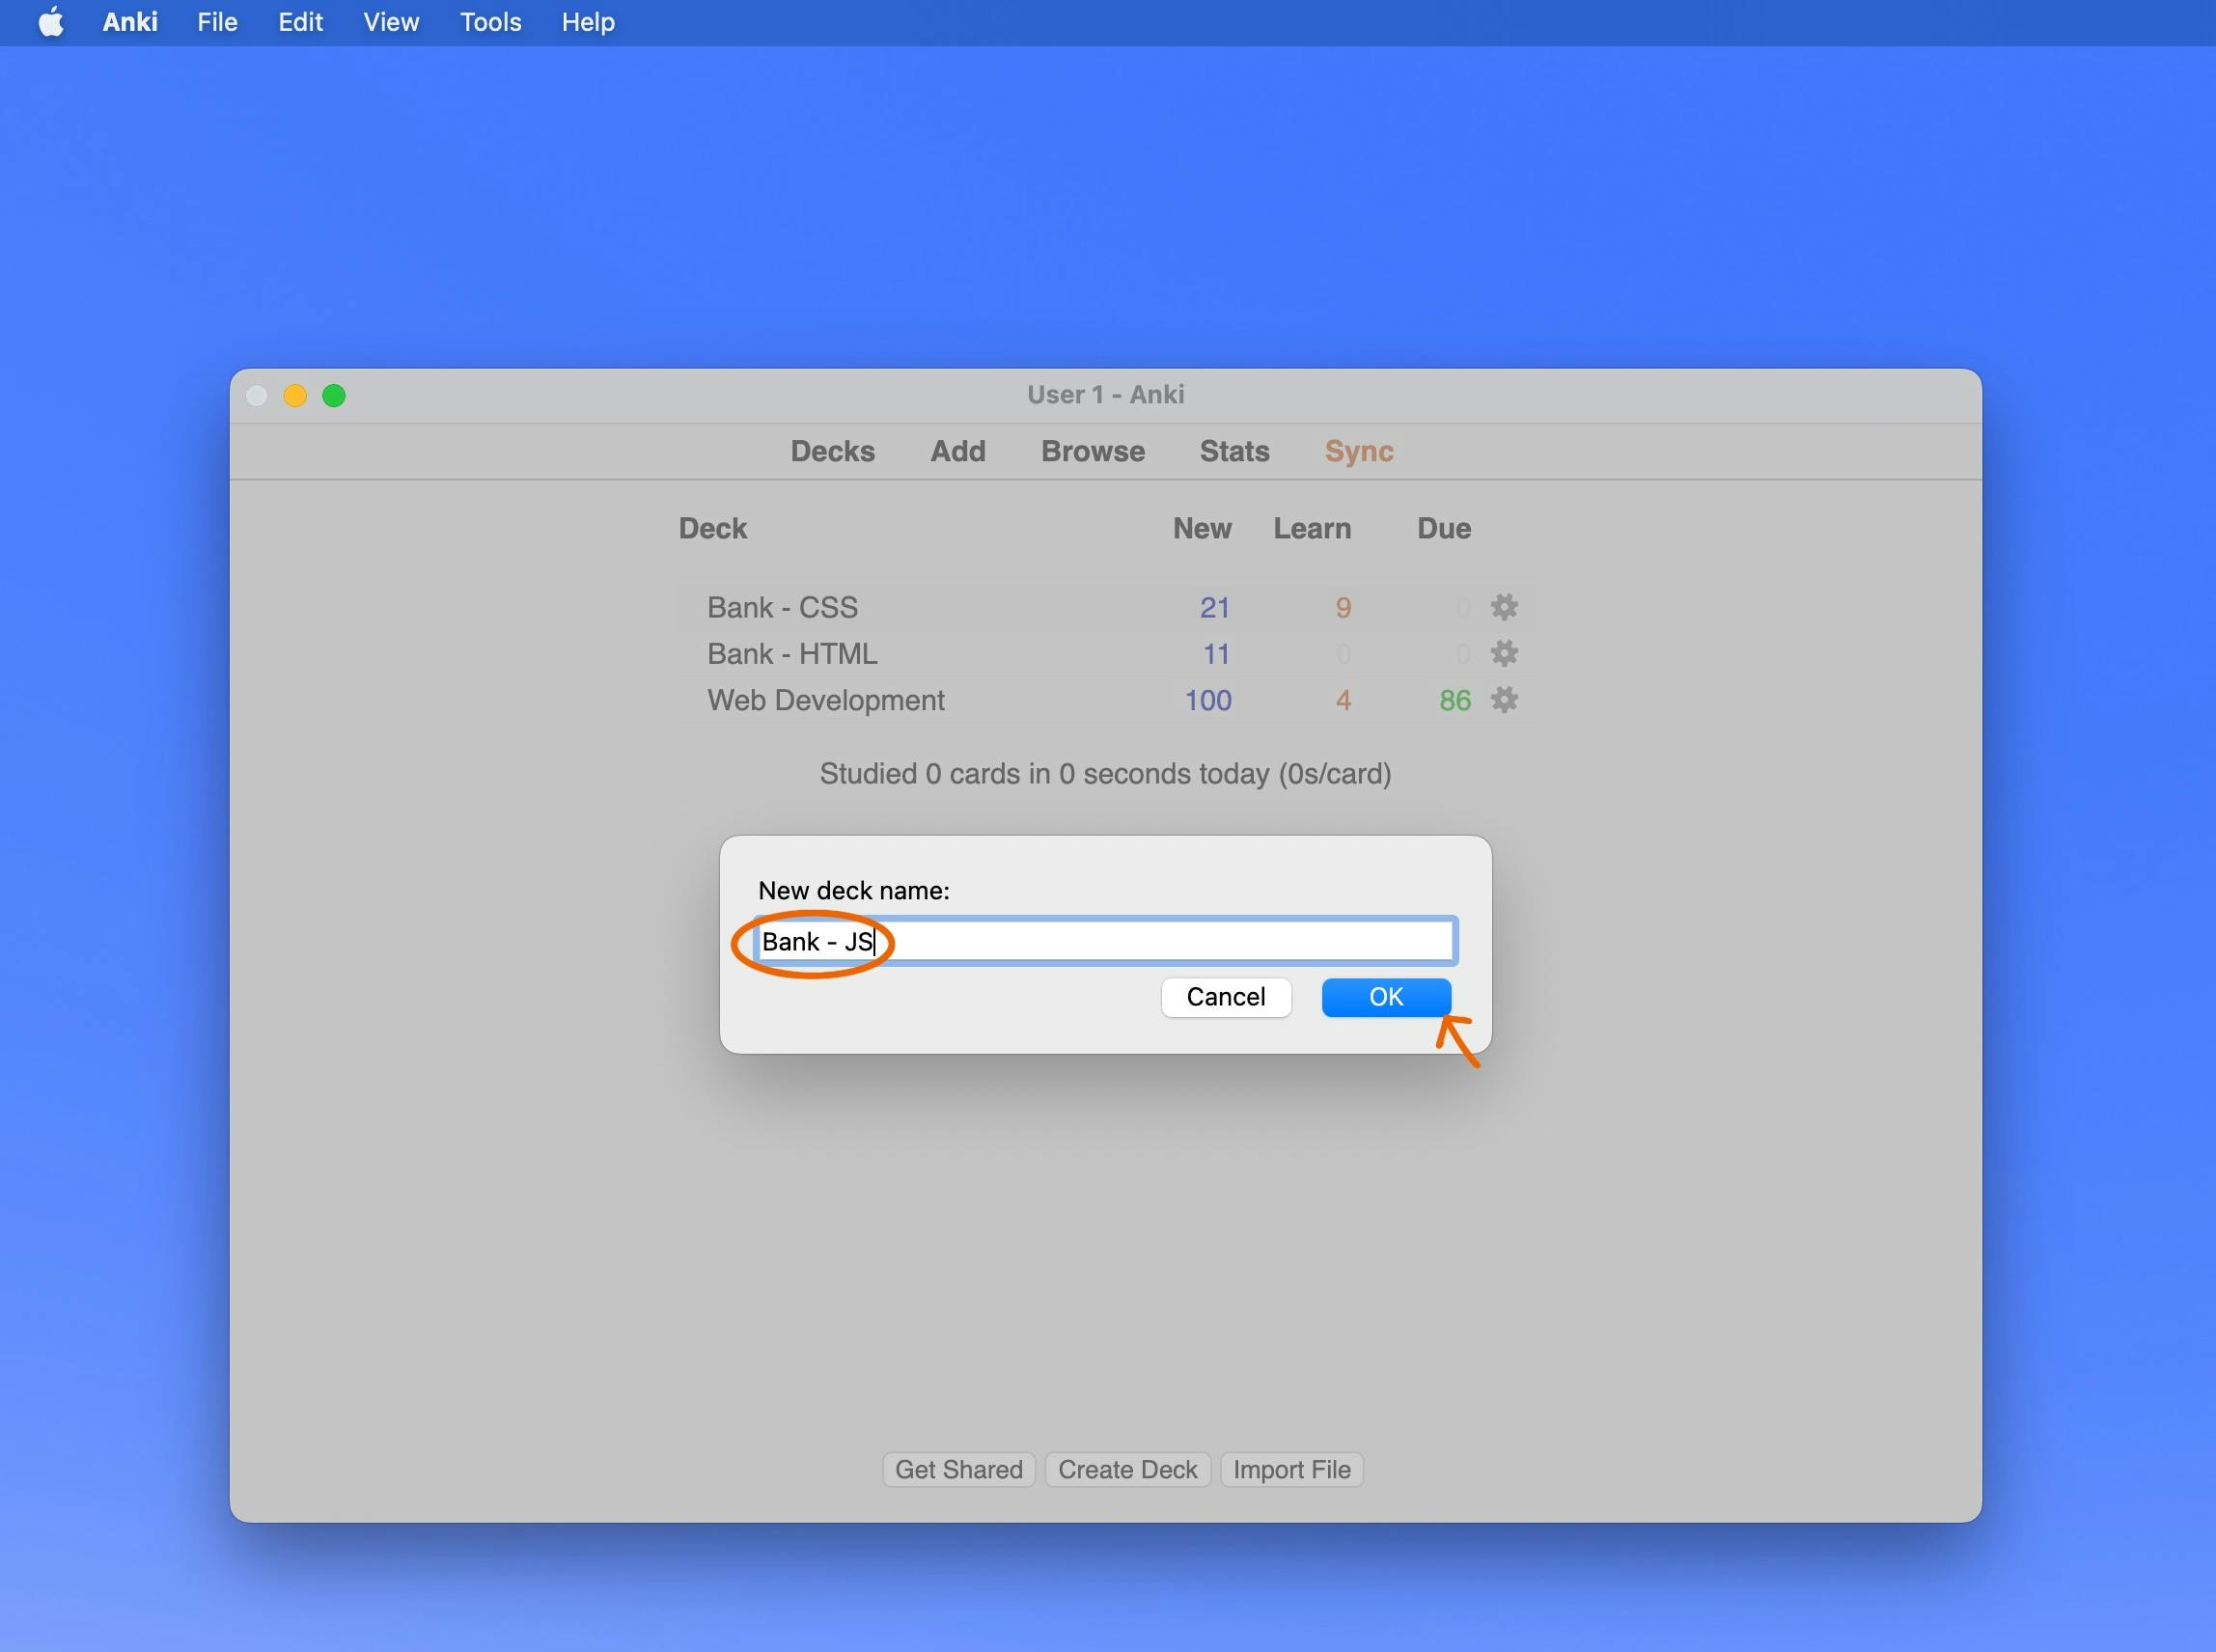
Step 11: Give it a name, then click "OK". I named mine "Bank - JS".
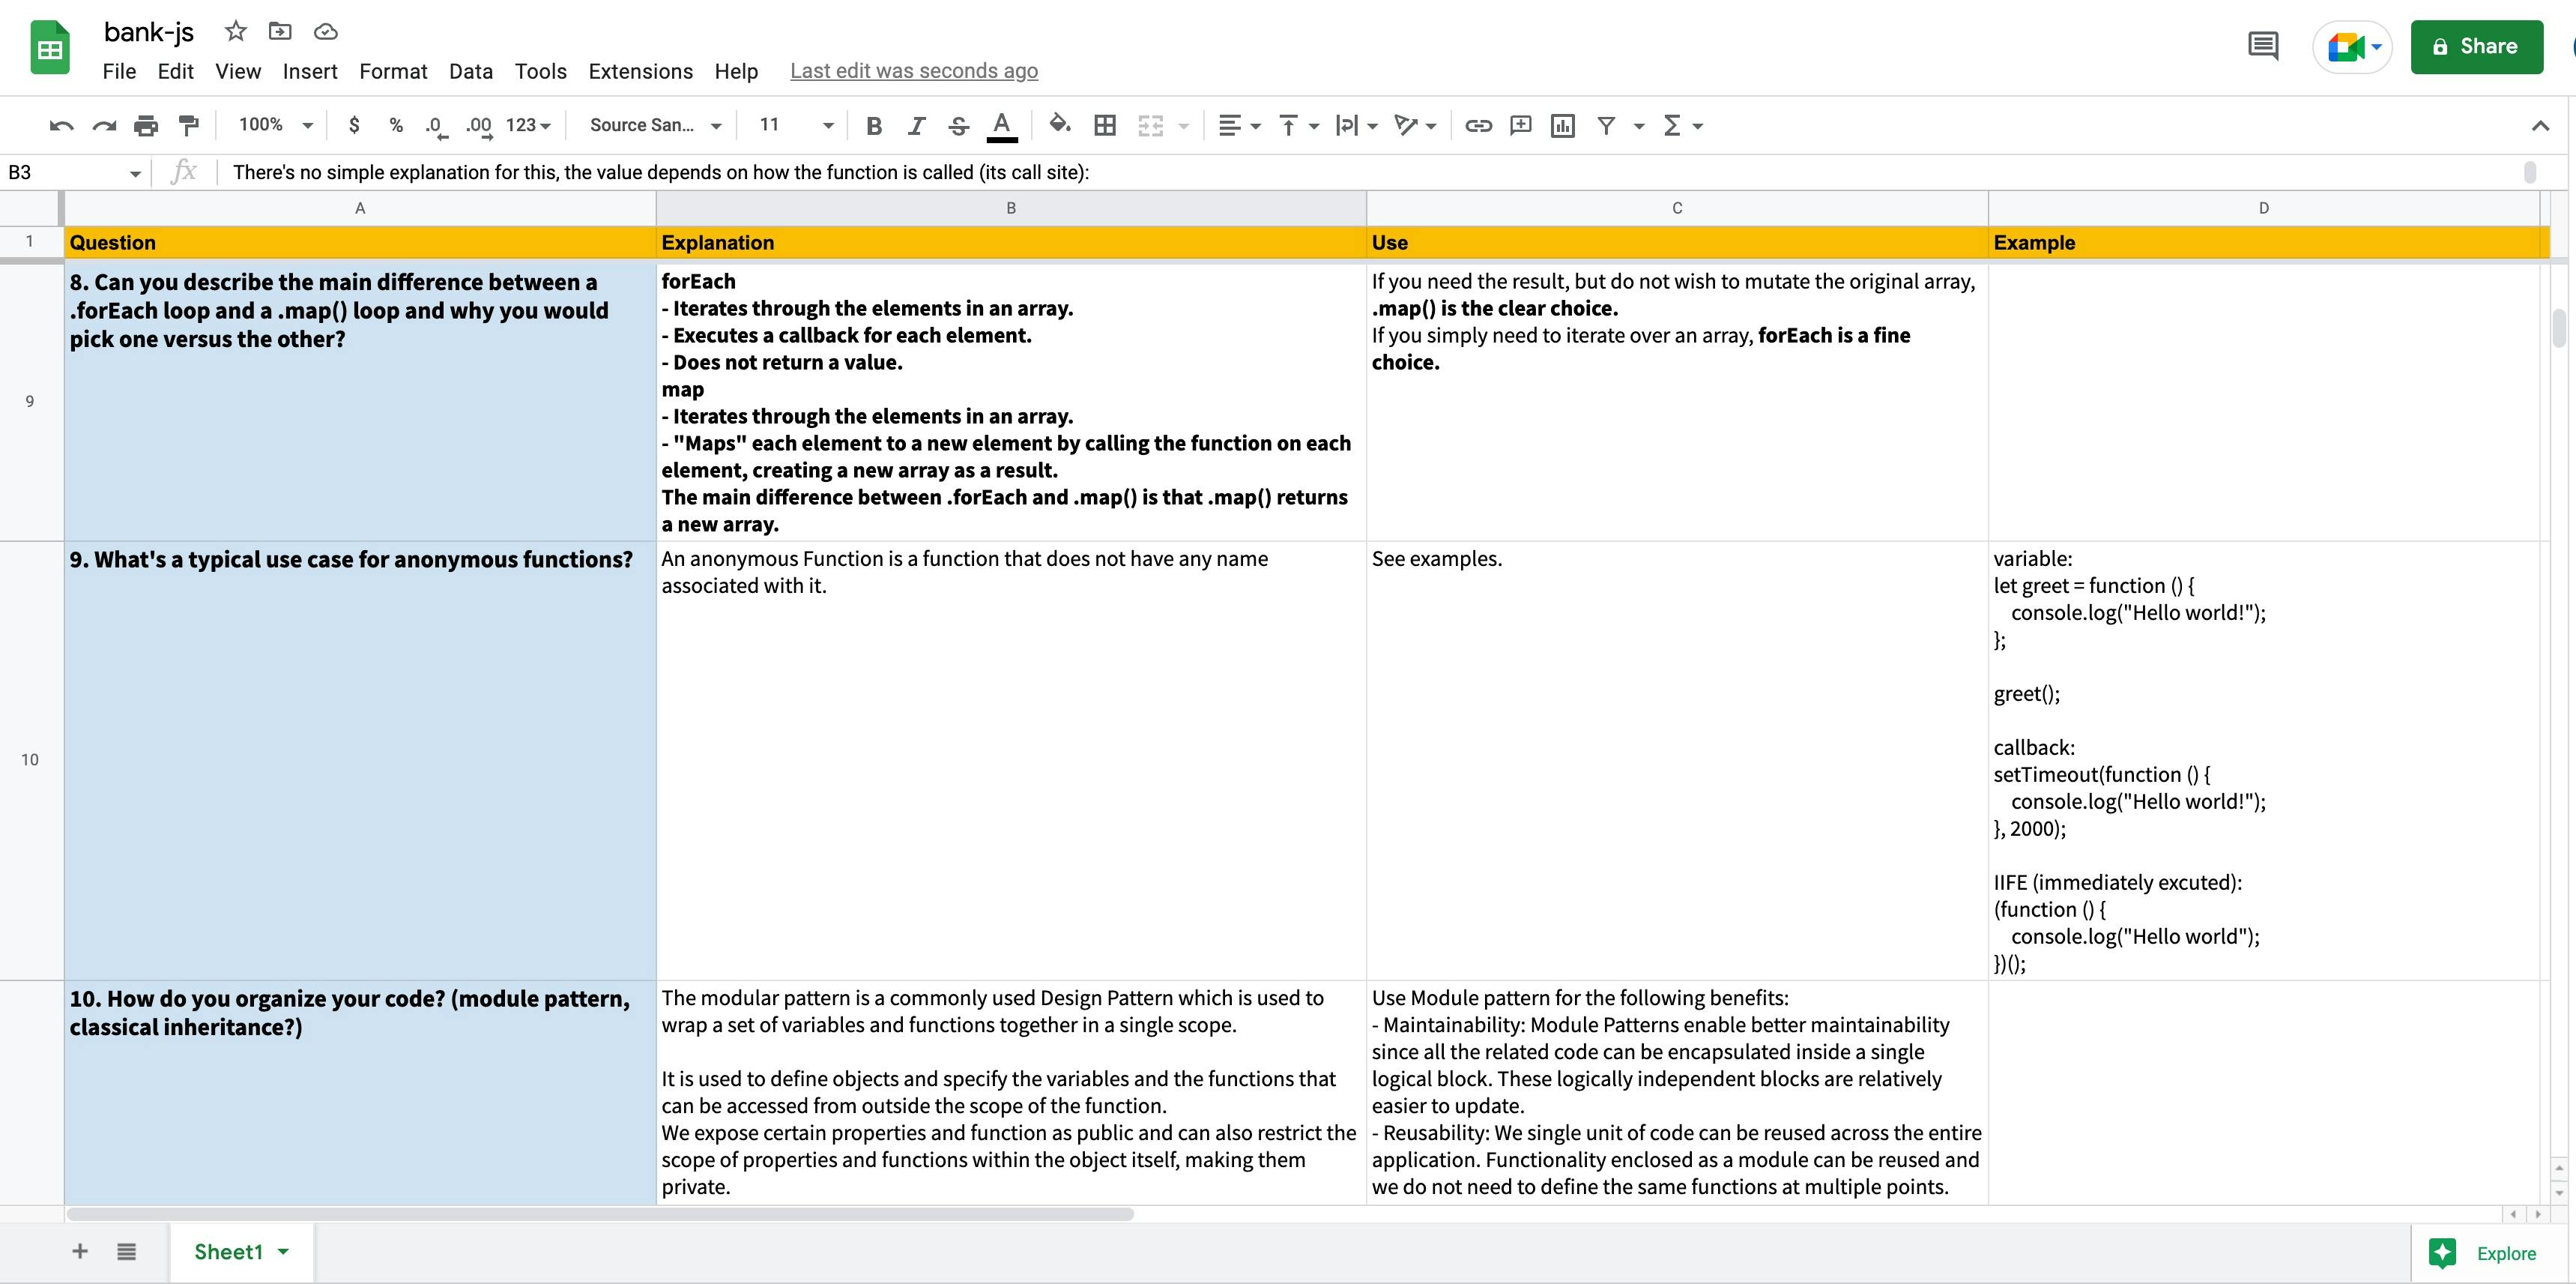
Step 12: Let's go to our spread sheet! As you can see, I have columns with names that correspond to the names of the customized fields in my new note type. *Note: The number and names of fields should be dictated by your actual spreadsheet, not vice versa. I had these columns in my study notes, which is why I renamed and added fields to a basic note type.
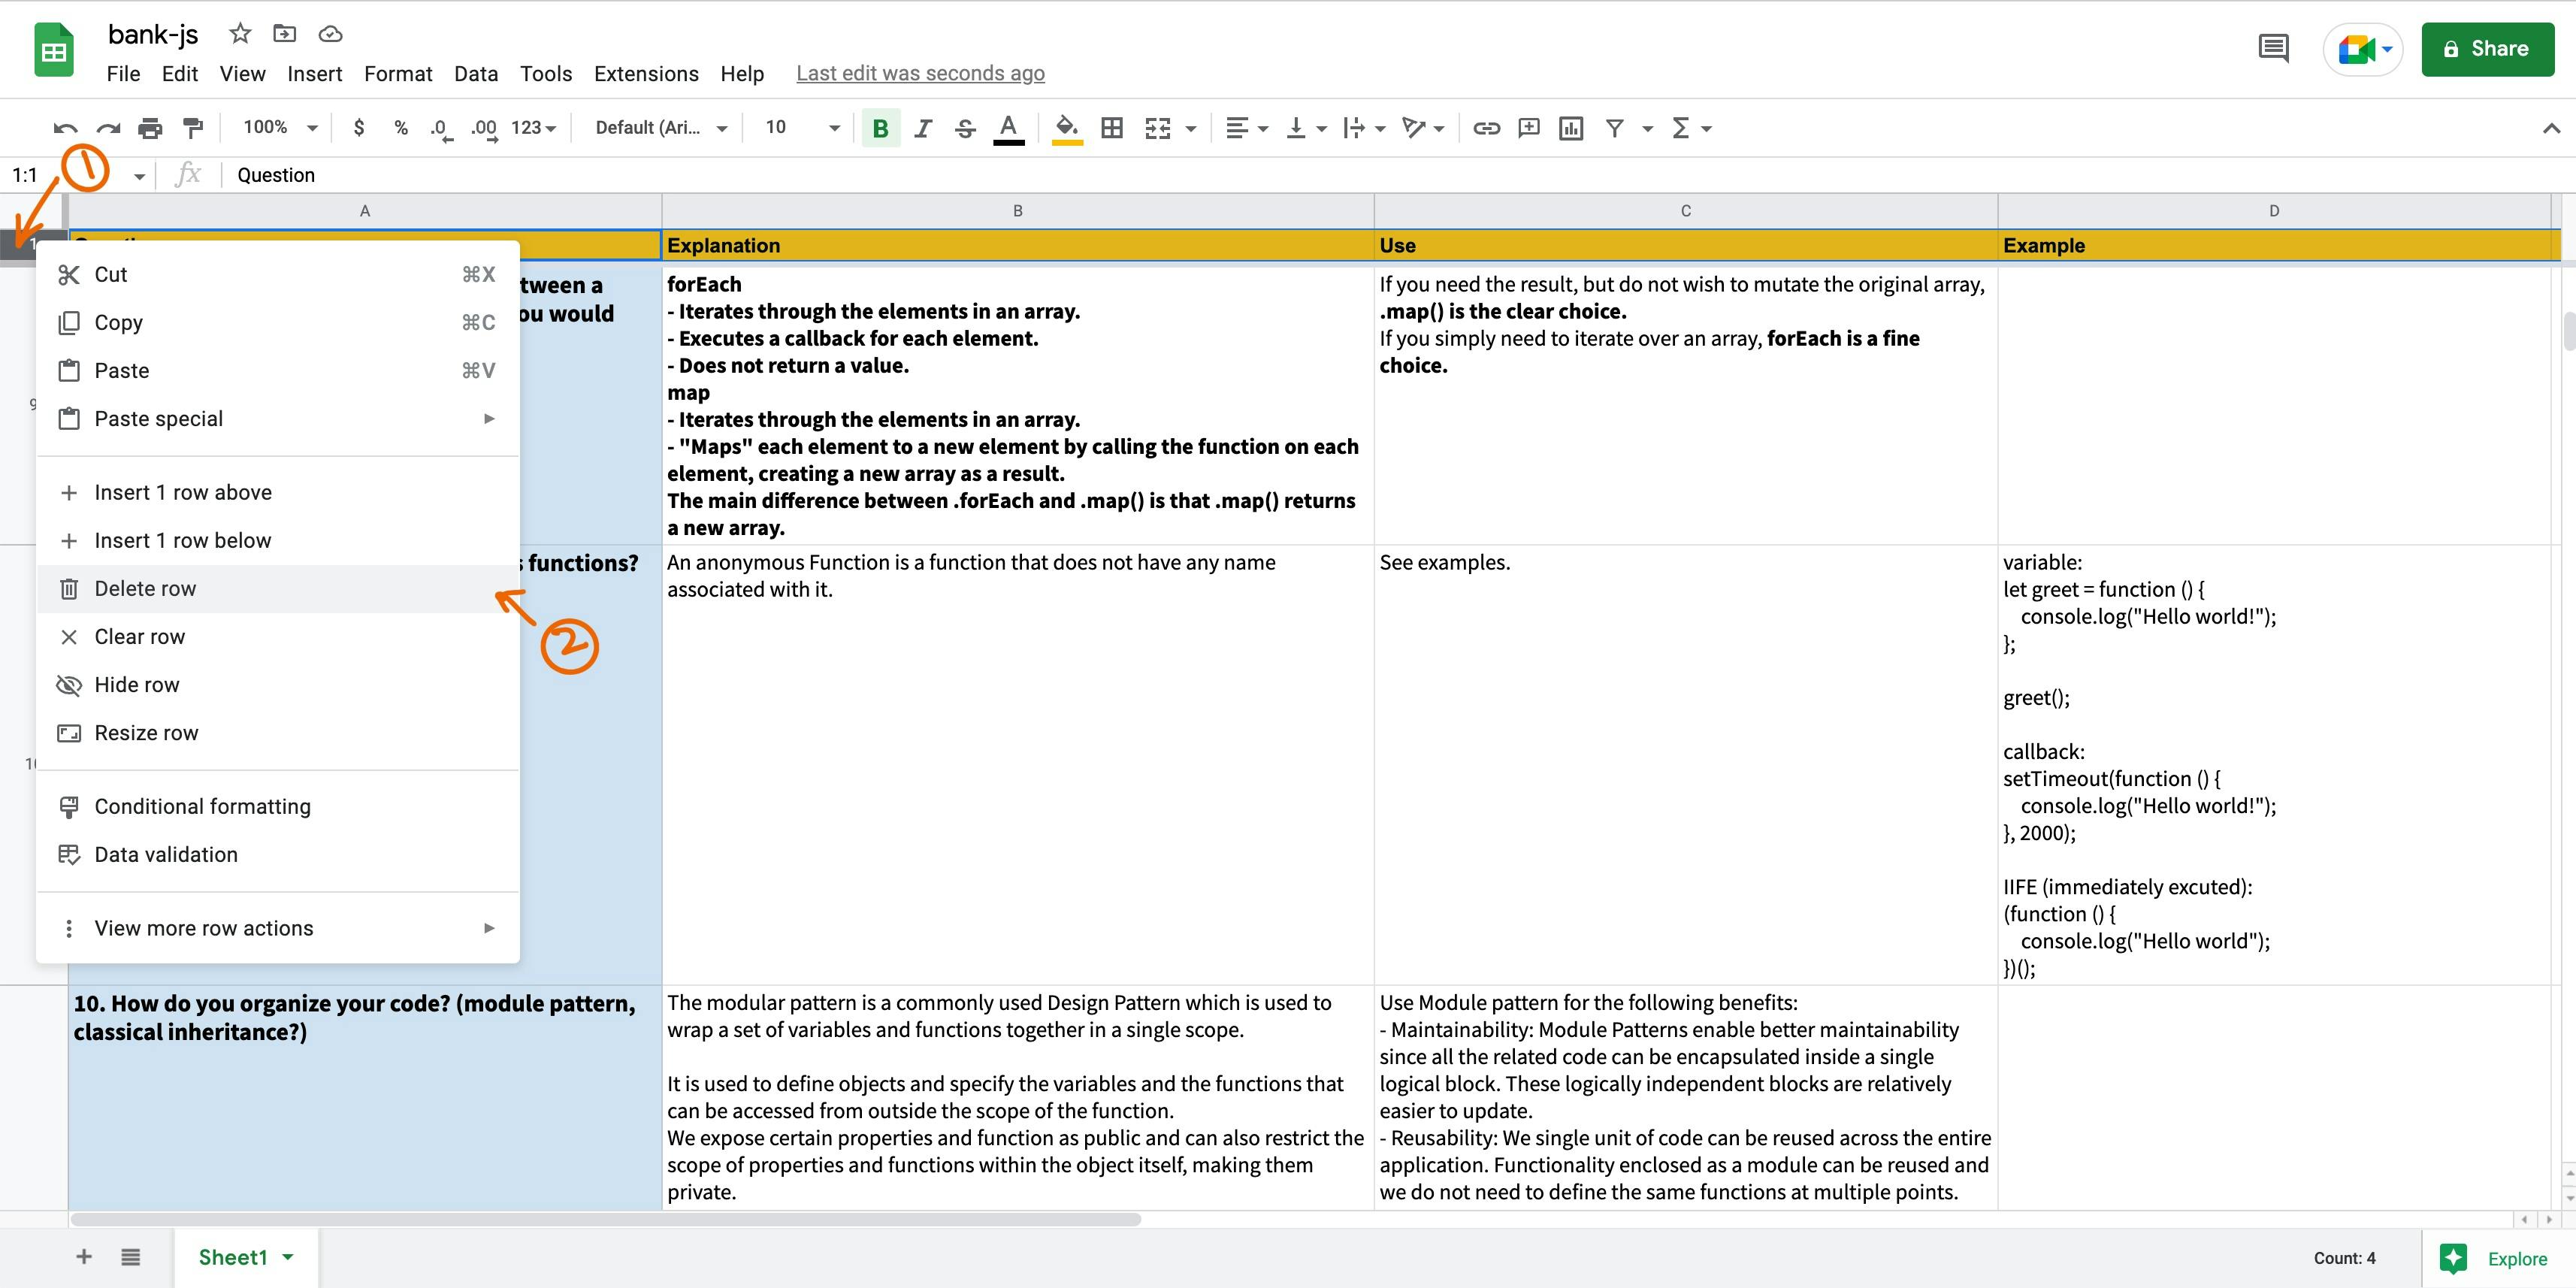
Step 13: Delete the first row (this is temporary and you can always add it back), the reason being you don't want to actually create a flashcard with "Question" on the front and "Explanation", "Use", "Example" and "Reference" on the back. (Unless somehow you want to quiz yourself on that... then leave it.)
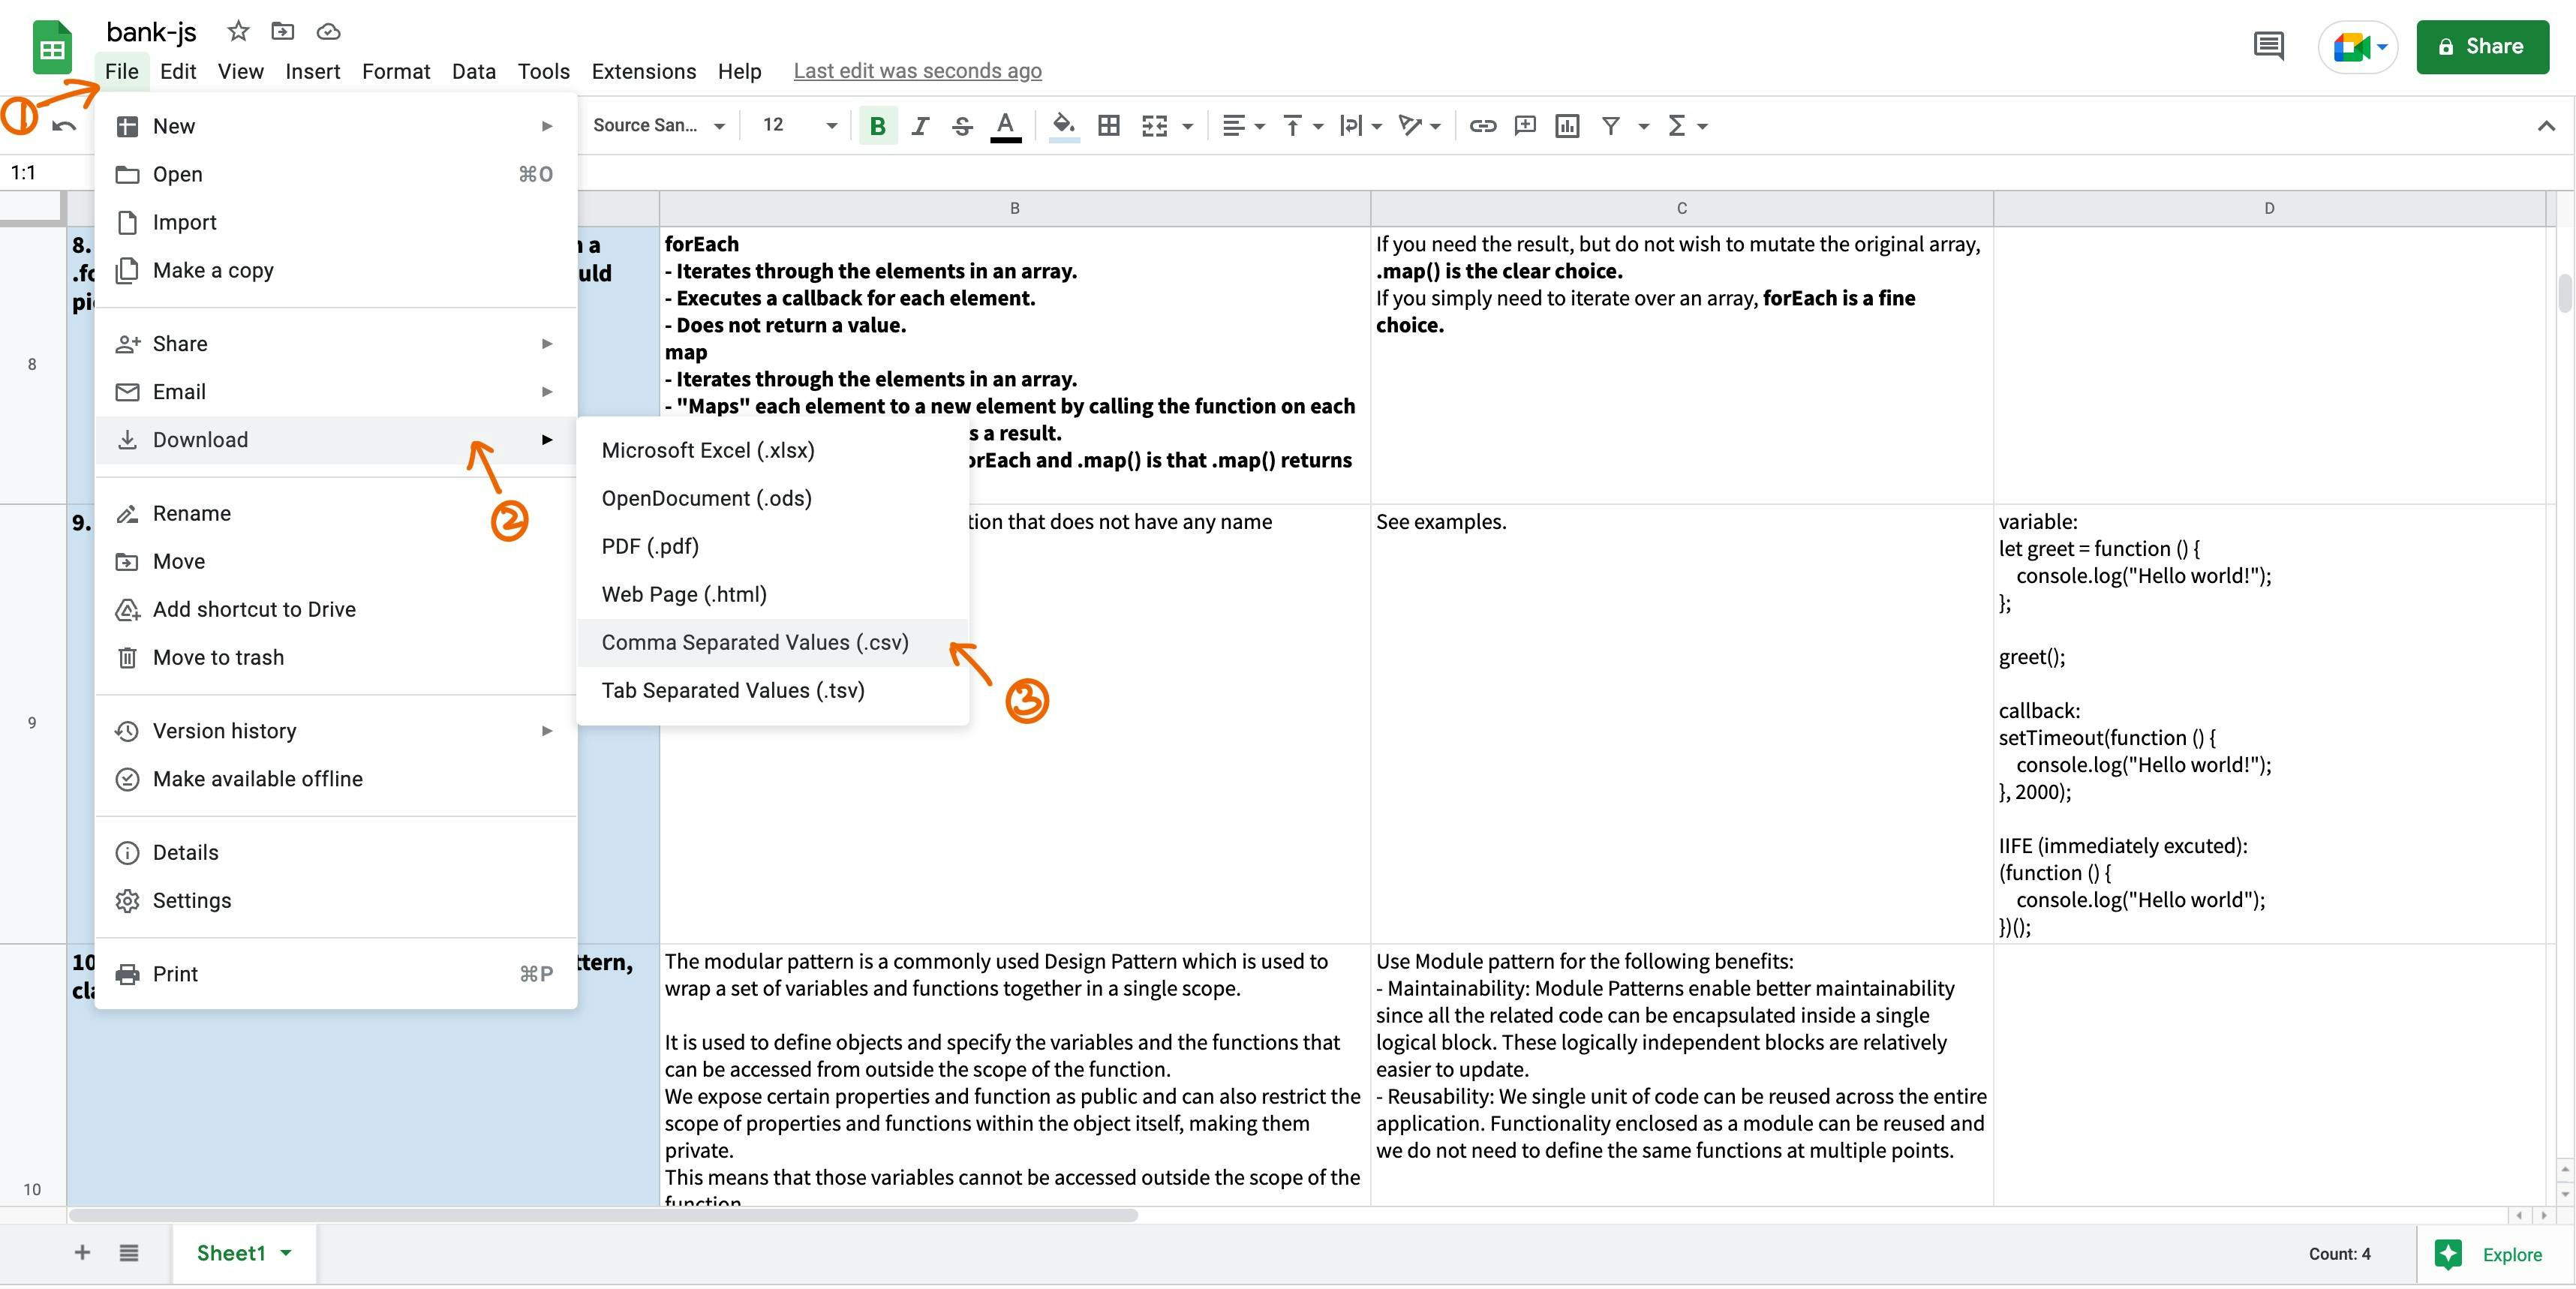
Step 14: Download the file as a .csv file by going to "File" -> "Download" -> click "Comma Separated Values (.csv).
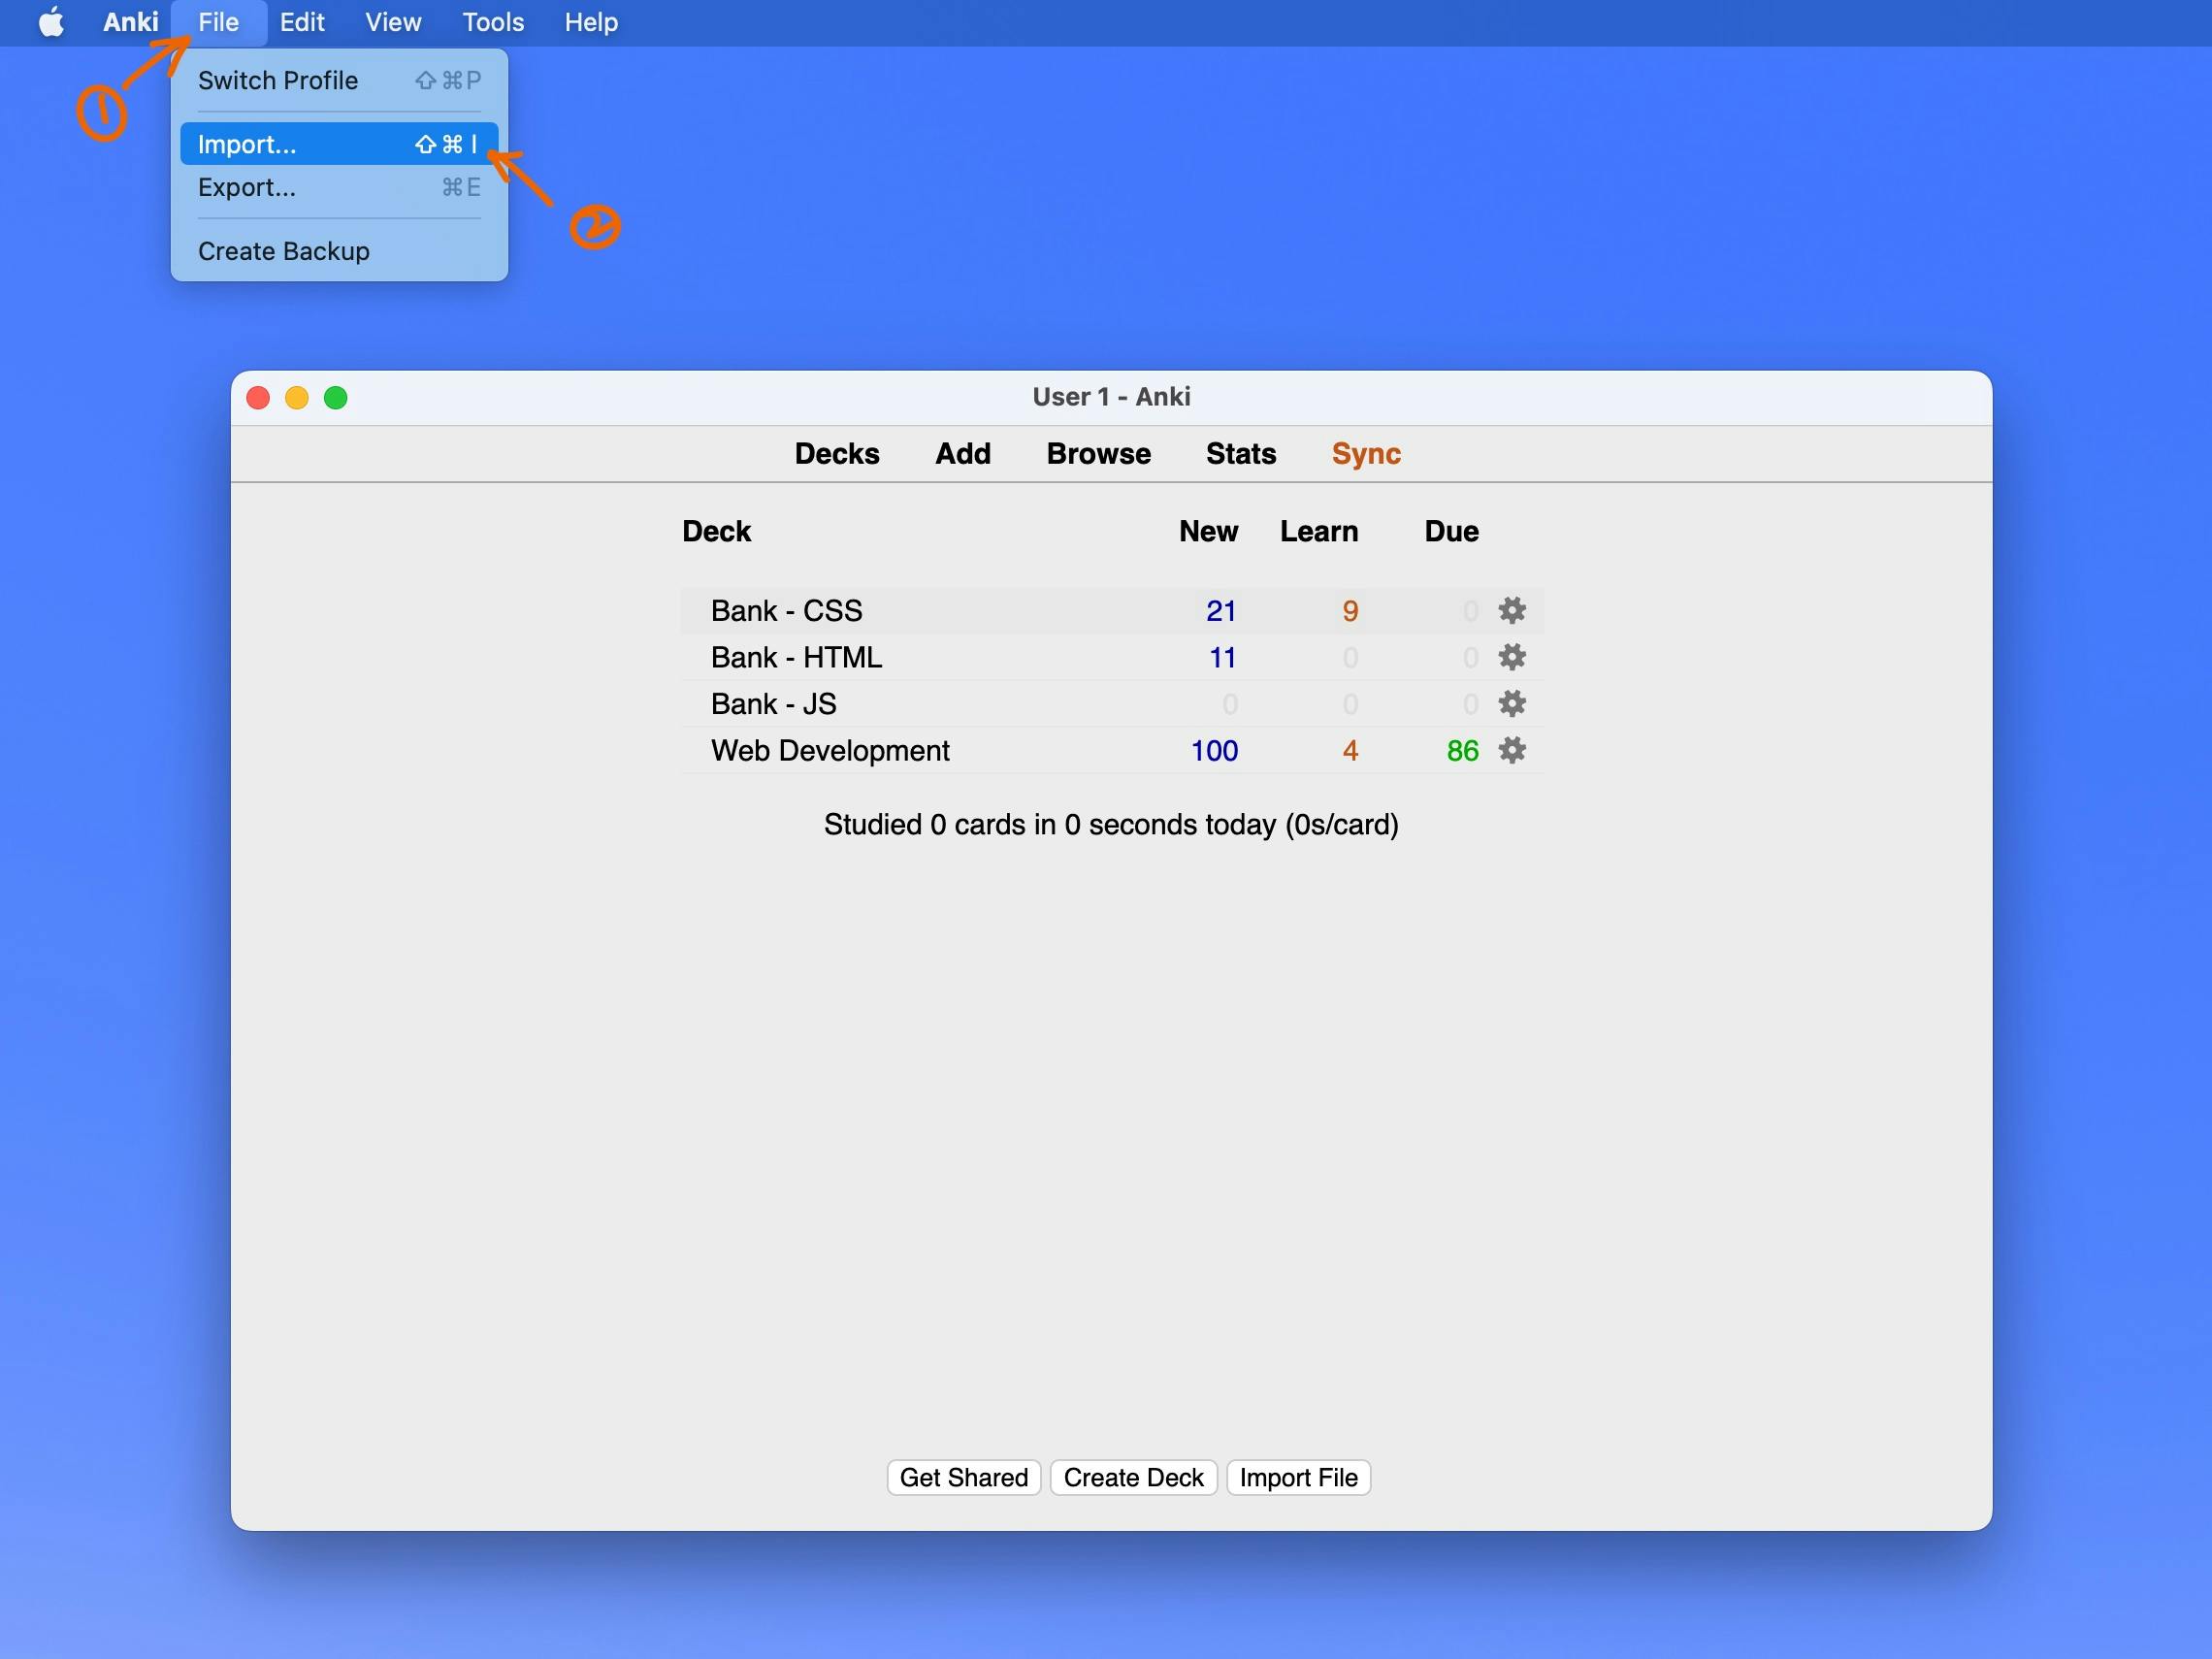
Step 15: Now back to our Anki application. Go to "File" and click "Import...".
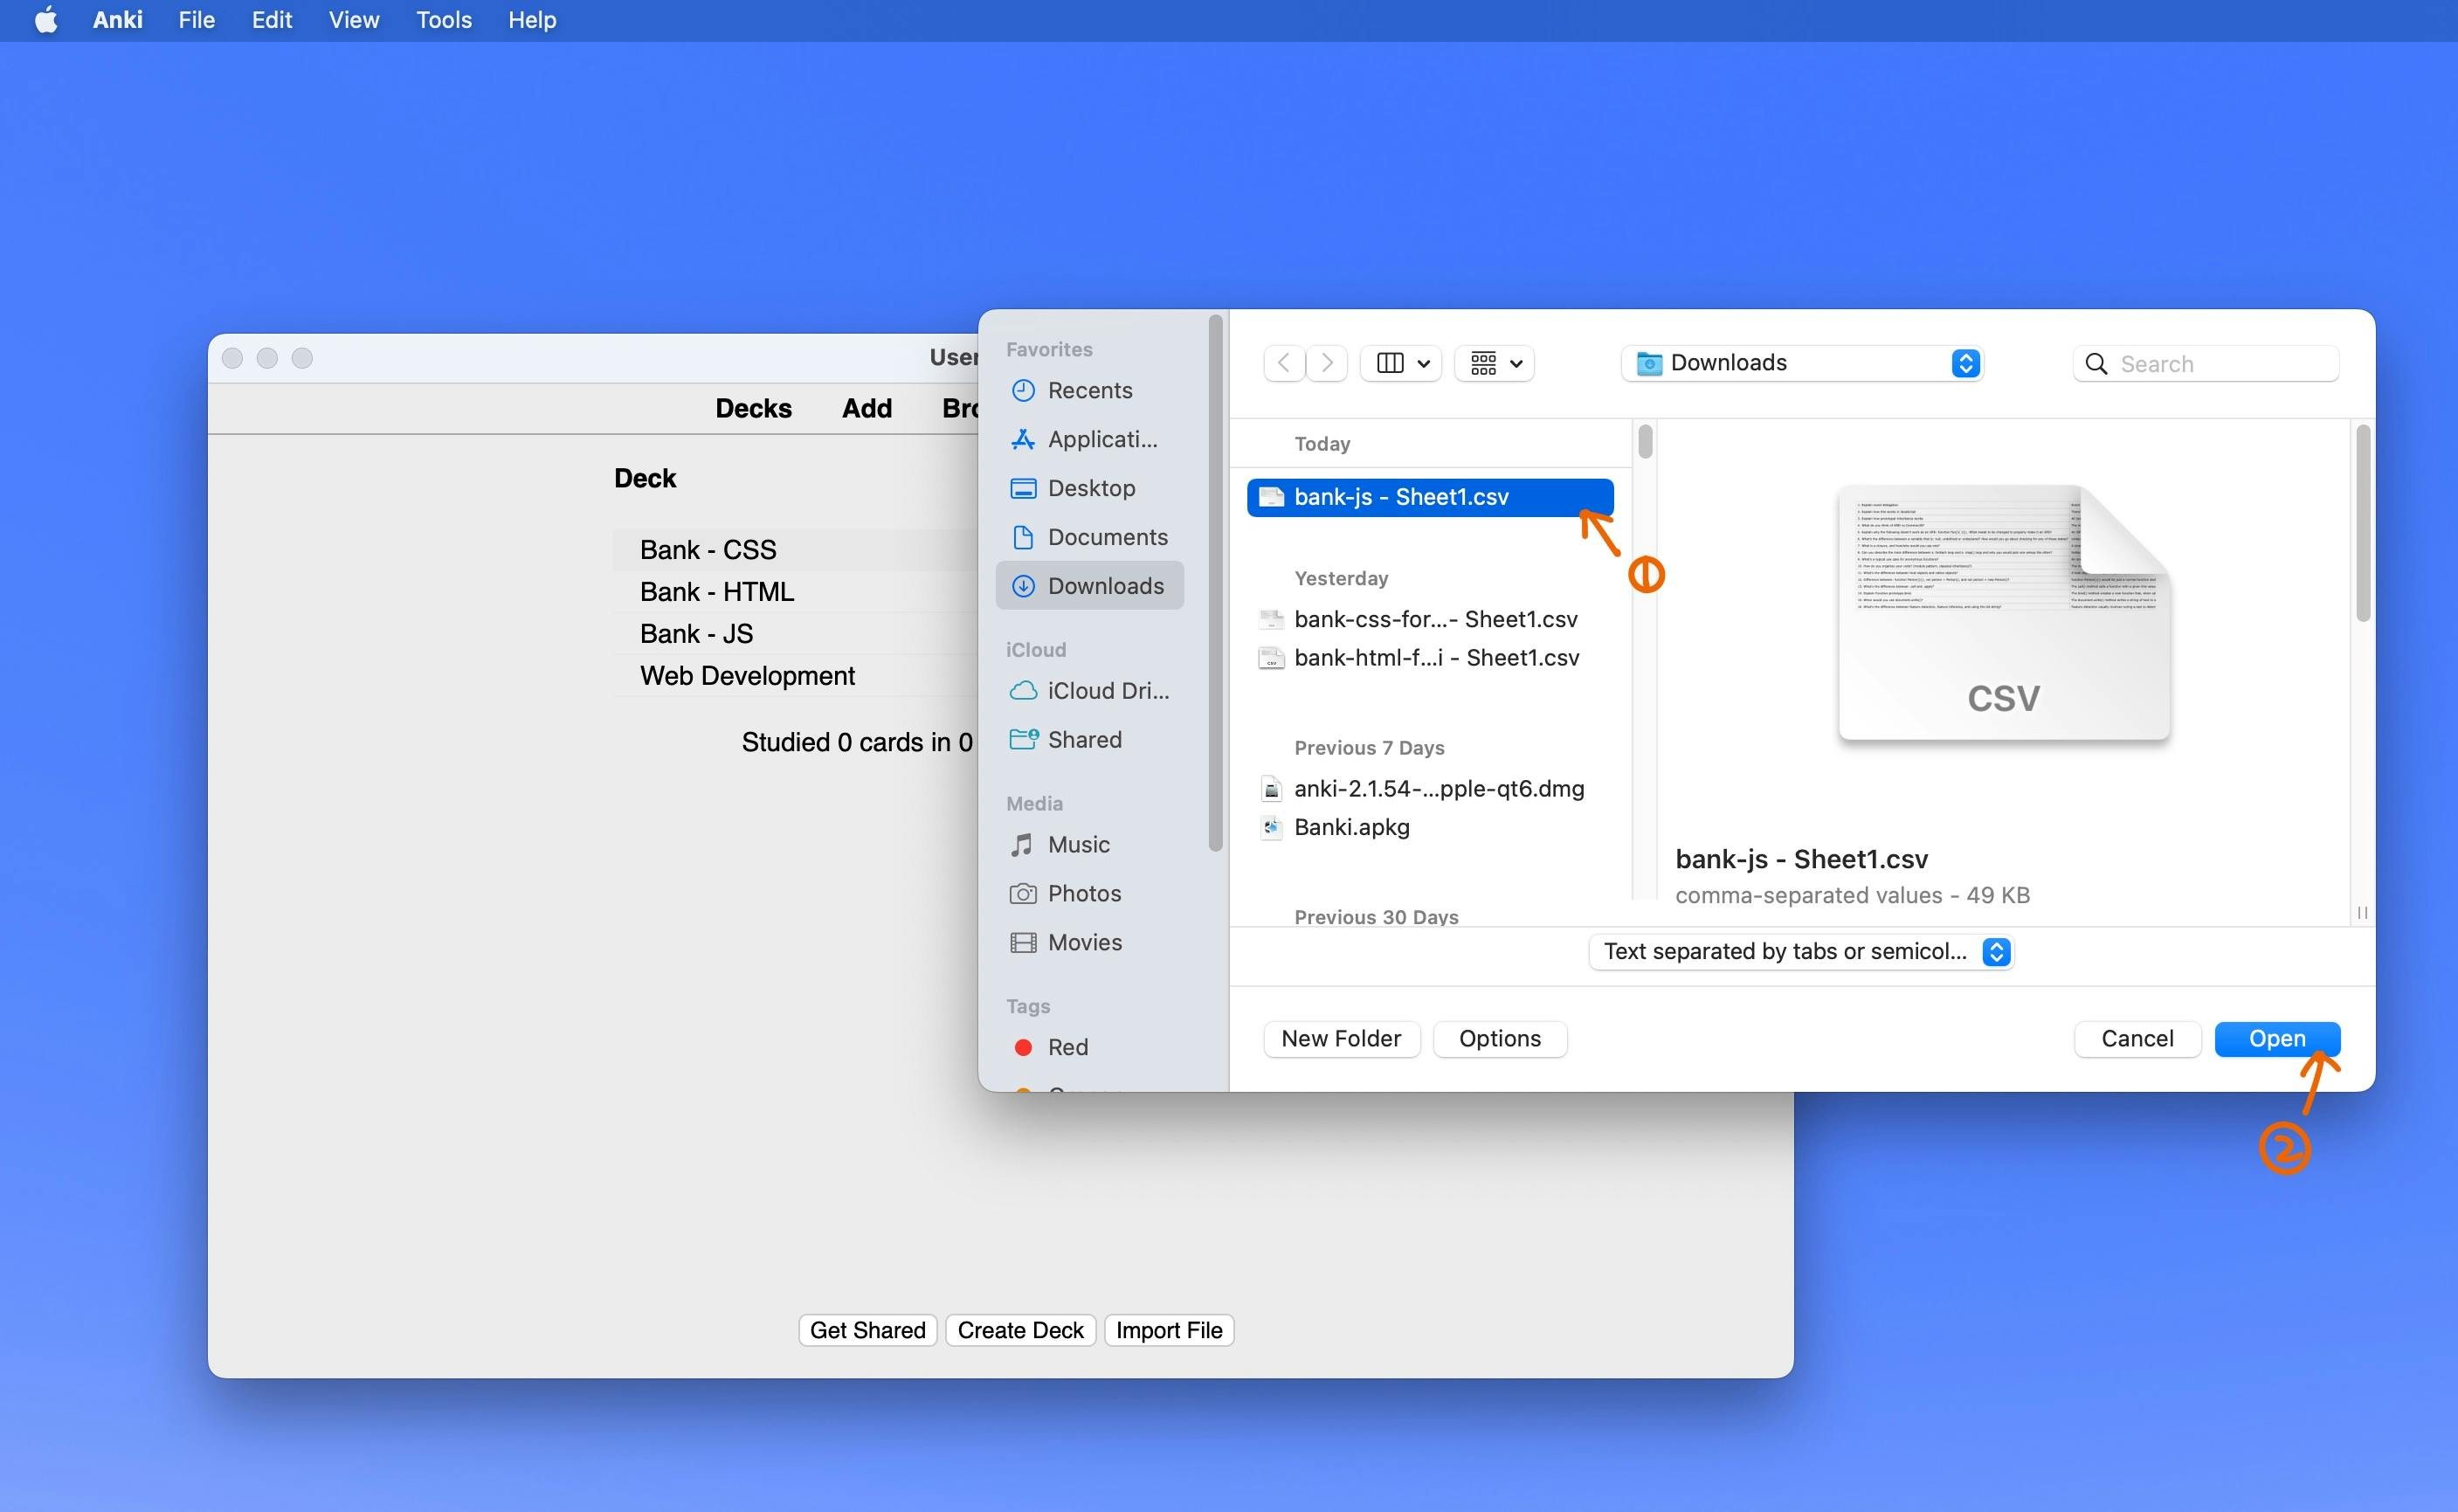
Step 16: Select the .csv file you just downloaded and click "Open".
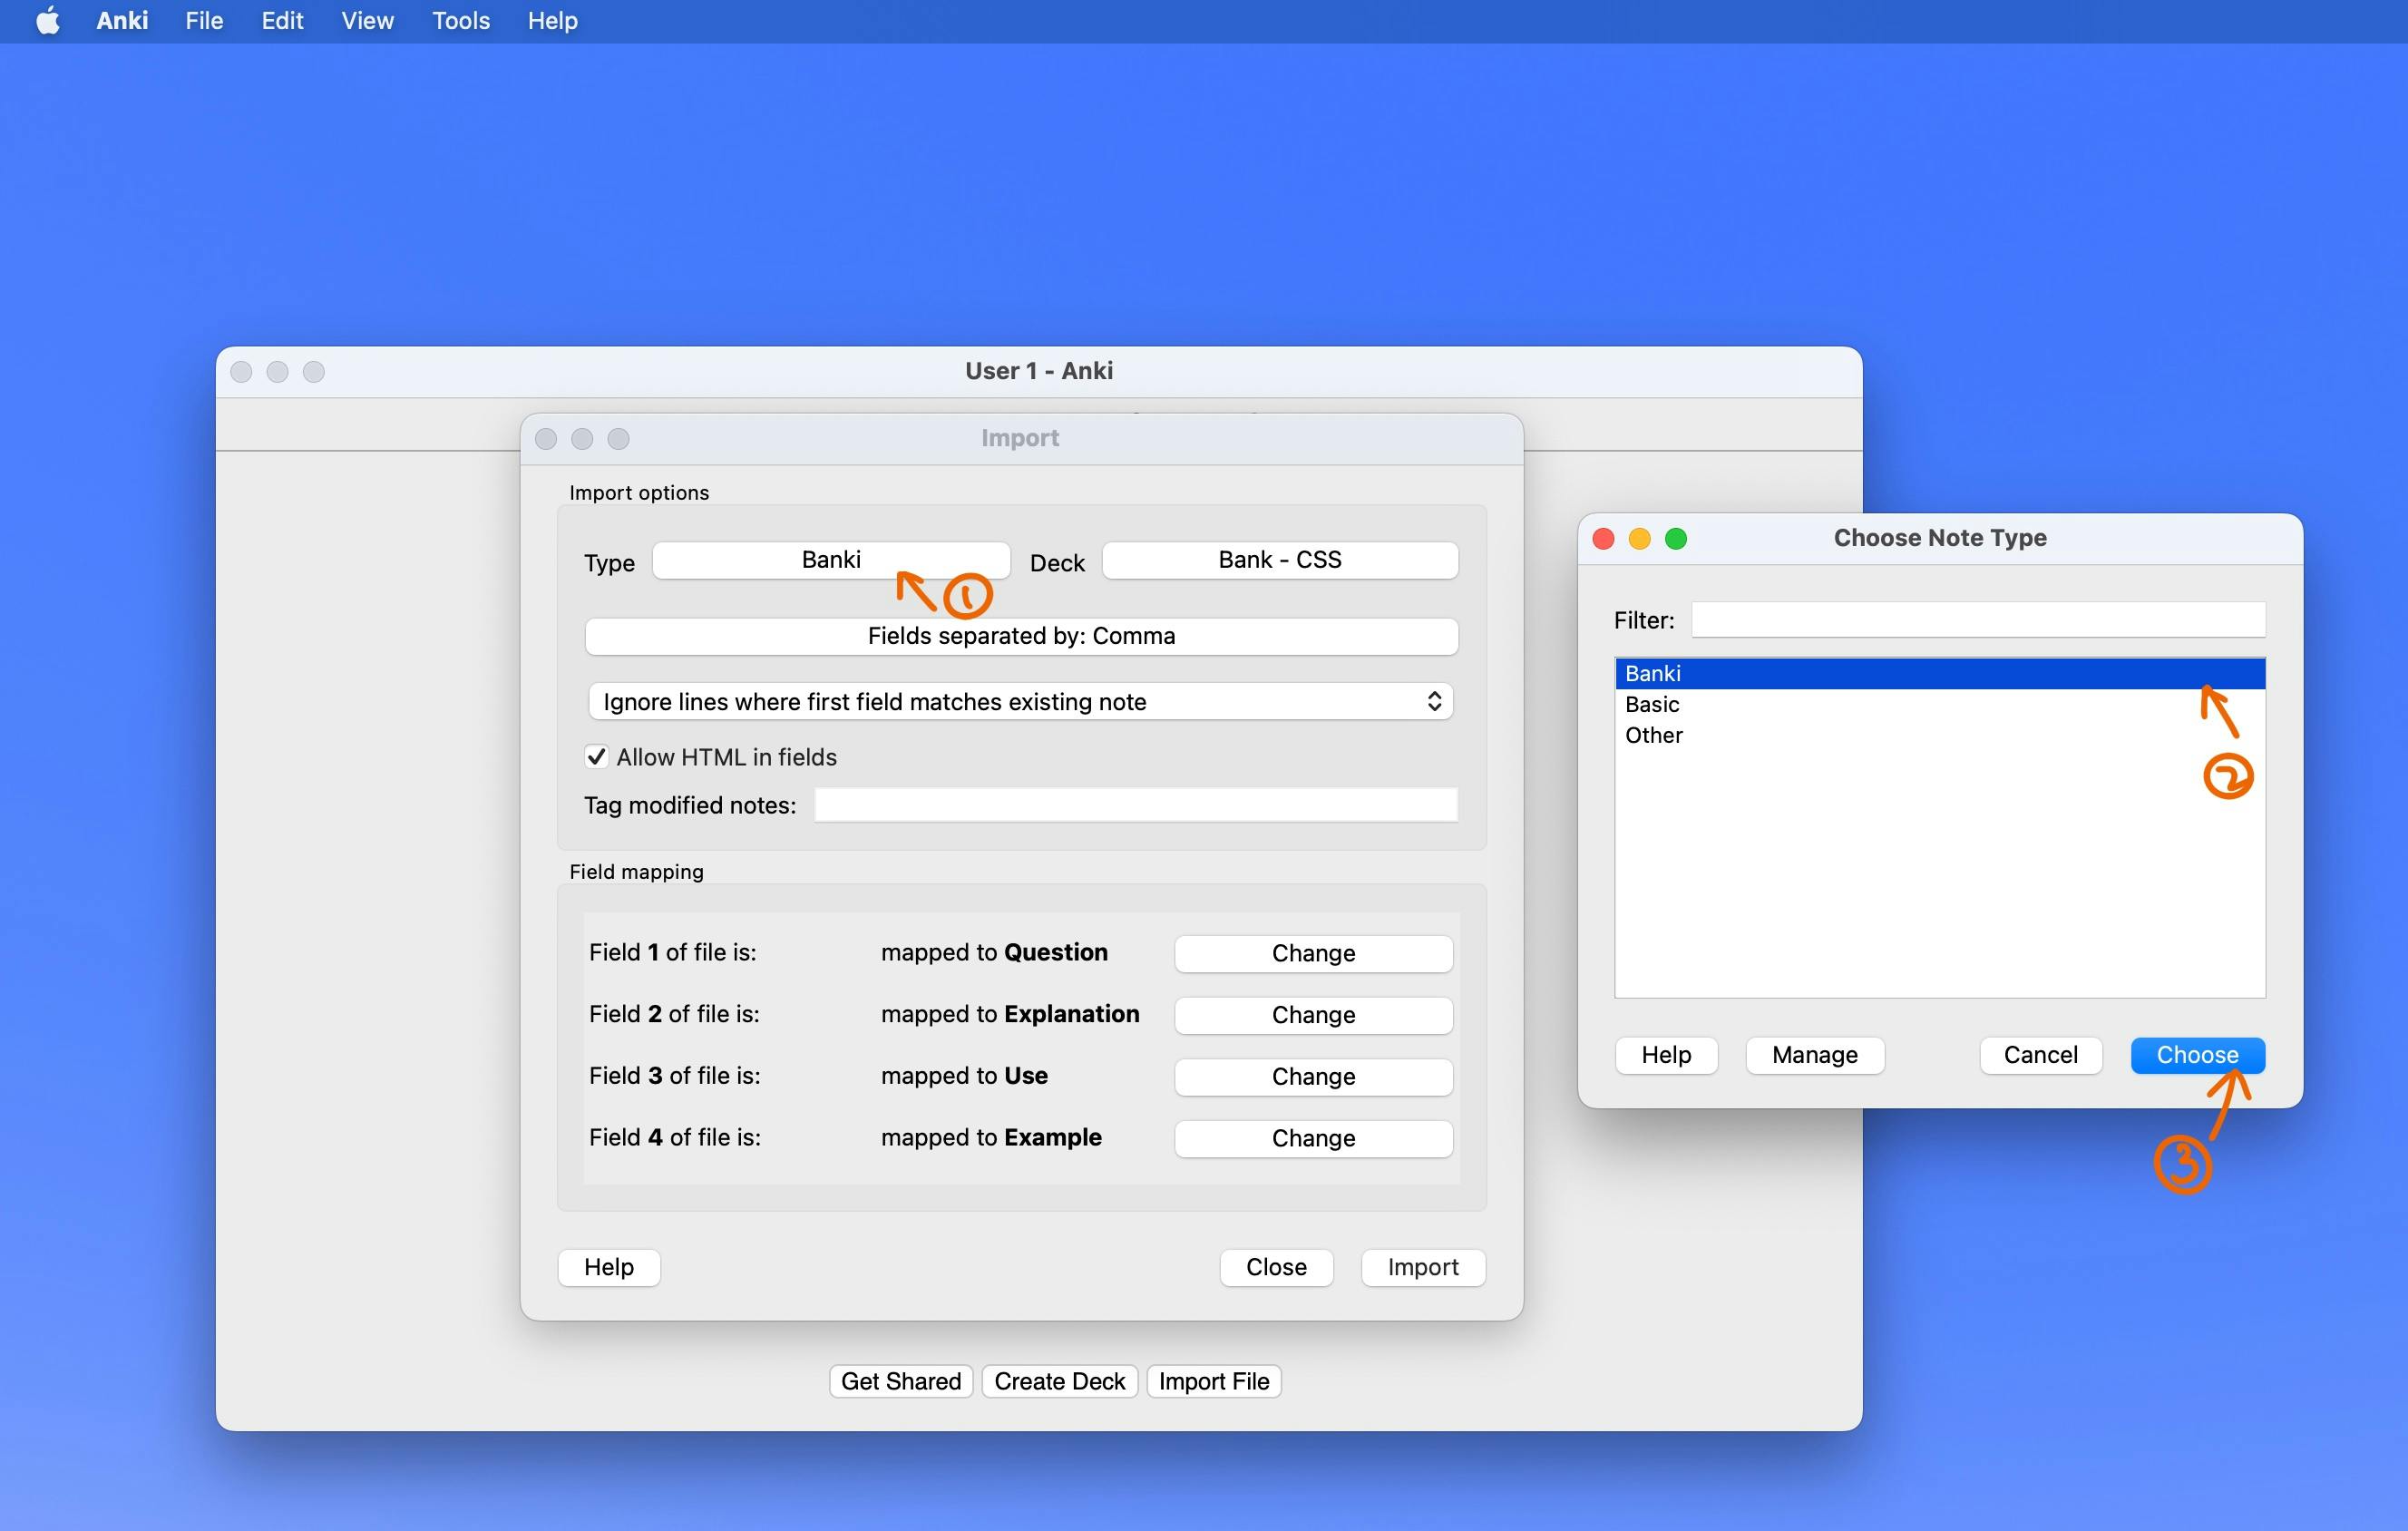
Step 17: In the pop-up "Import" window, first click the button after "Type". Select the new note type you created earlier, then click "Choose". Mine is called "Banki".
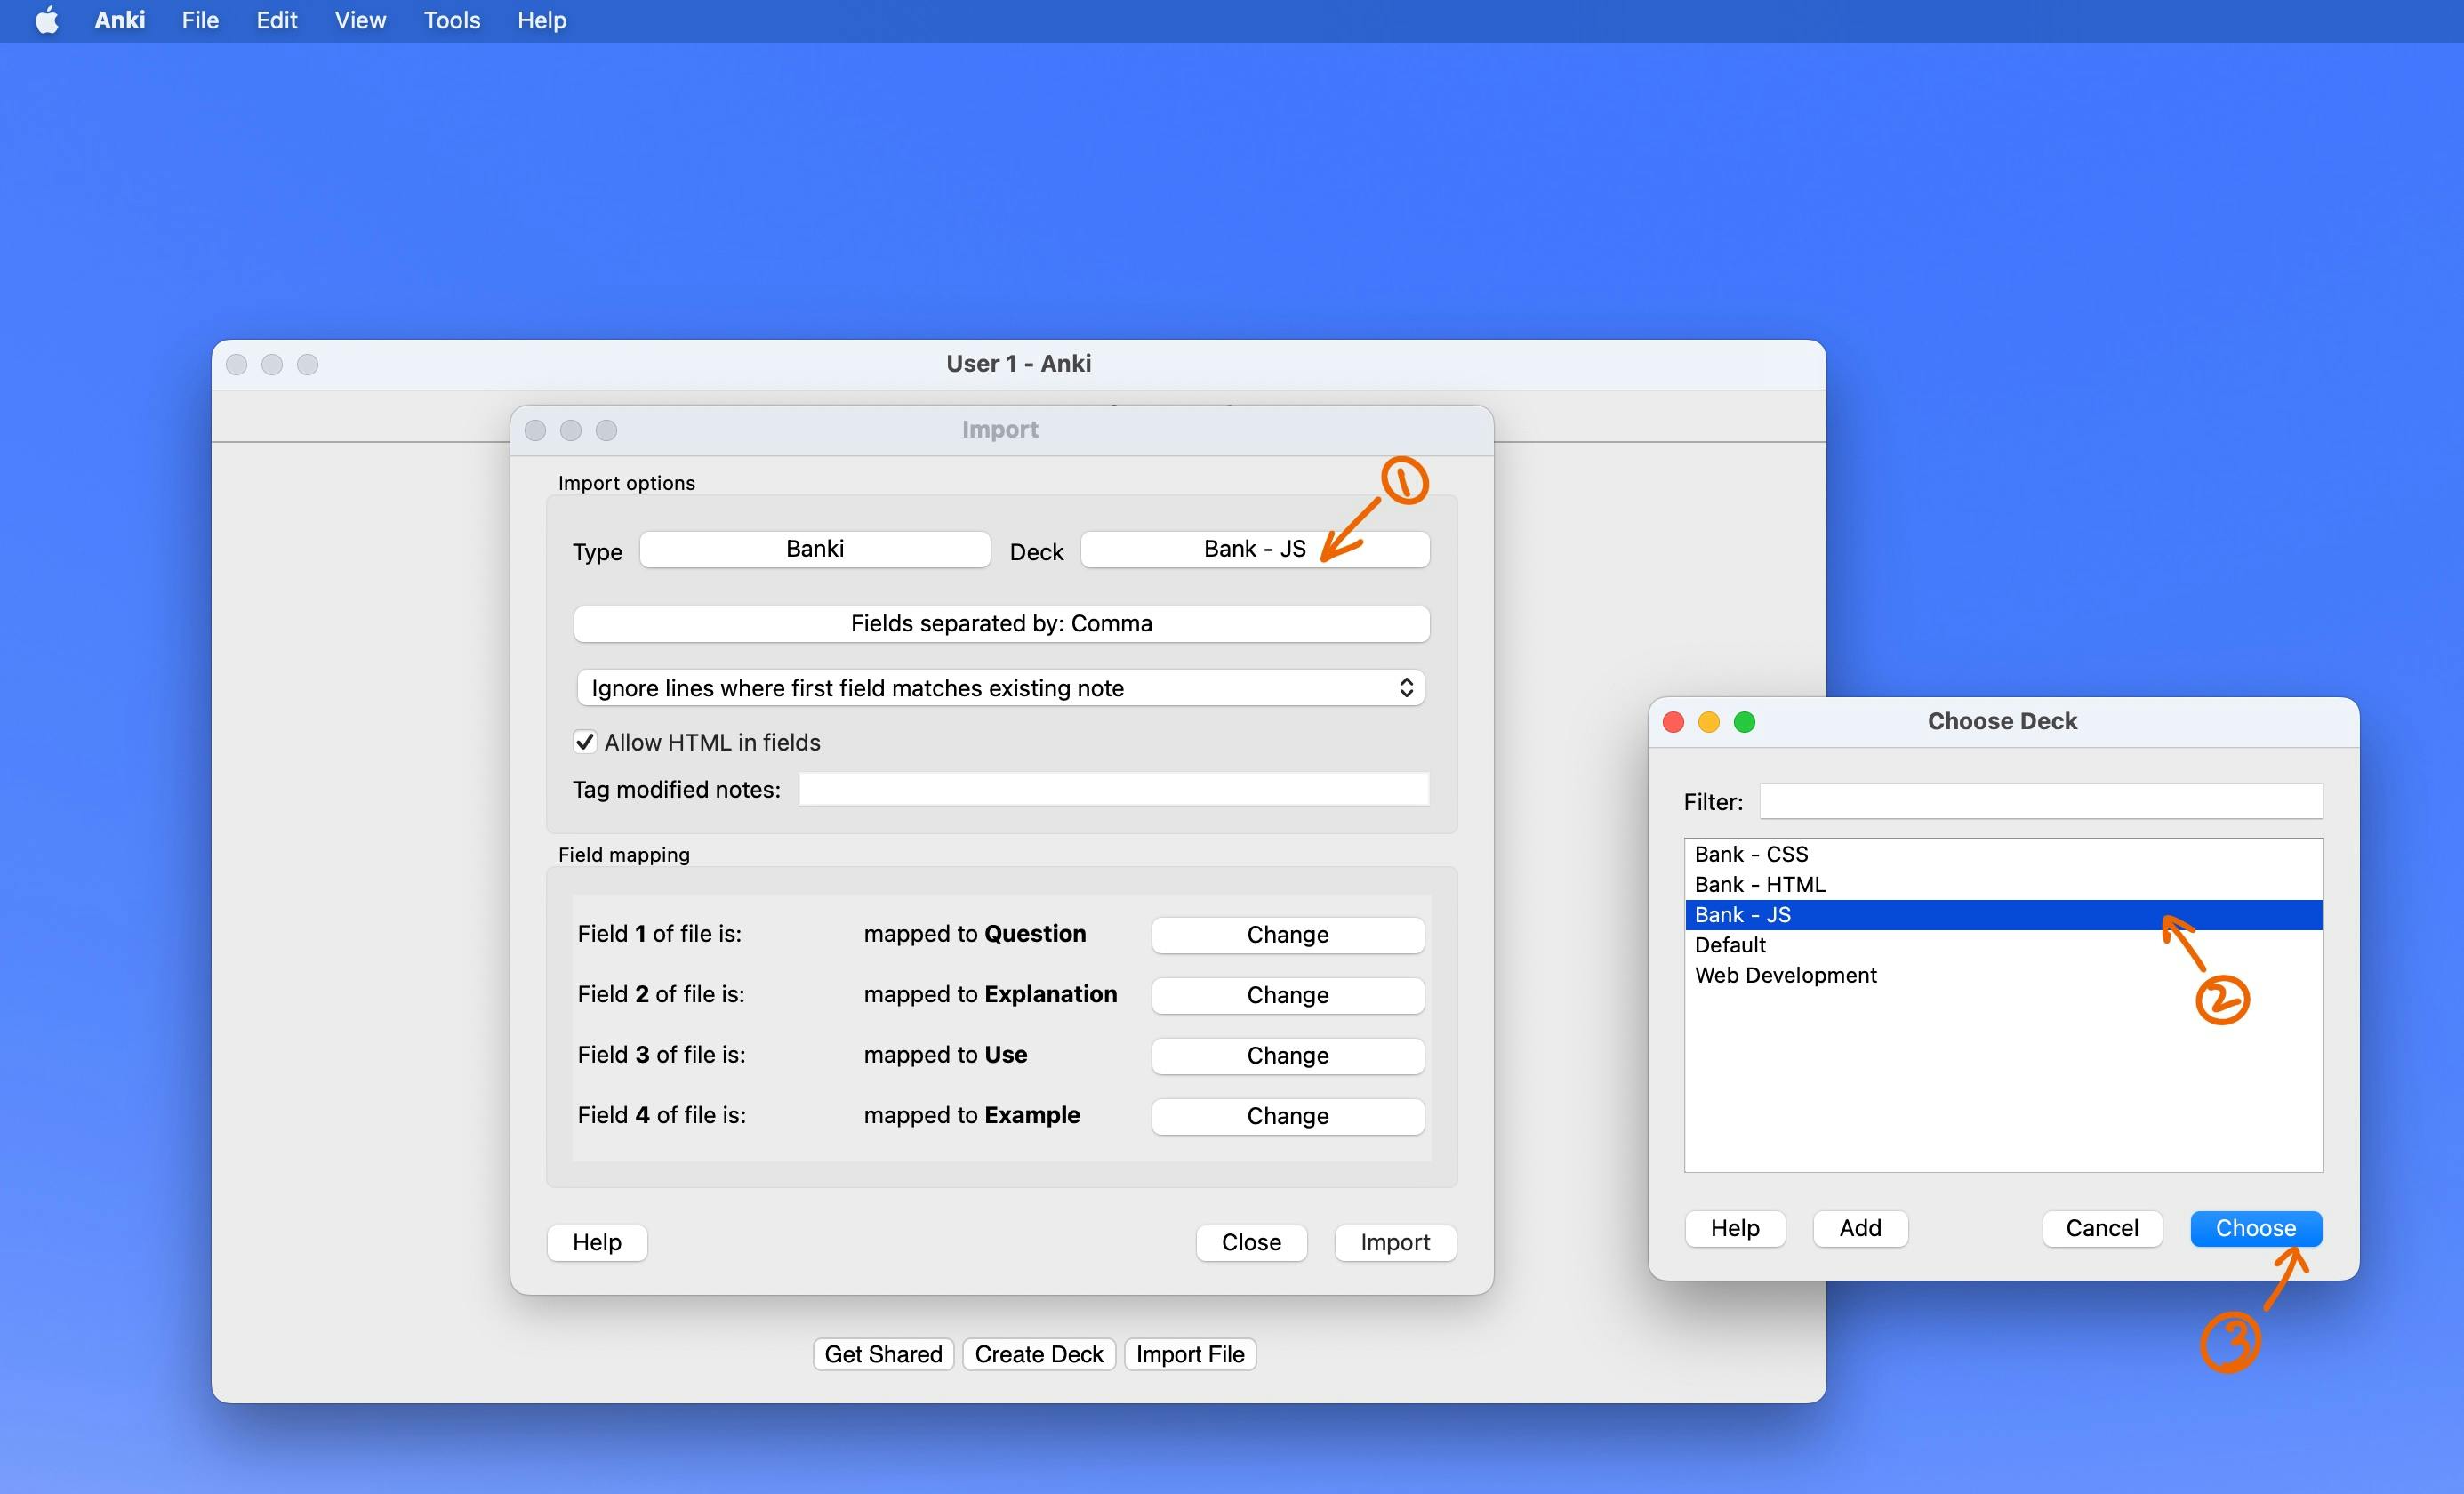
Step 18: In the same pop-up window, click the button after "Deck". Select the deck you want to import the .csv file to, then click "Choose". My deck is called "Bank - JS".
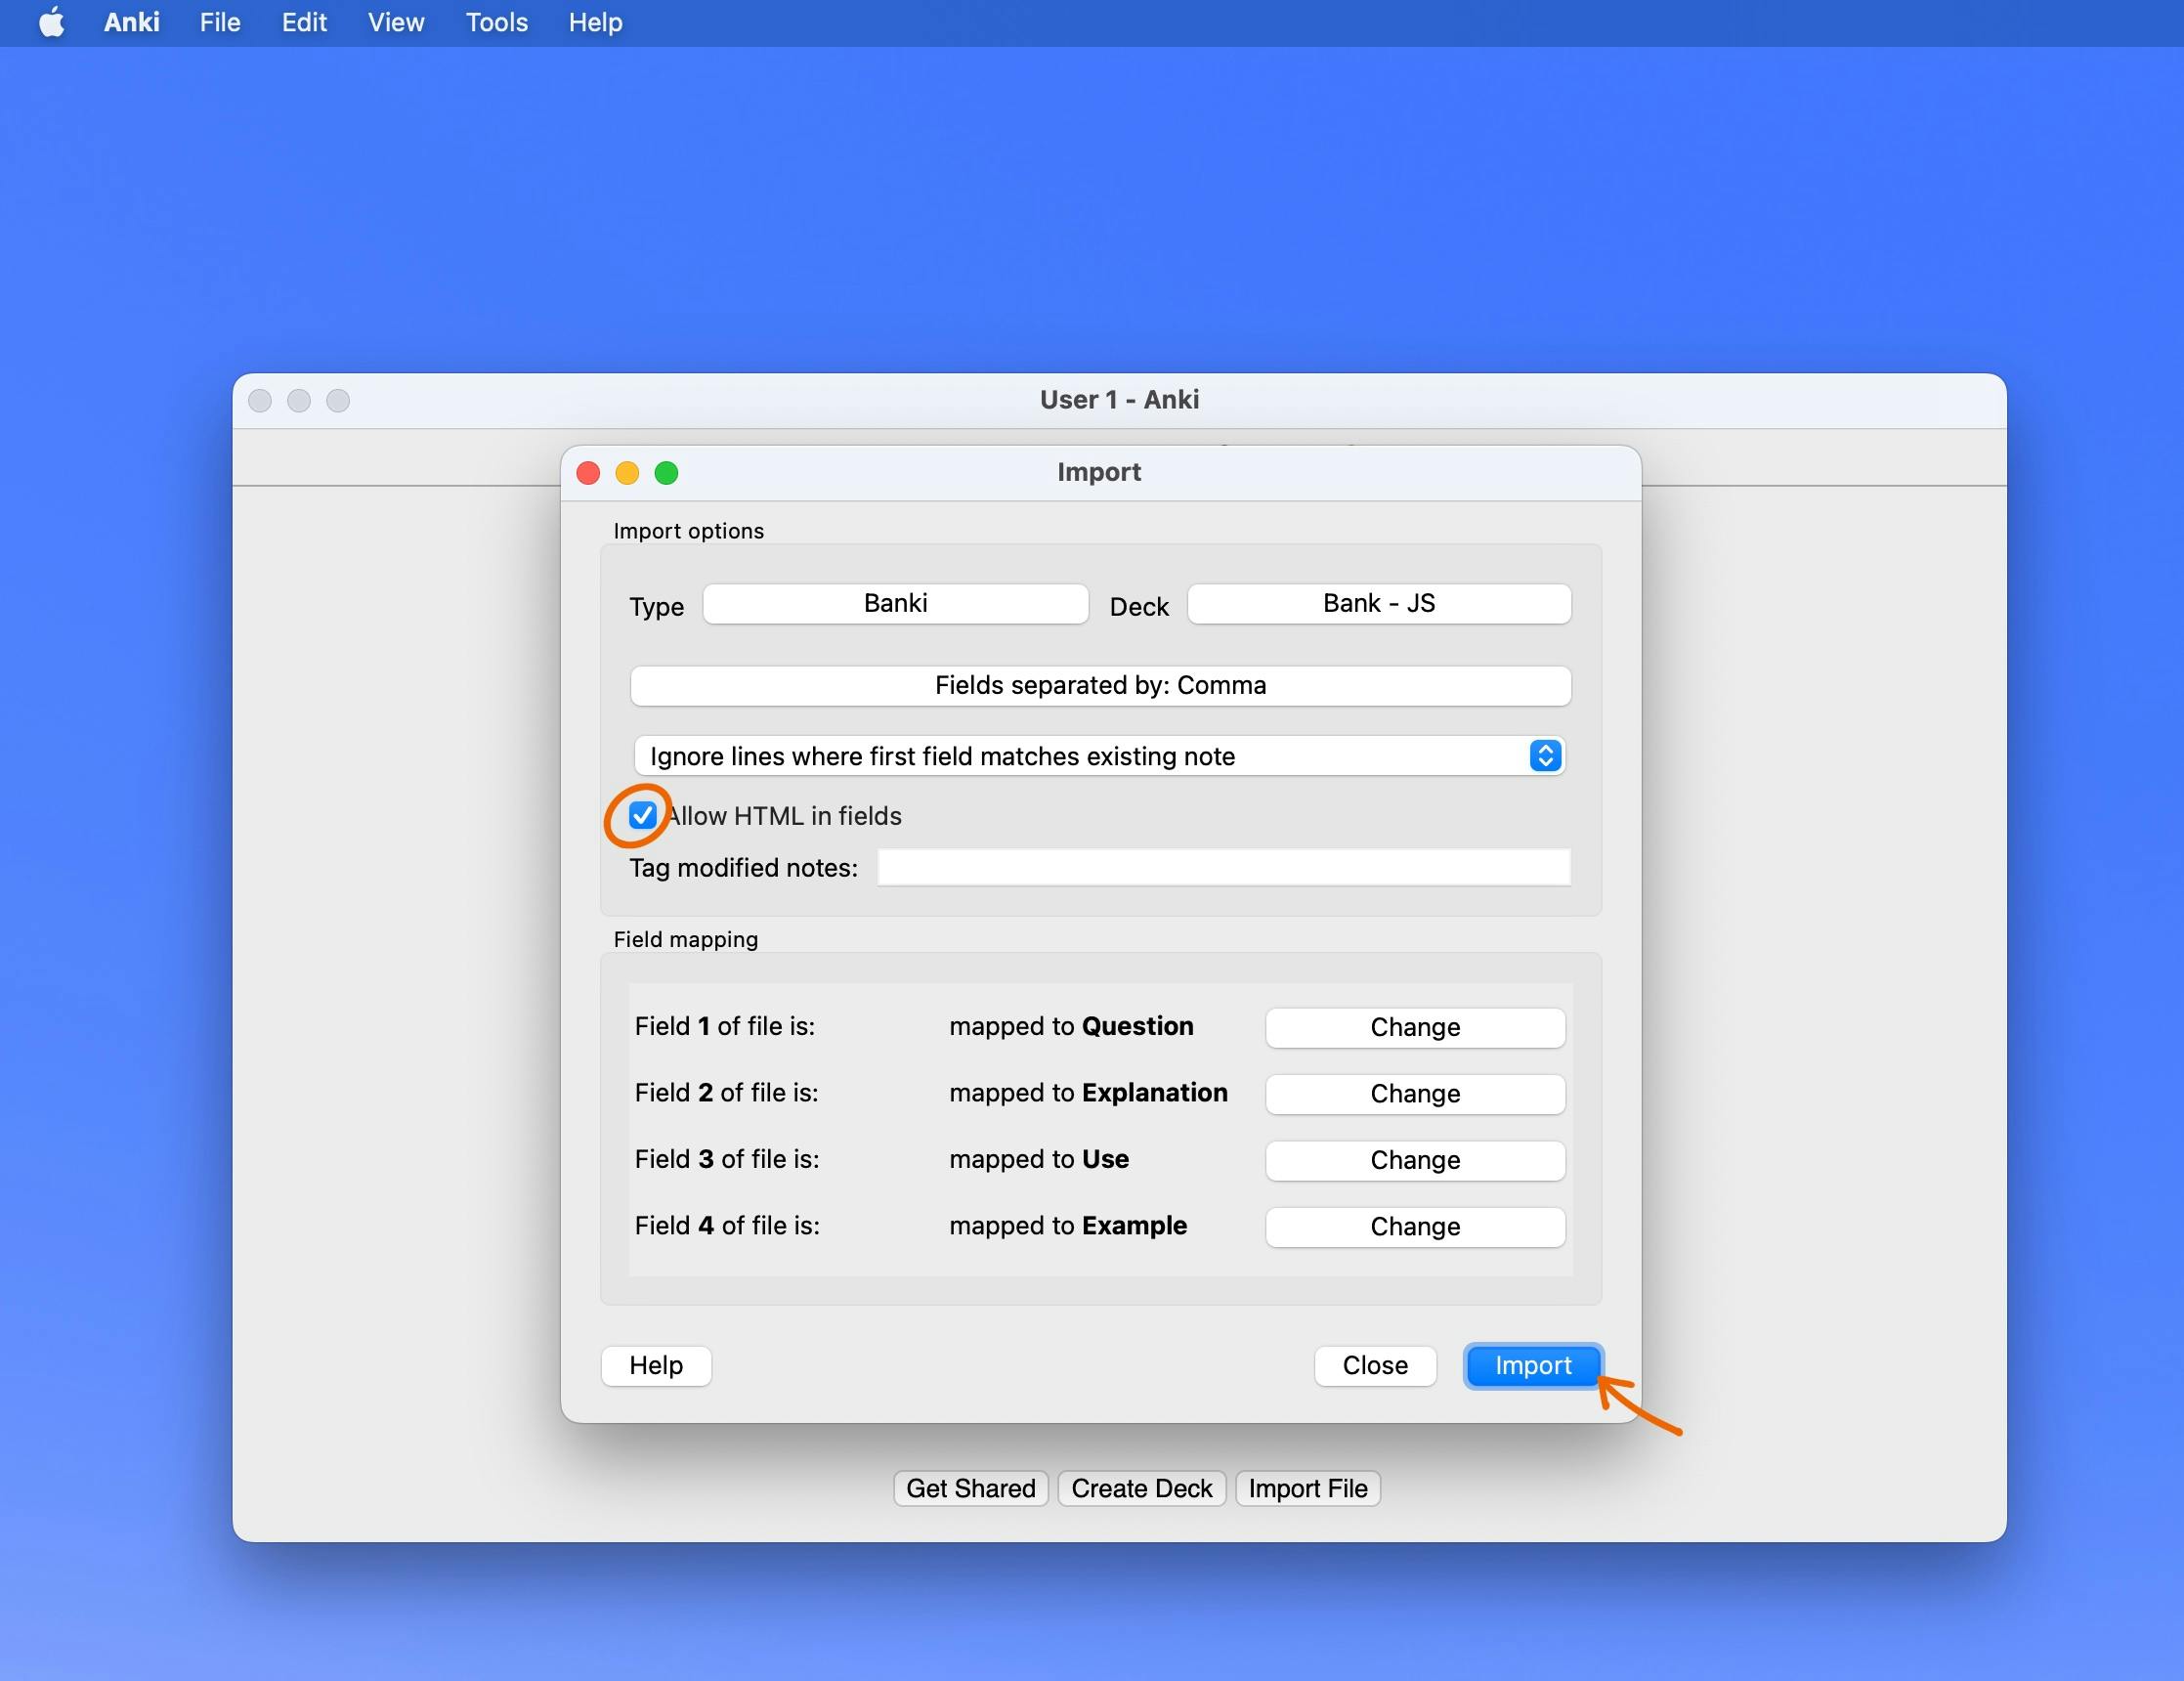
Step 19: Customize the rest of the options as you wish. I didn't change anything else but to check "Allow HTML in fields", because why not, but you don't have to--the default is unchecked. Once everything looks good to you, click "Import".
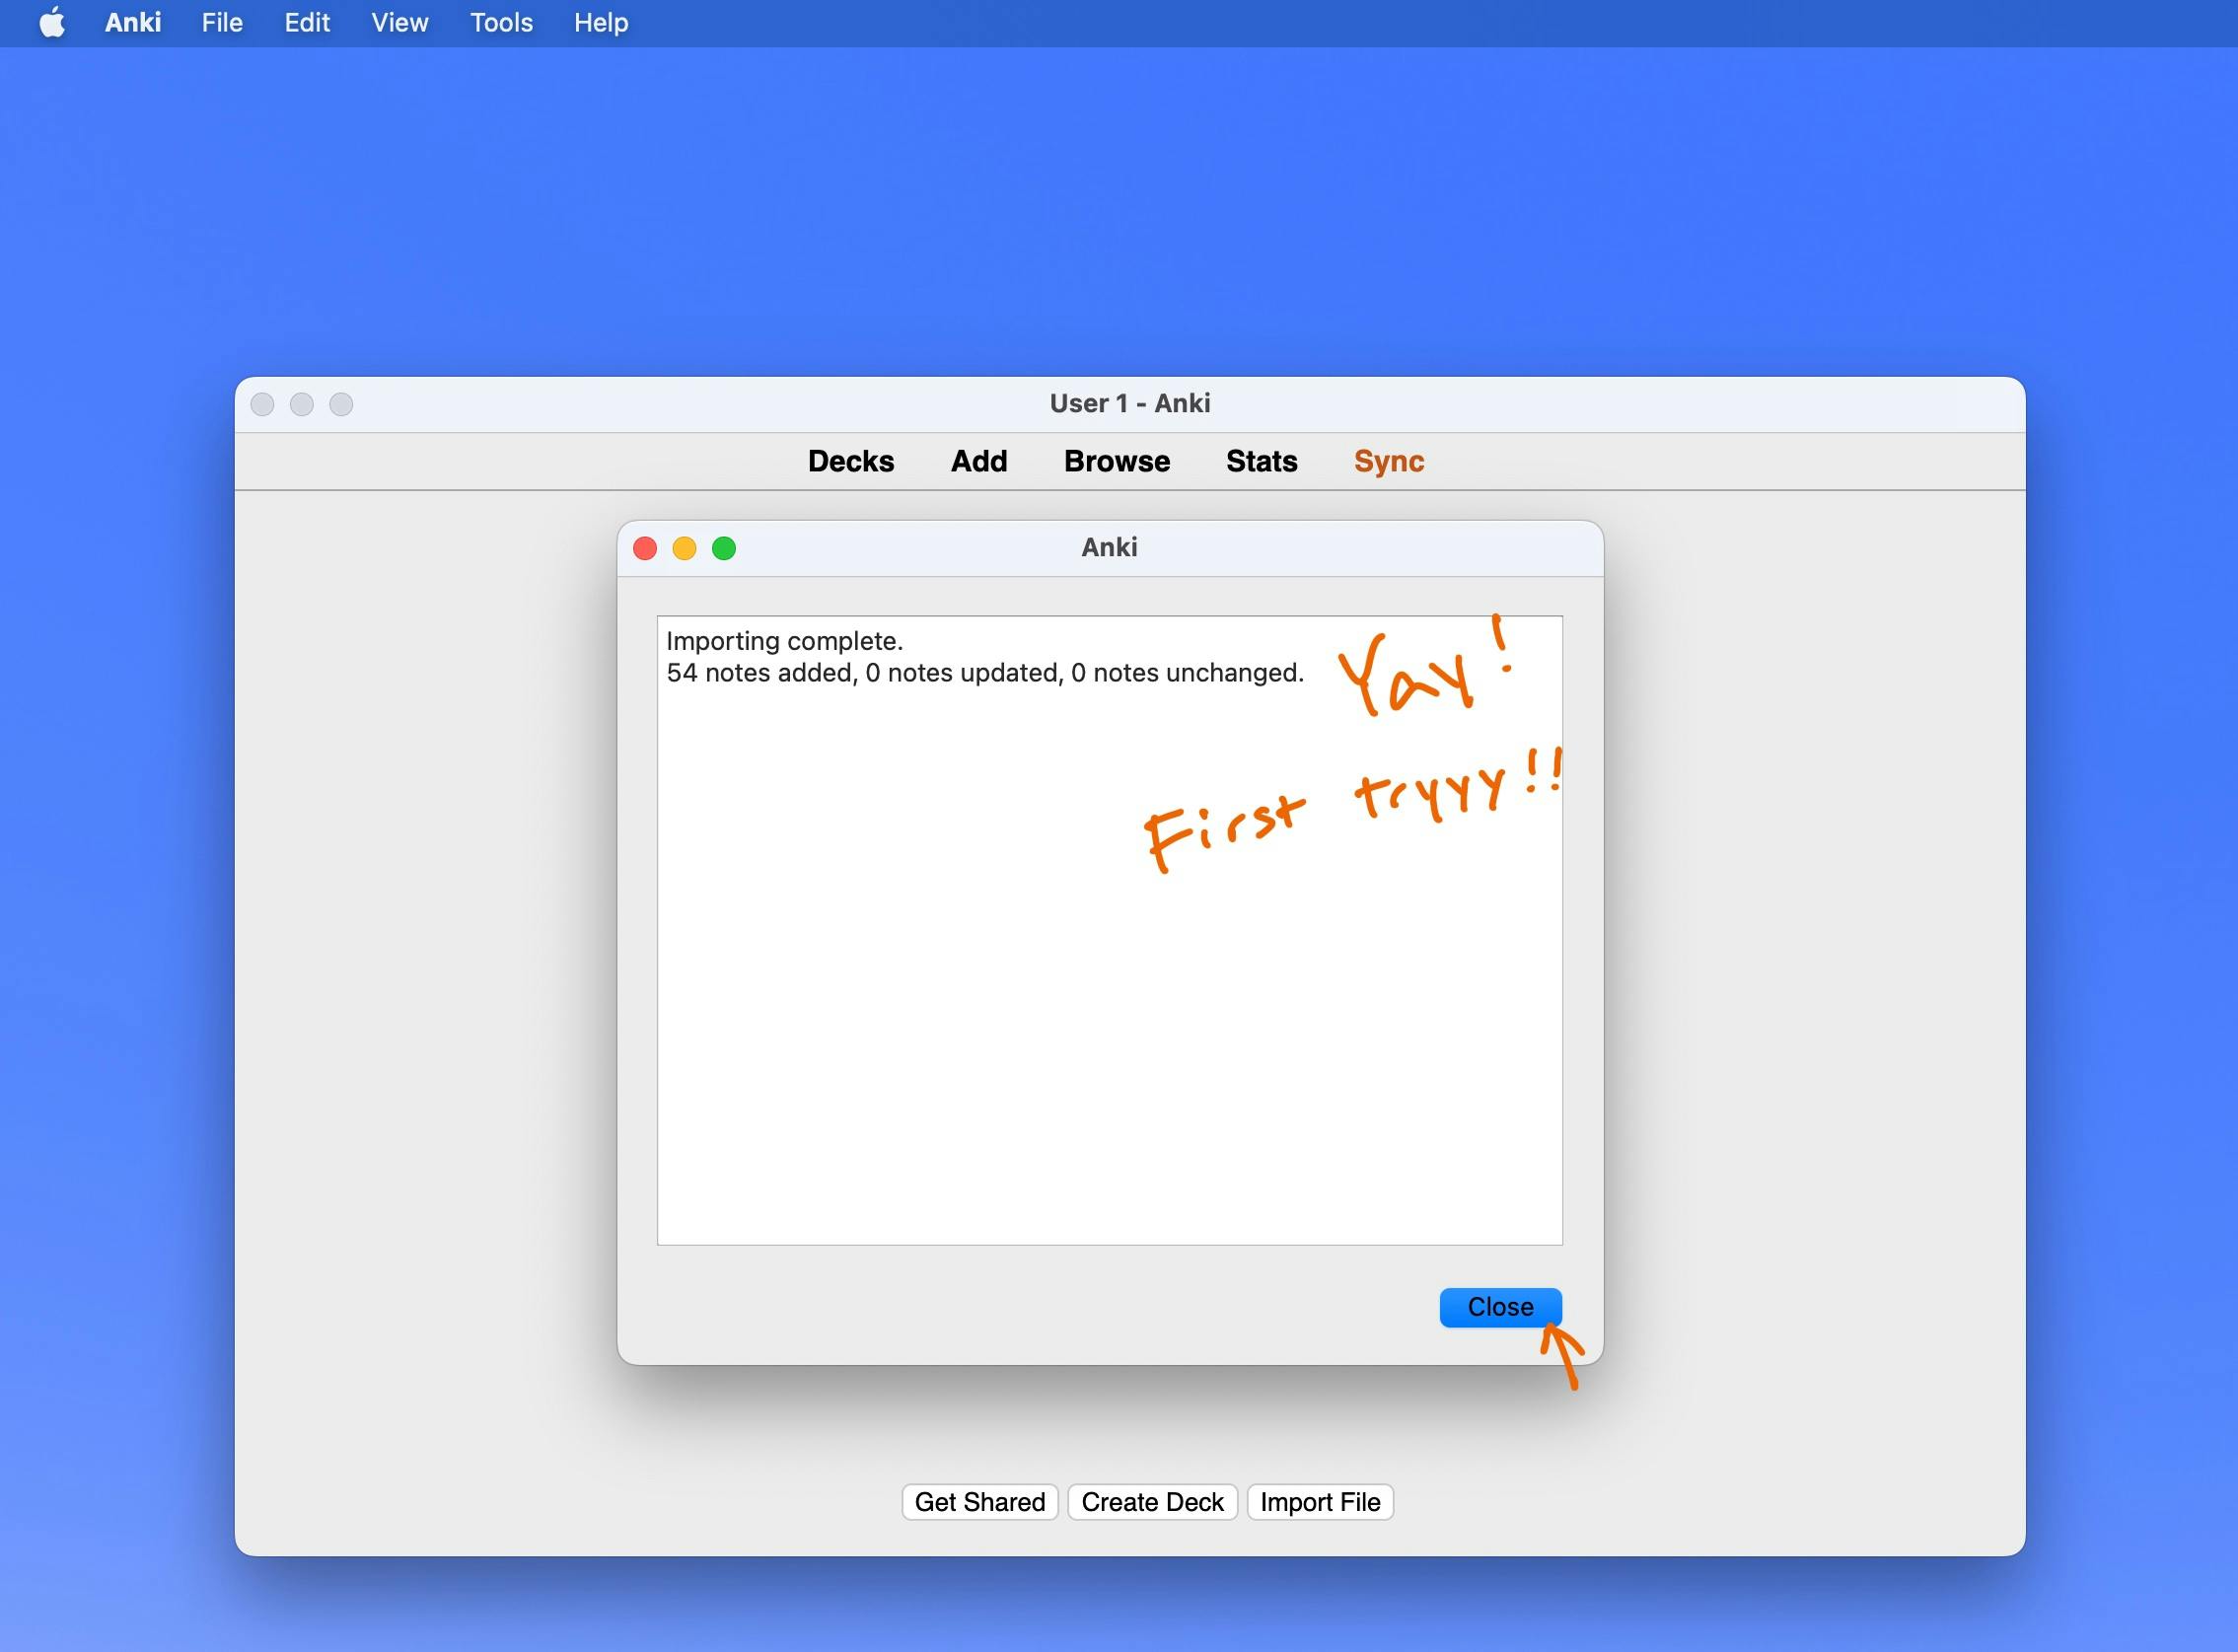
Step 20: Tada~ Anki's now telling you that the important is complete. It will tell you the number of notes added, updated and unchanged. First tryyy (wink wink 100Devs)! *If you are importing to a deck that already has some cards, you'll most likely see the number of updated and unchanged not being 0. Mine has 0's because this is a new deck.
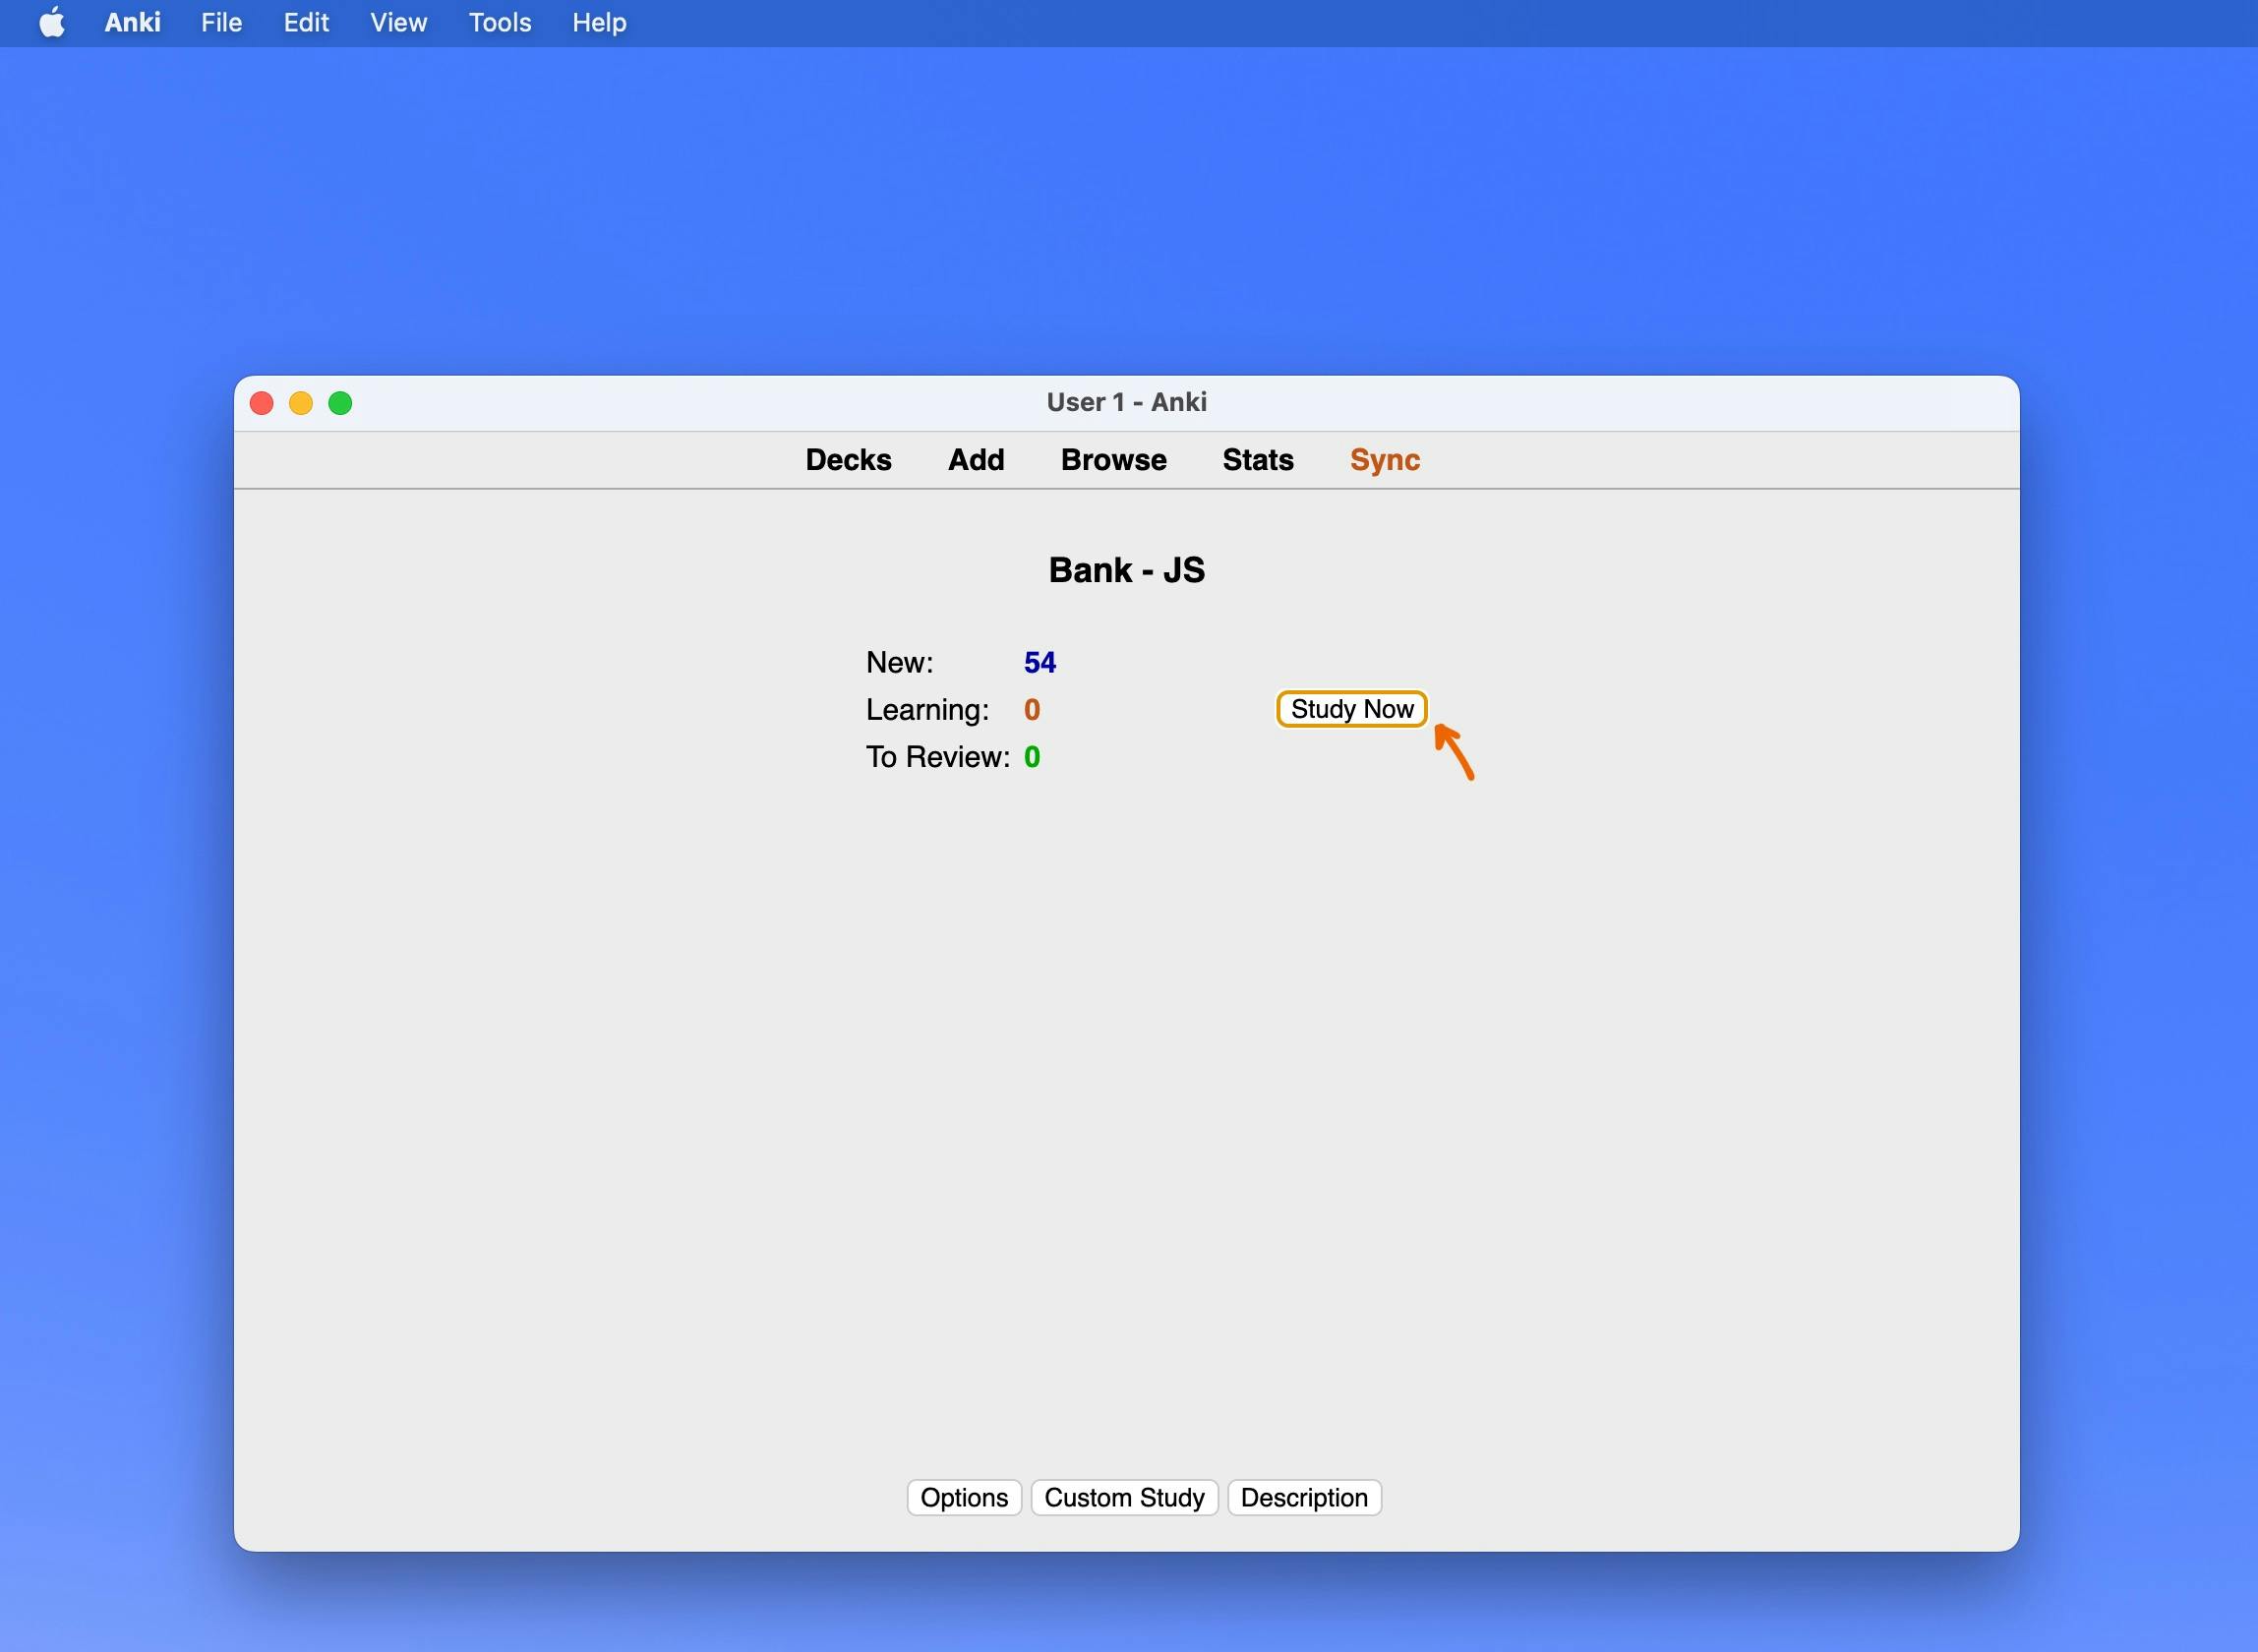
Step 21: Now let's study our deck! Don't leave--the tutorial is not finished yet!

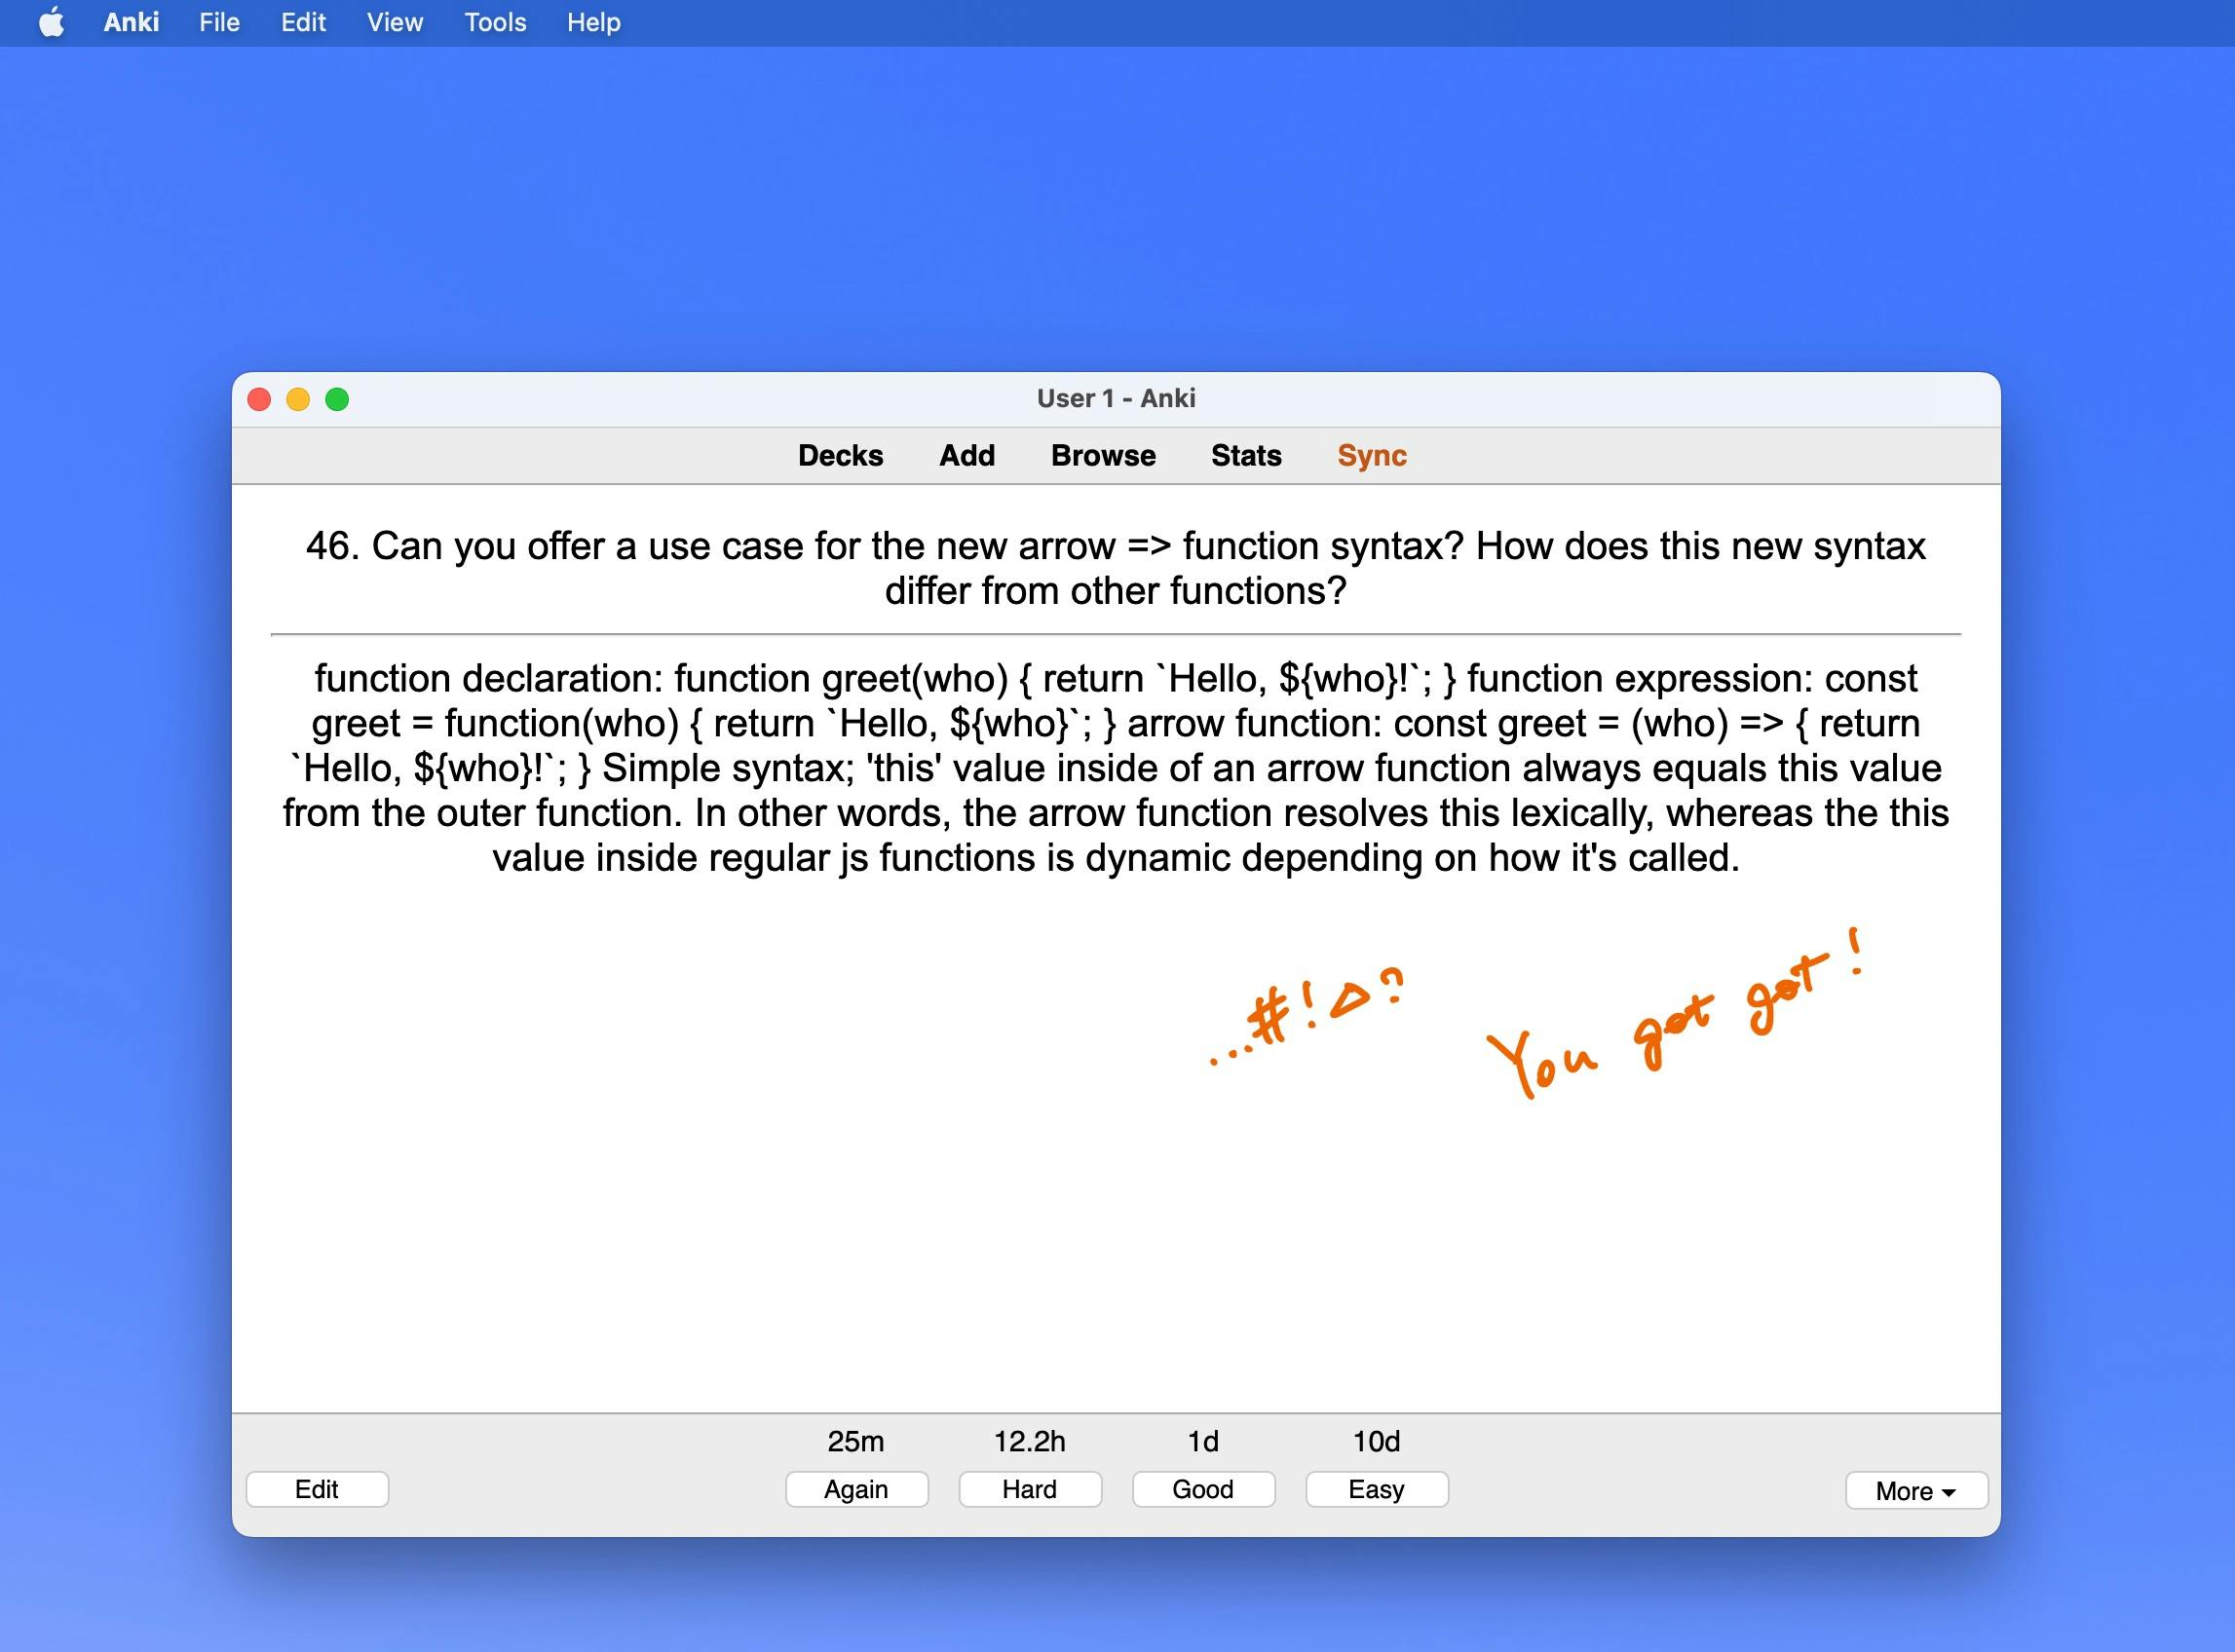
Got our first question, good, flip the card to check our answer--wait a minute, how come the back of the card looks so messy, and only has one field? Where are the other fields?! We got got (wink wink 100Devs)!
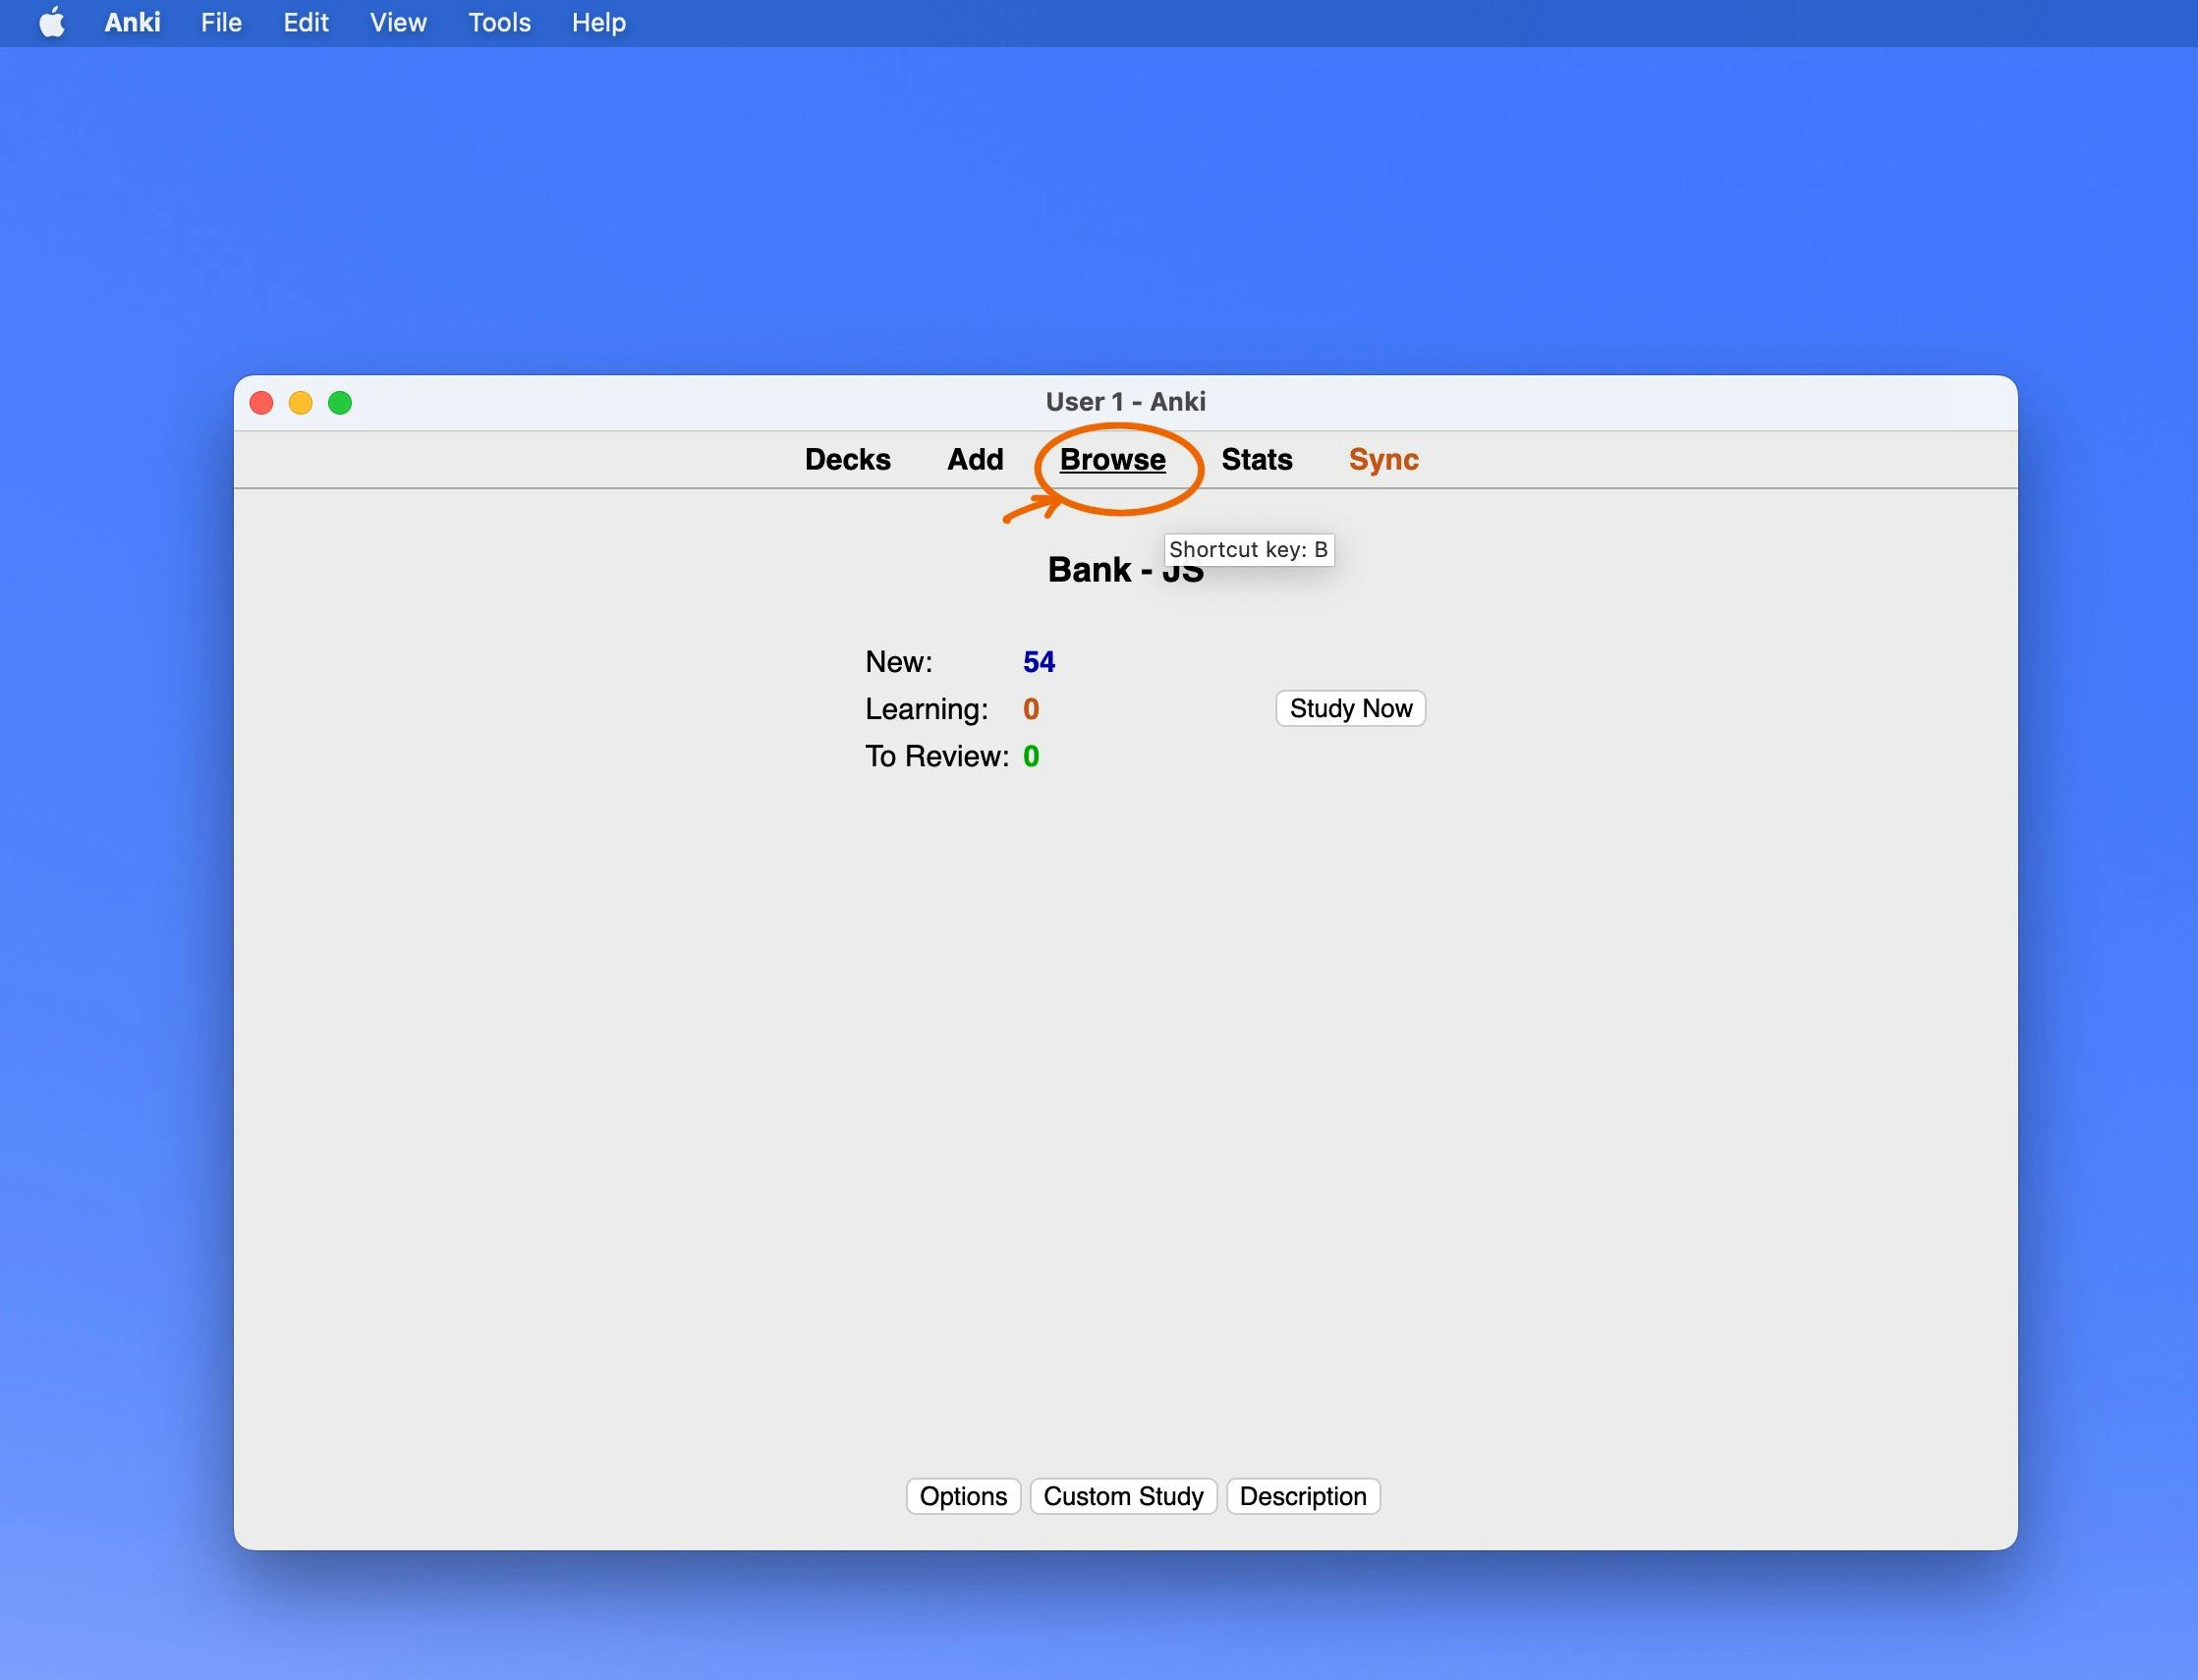
Step 22: Let's "Browse" the deck to debug!
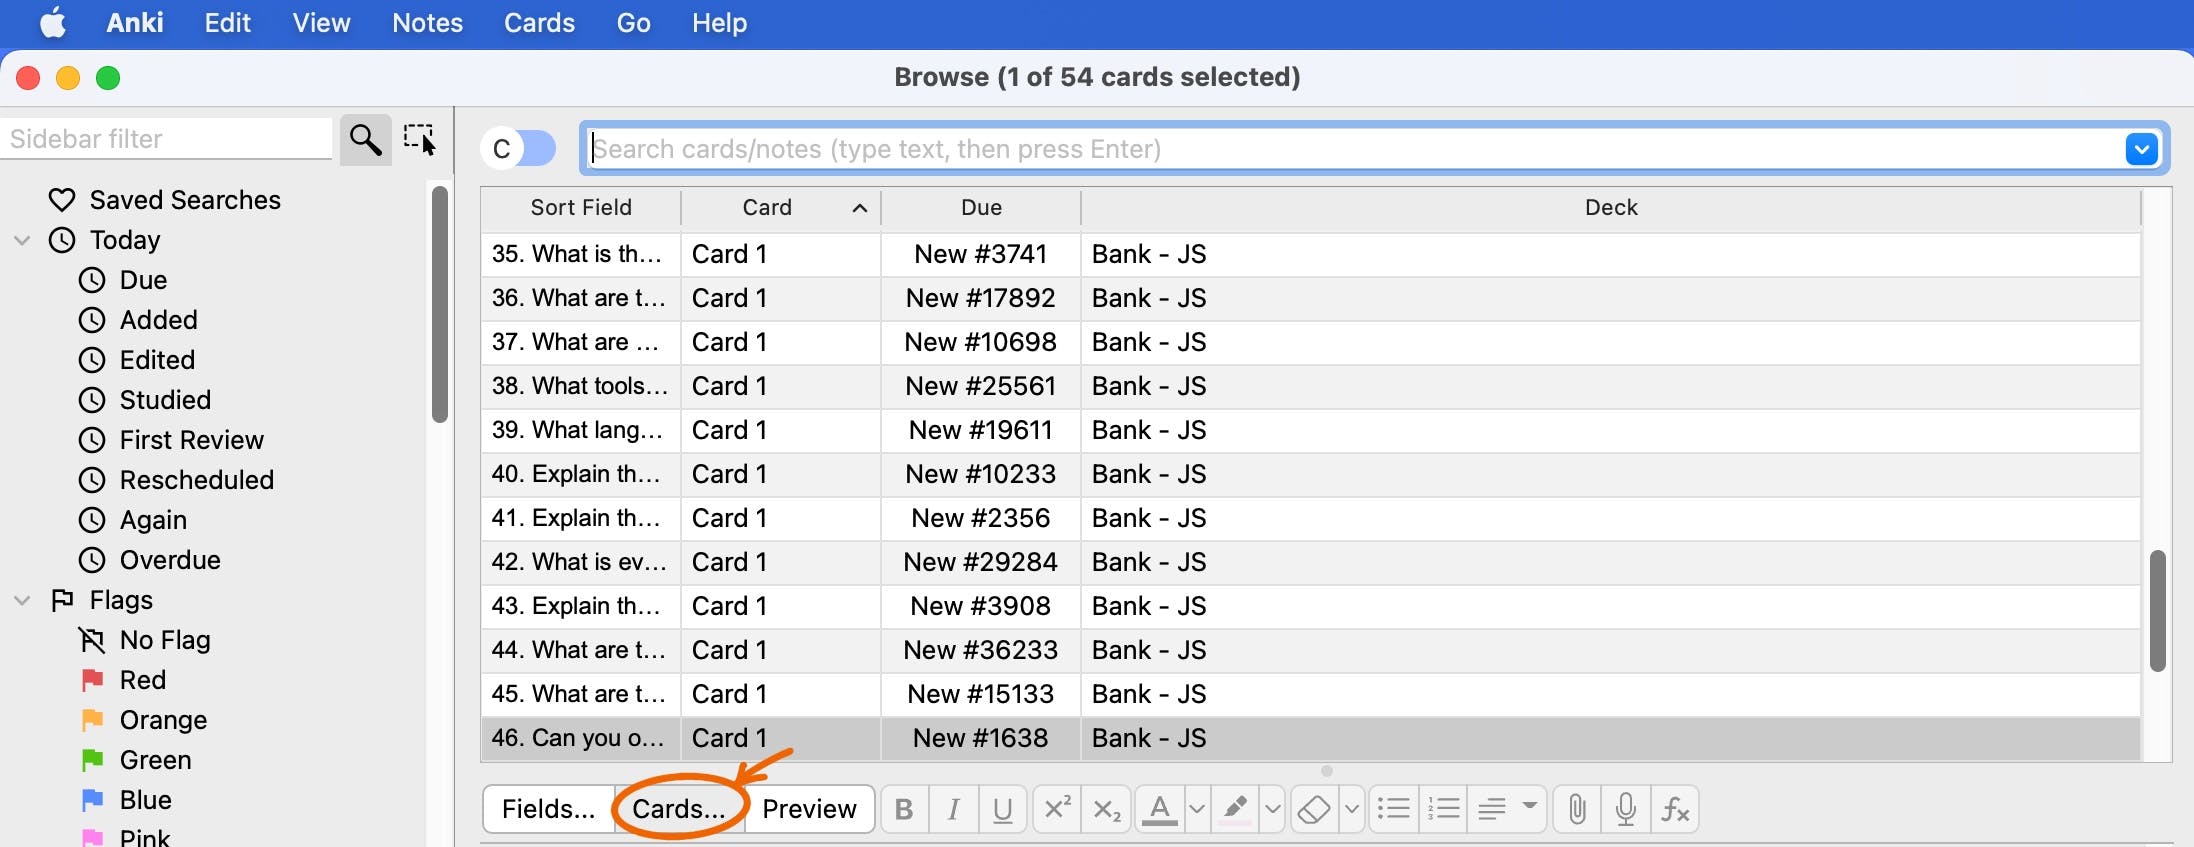
Step 23: Click "Cards...".
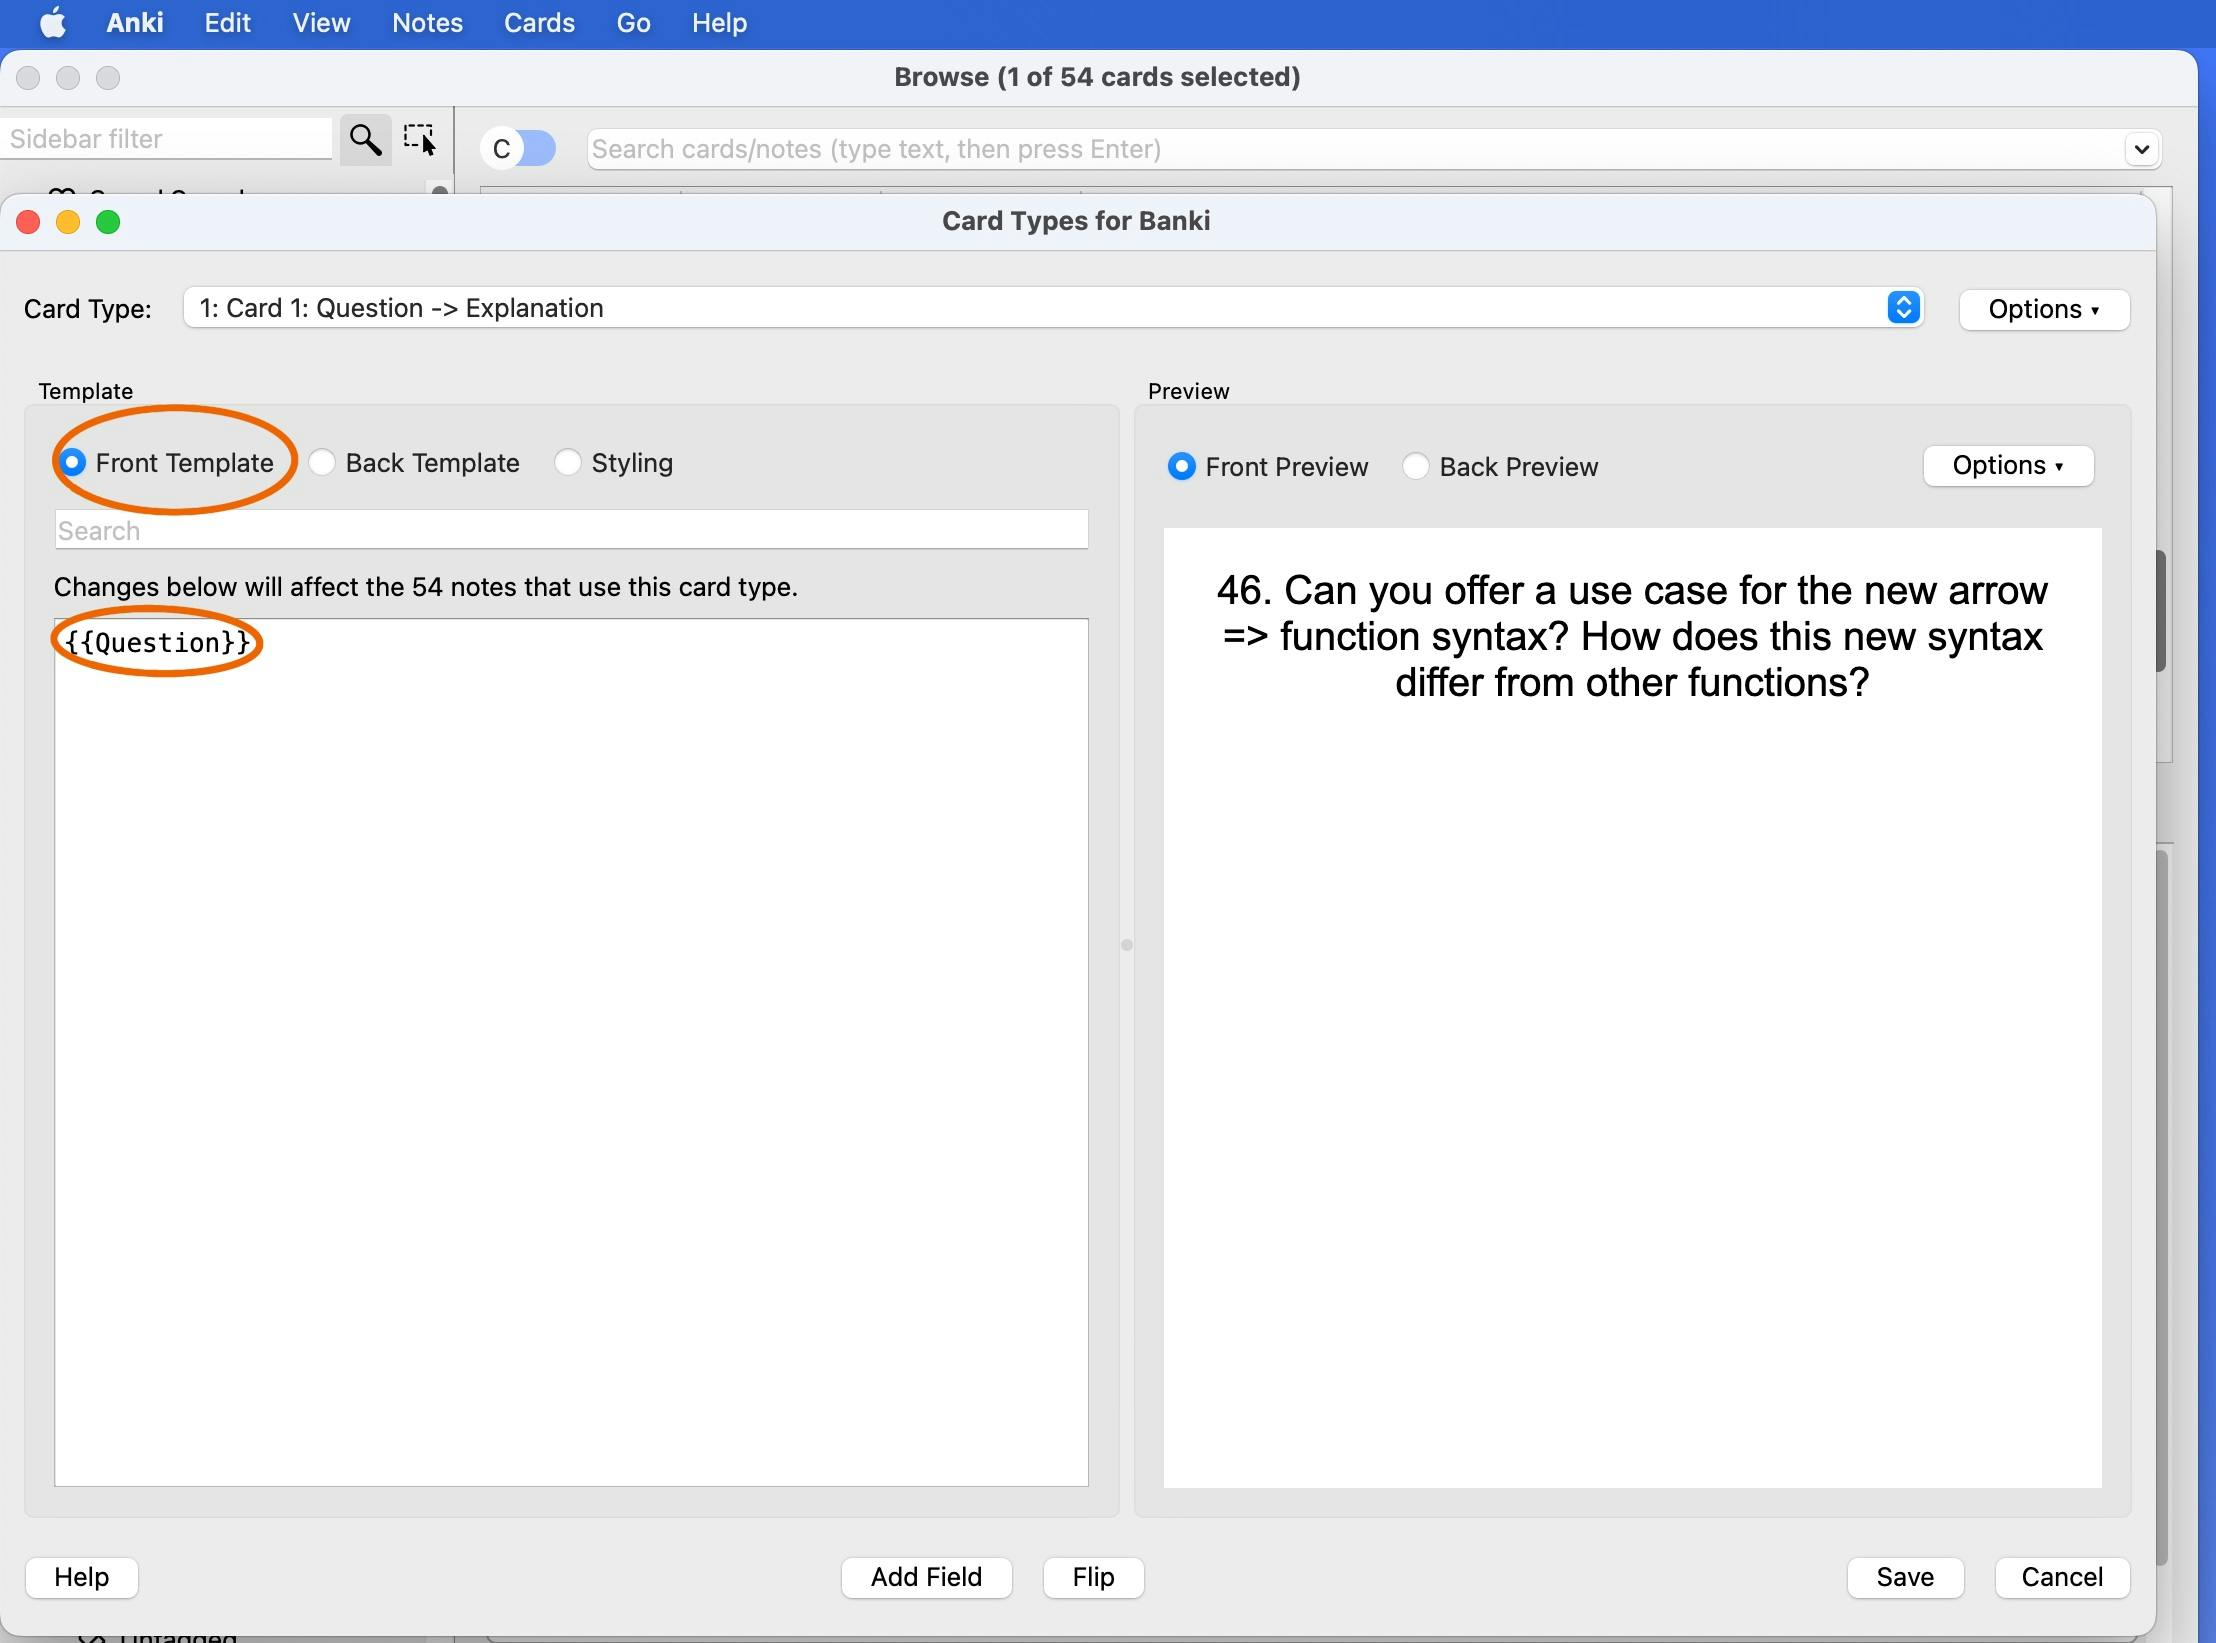
Step 24: In the pop-up "Card Types for Banki(or the name of your deck)", cilck "Front Template and make sure it has {{Question(or the name of your first field)}}. In my case, it looks good.
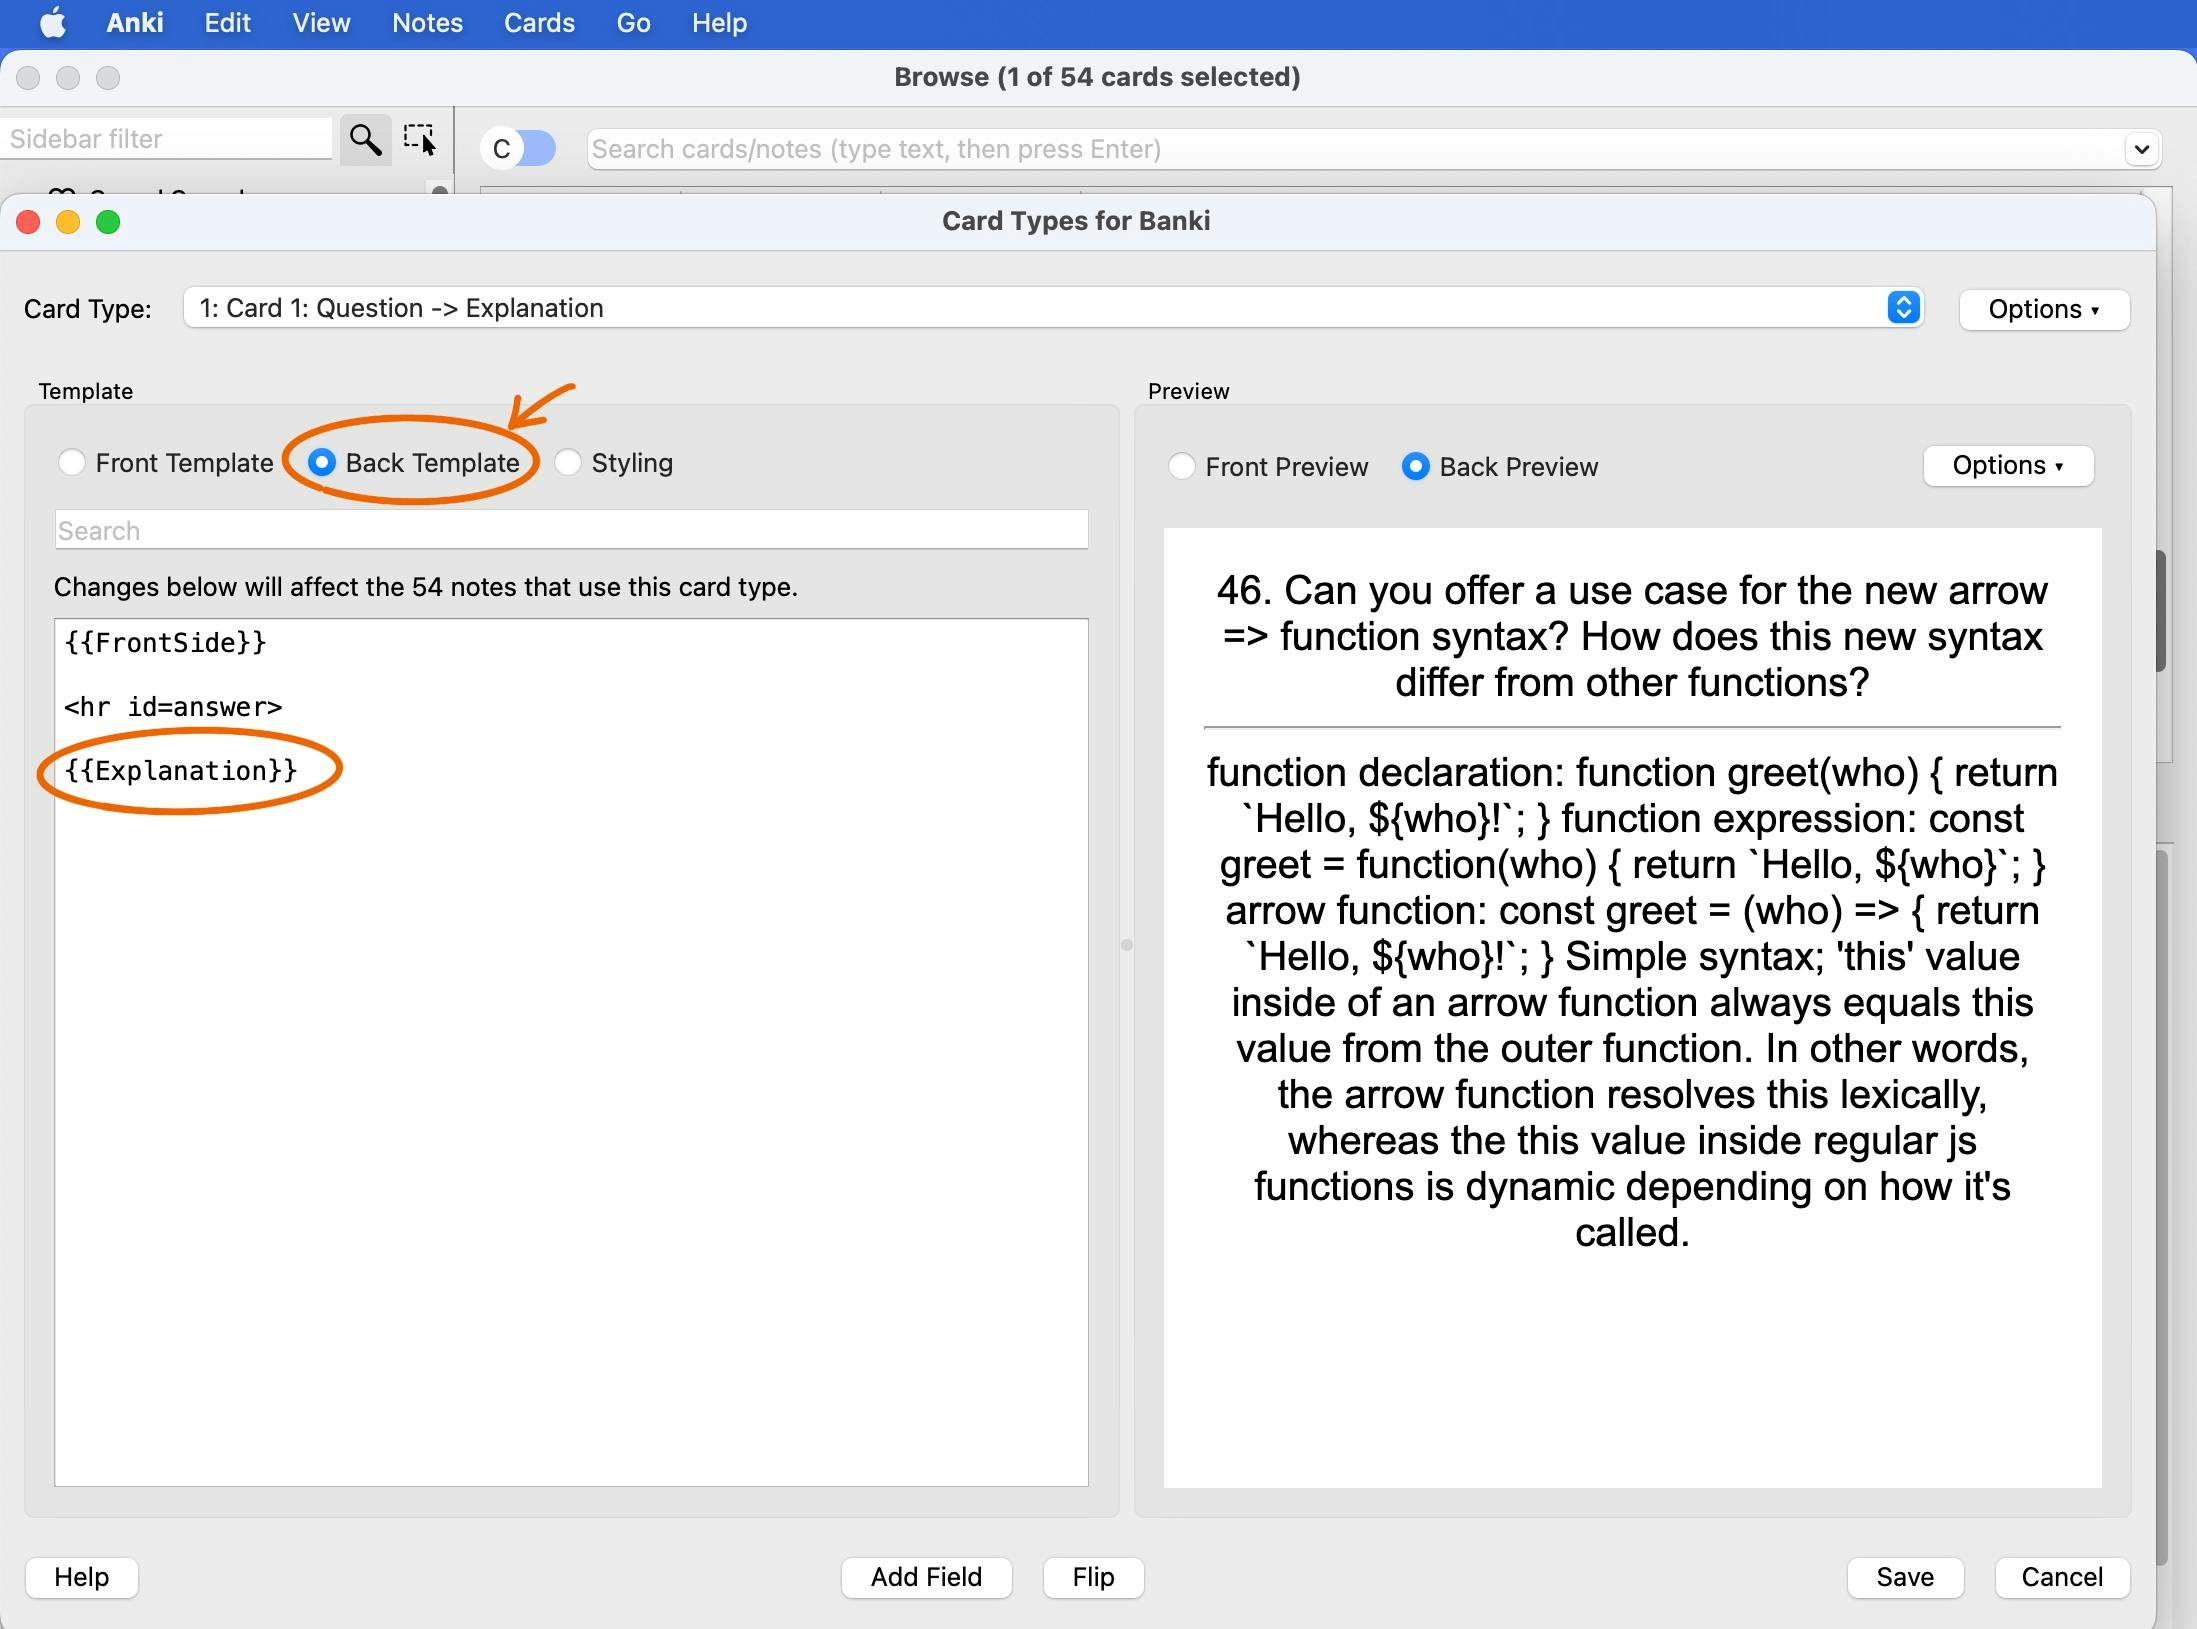
Step 25: In the same window, now click "Back Template". Ah ha! It only has {{Explanation}}, the second field listed under the {{FrontSide}} and
. No wonder we only saw one field instead of 4 earlier.
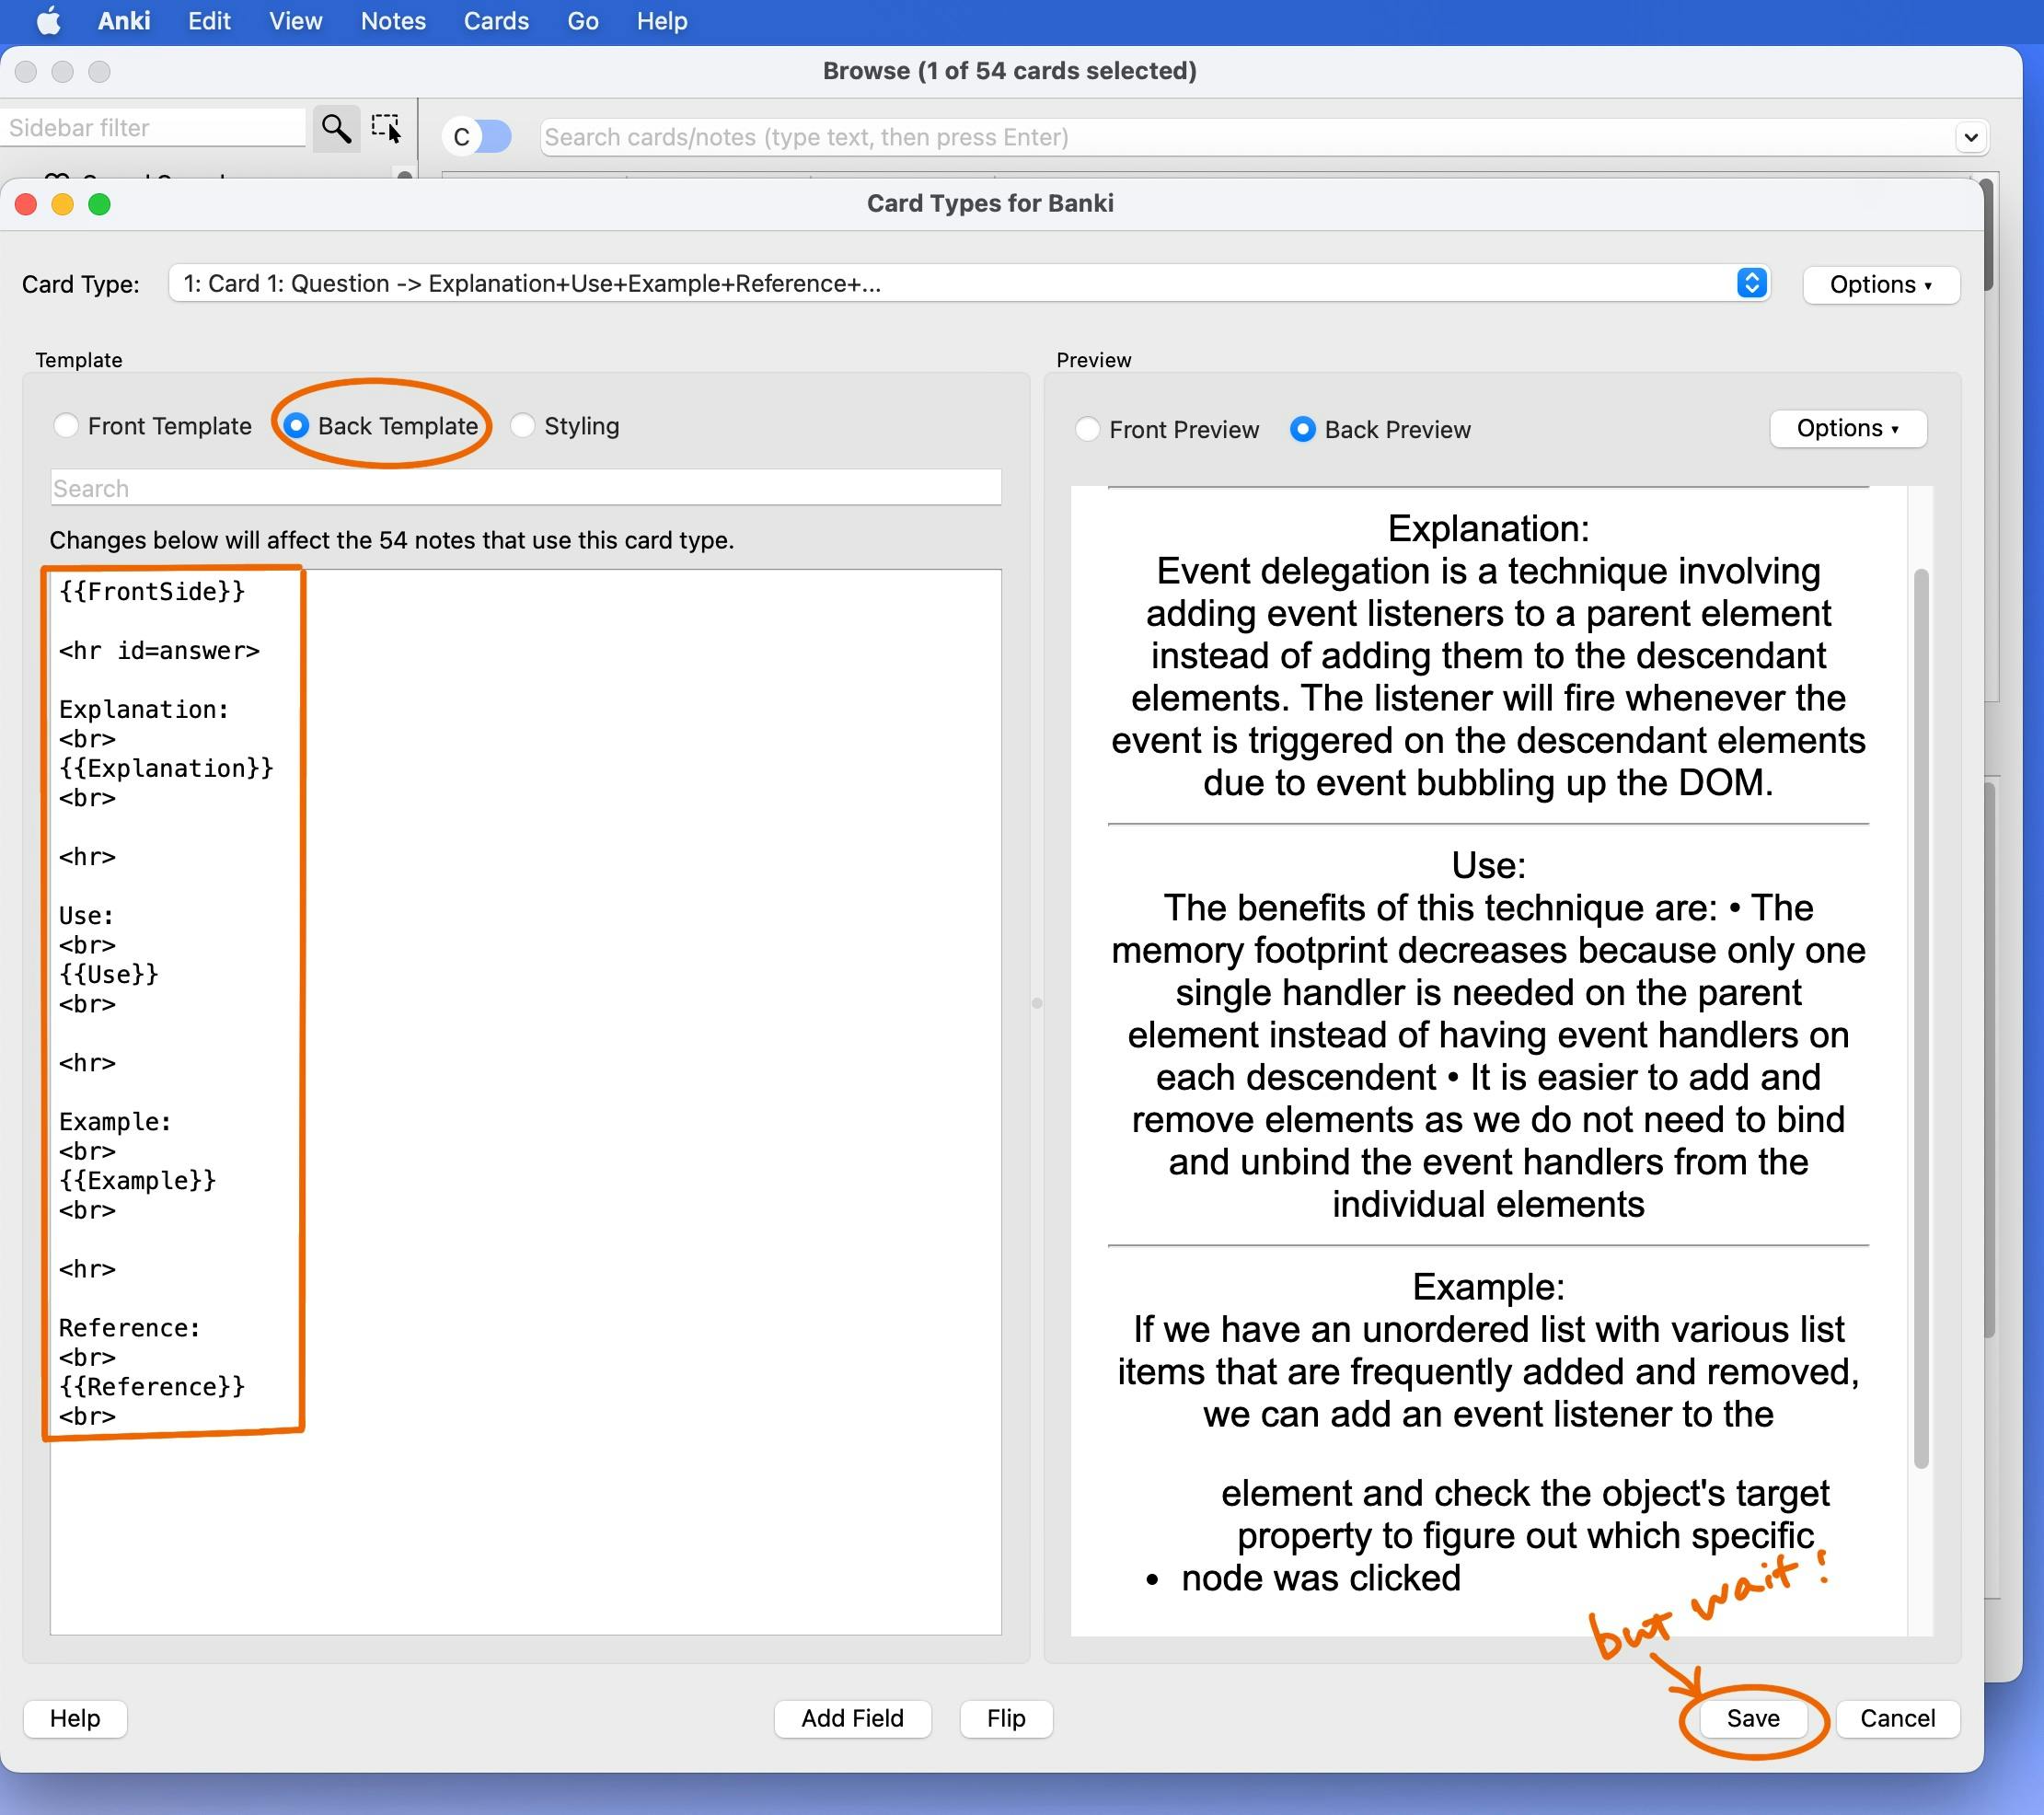
Step 26: So I added the other fields as well as some
and
elements to better format the content. If you're happy with the preview on the right, click "Save", but I don't like the centered text, so there is one more step to style it.
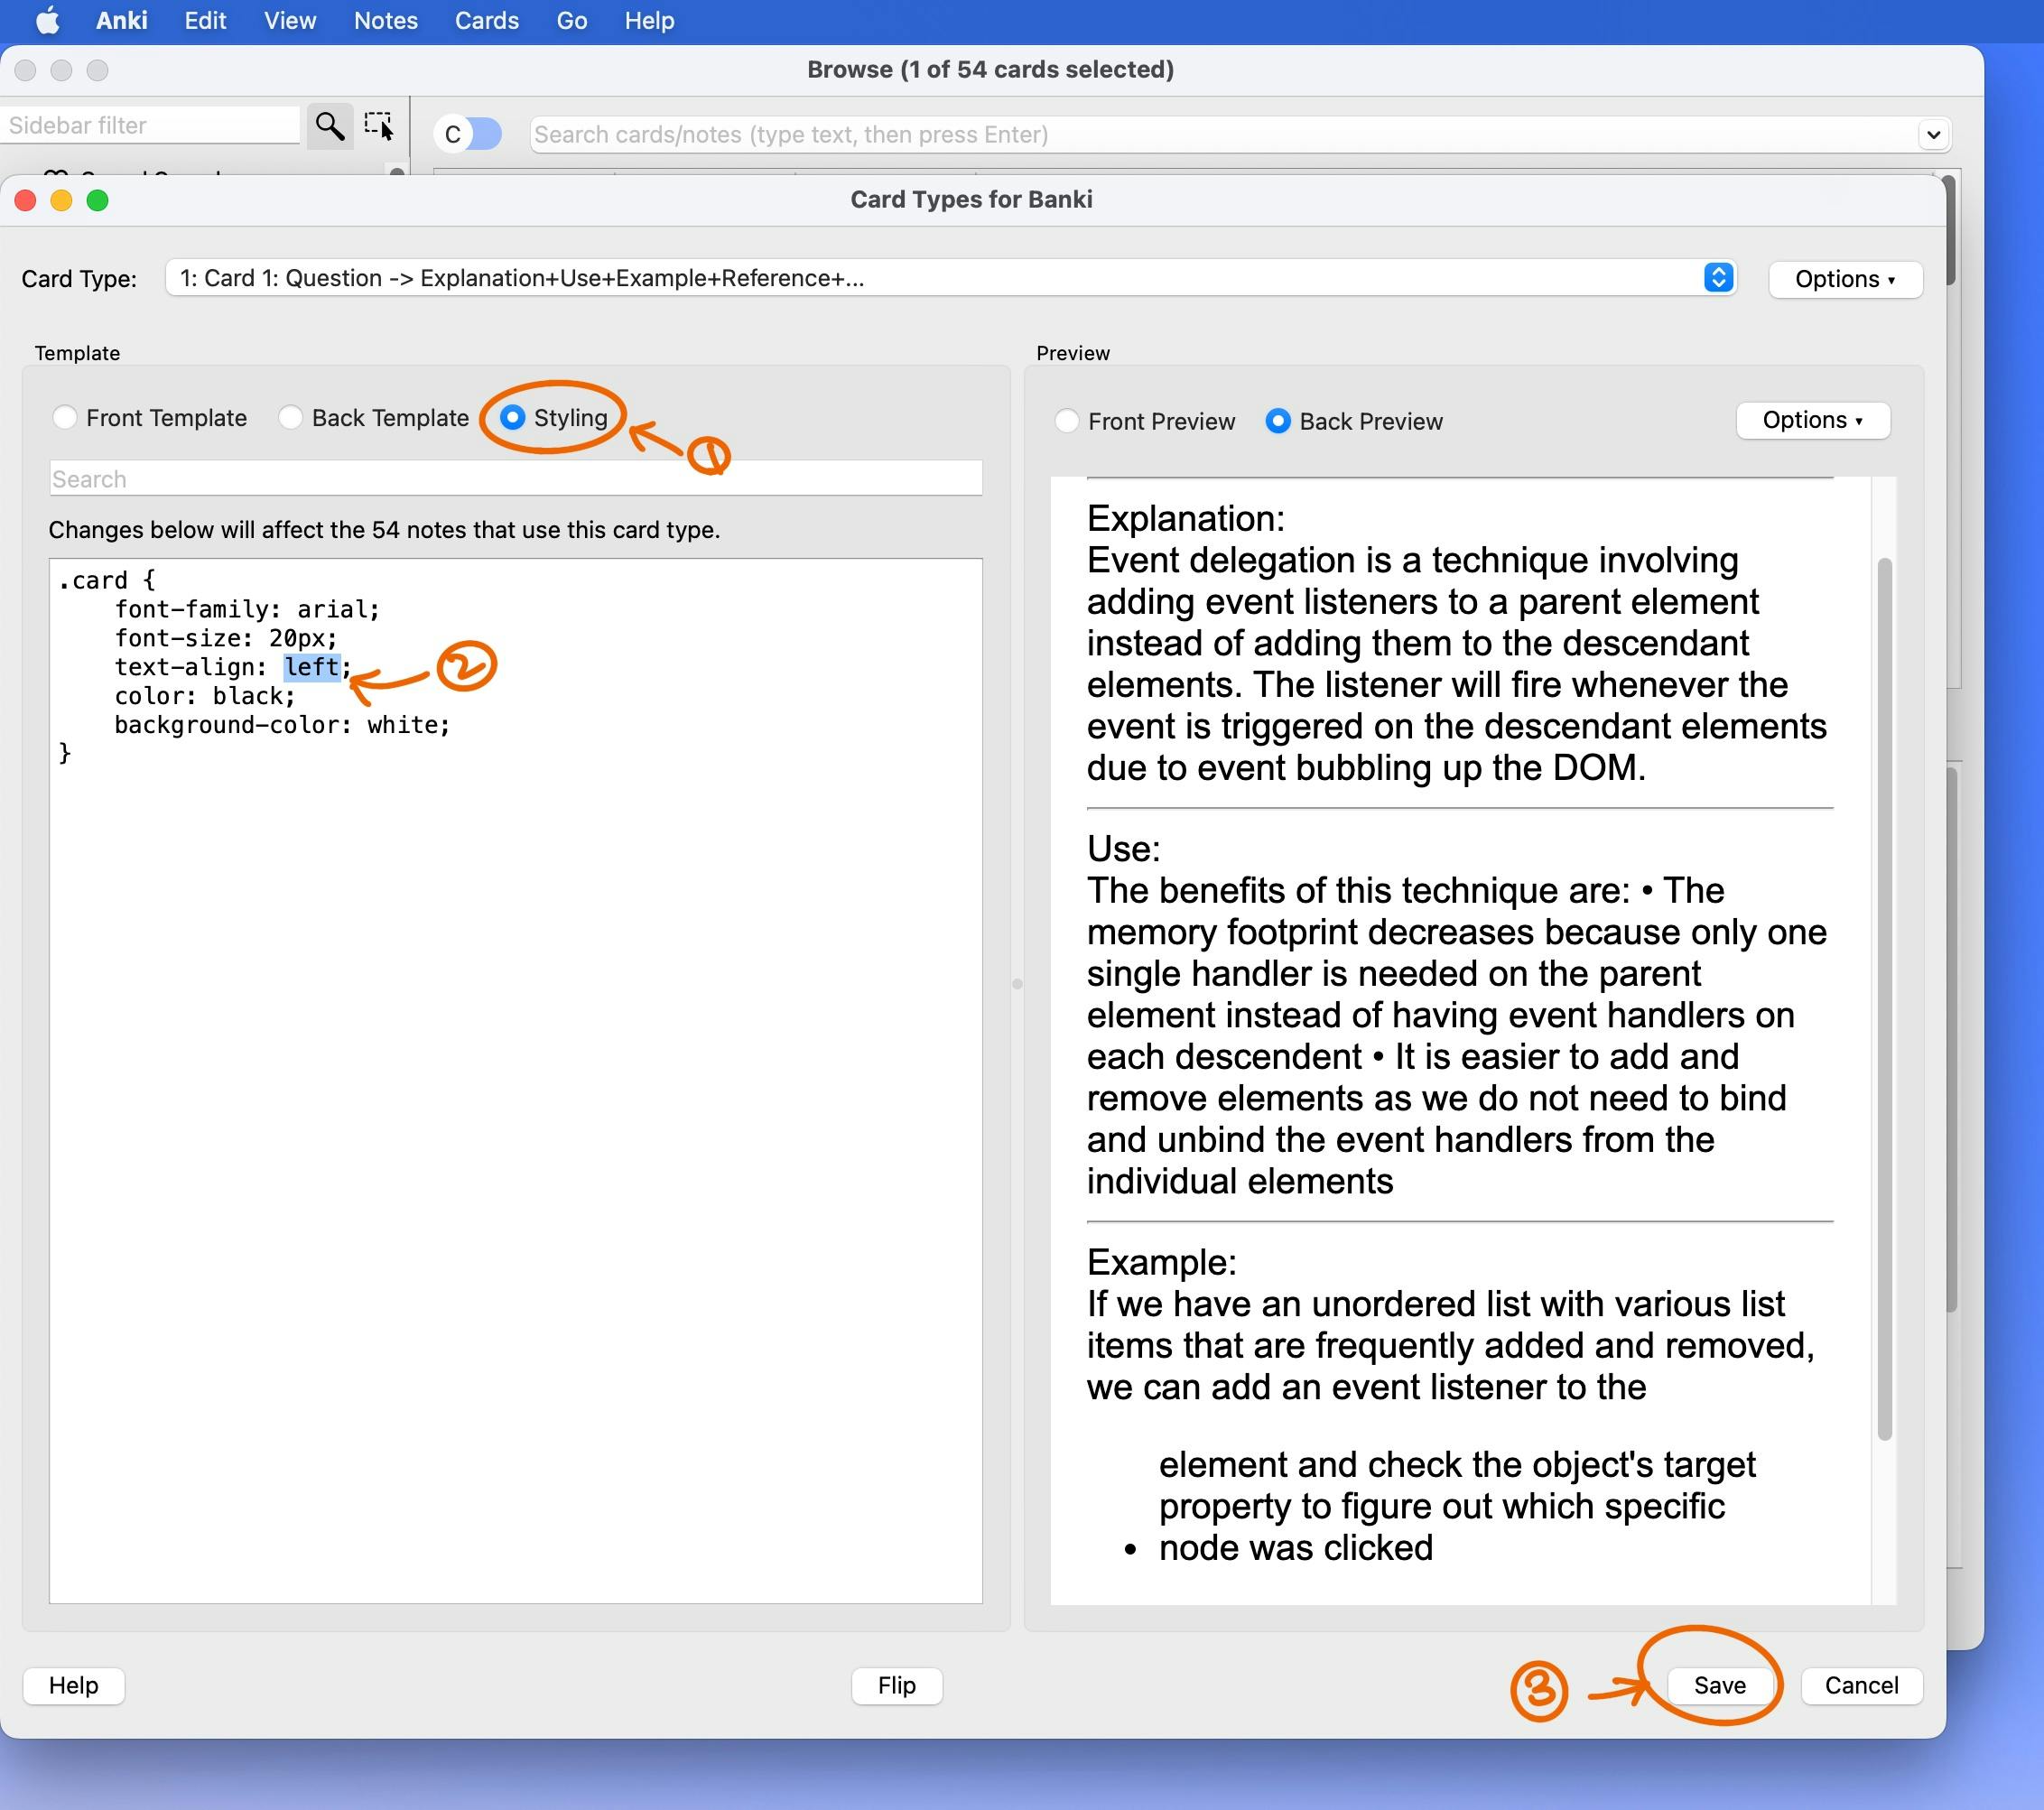
Step 27: We've check the "Front Template", and corrected the "Back Template". Now, click "Styling". You can be creative and change or add more properties but I only wanted to change the "text-align" from "center" to "left". If the preview looks good, click "Save".
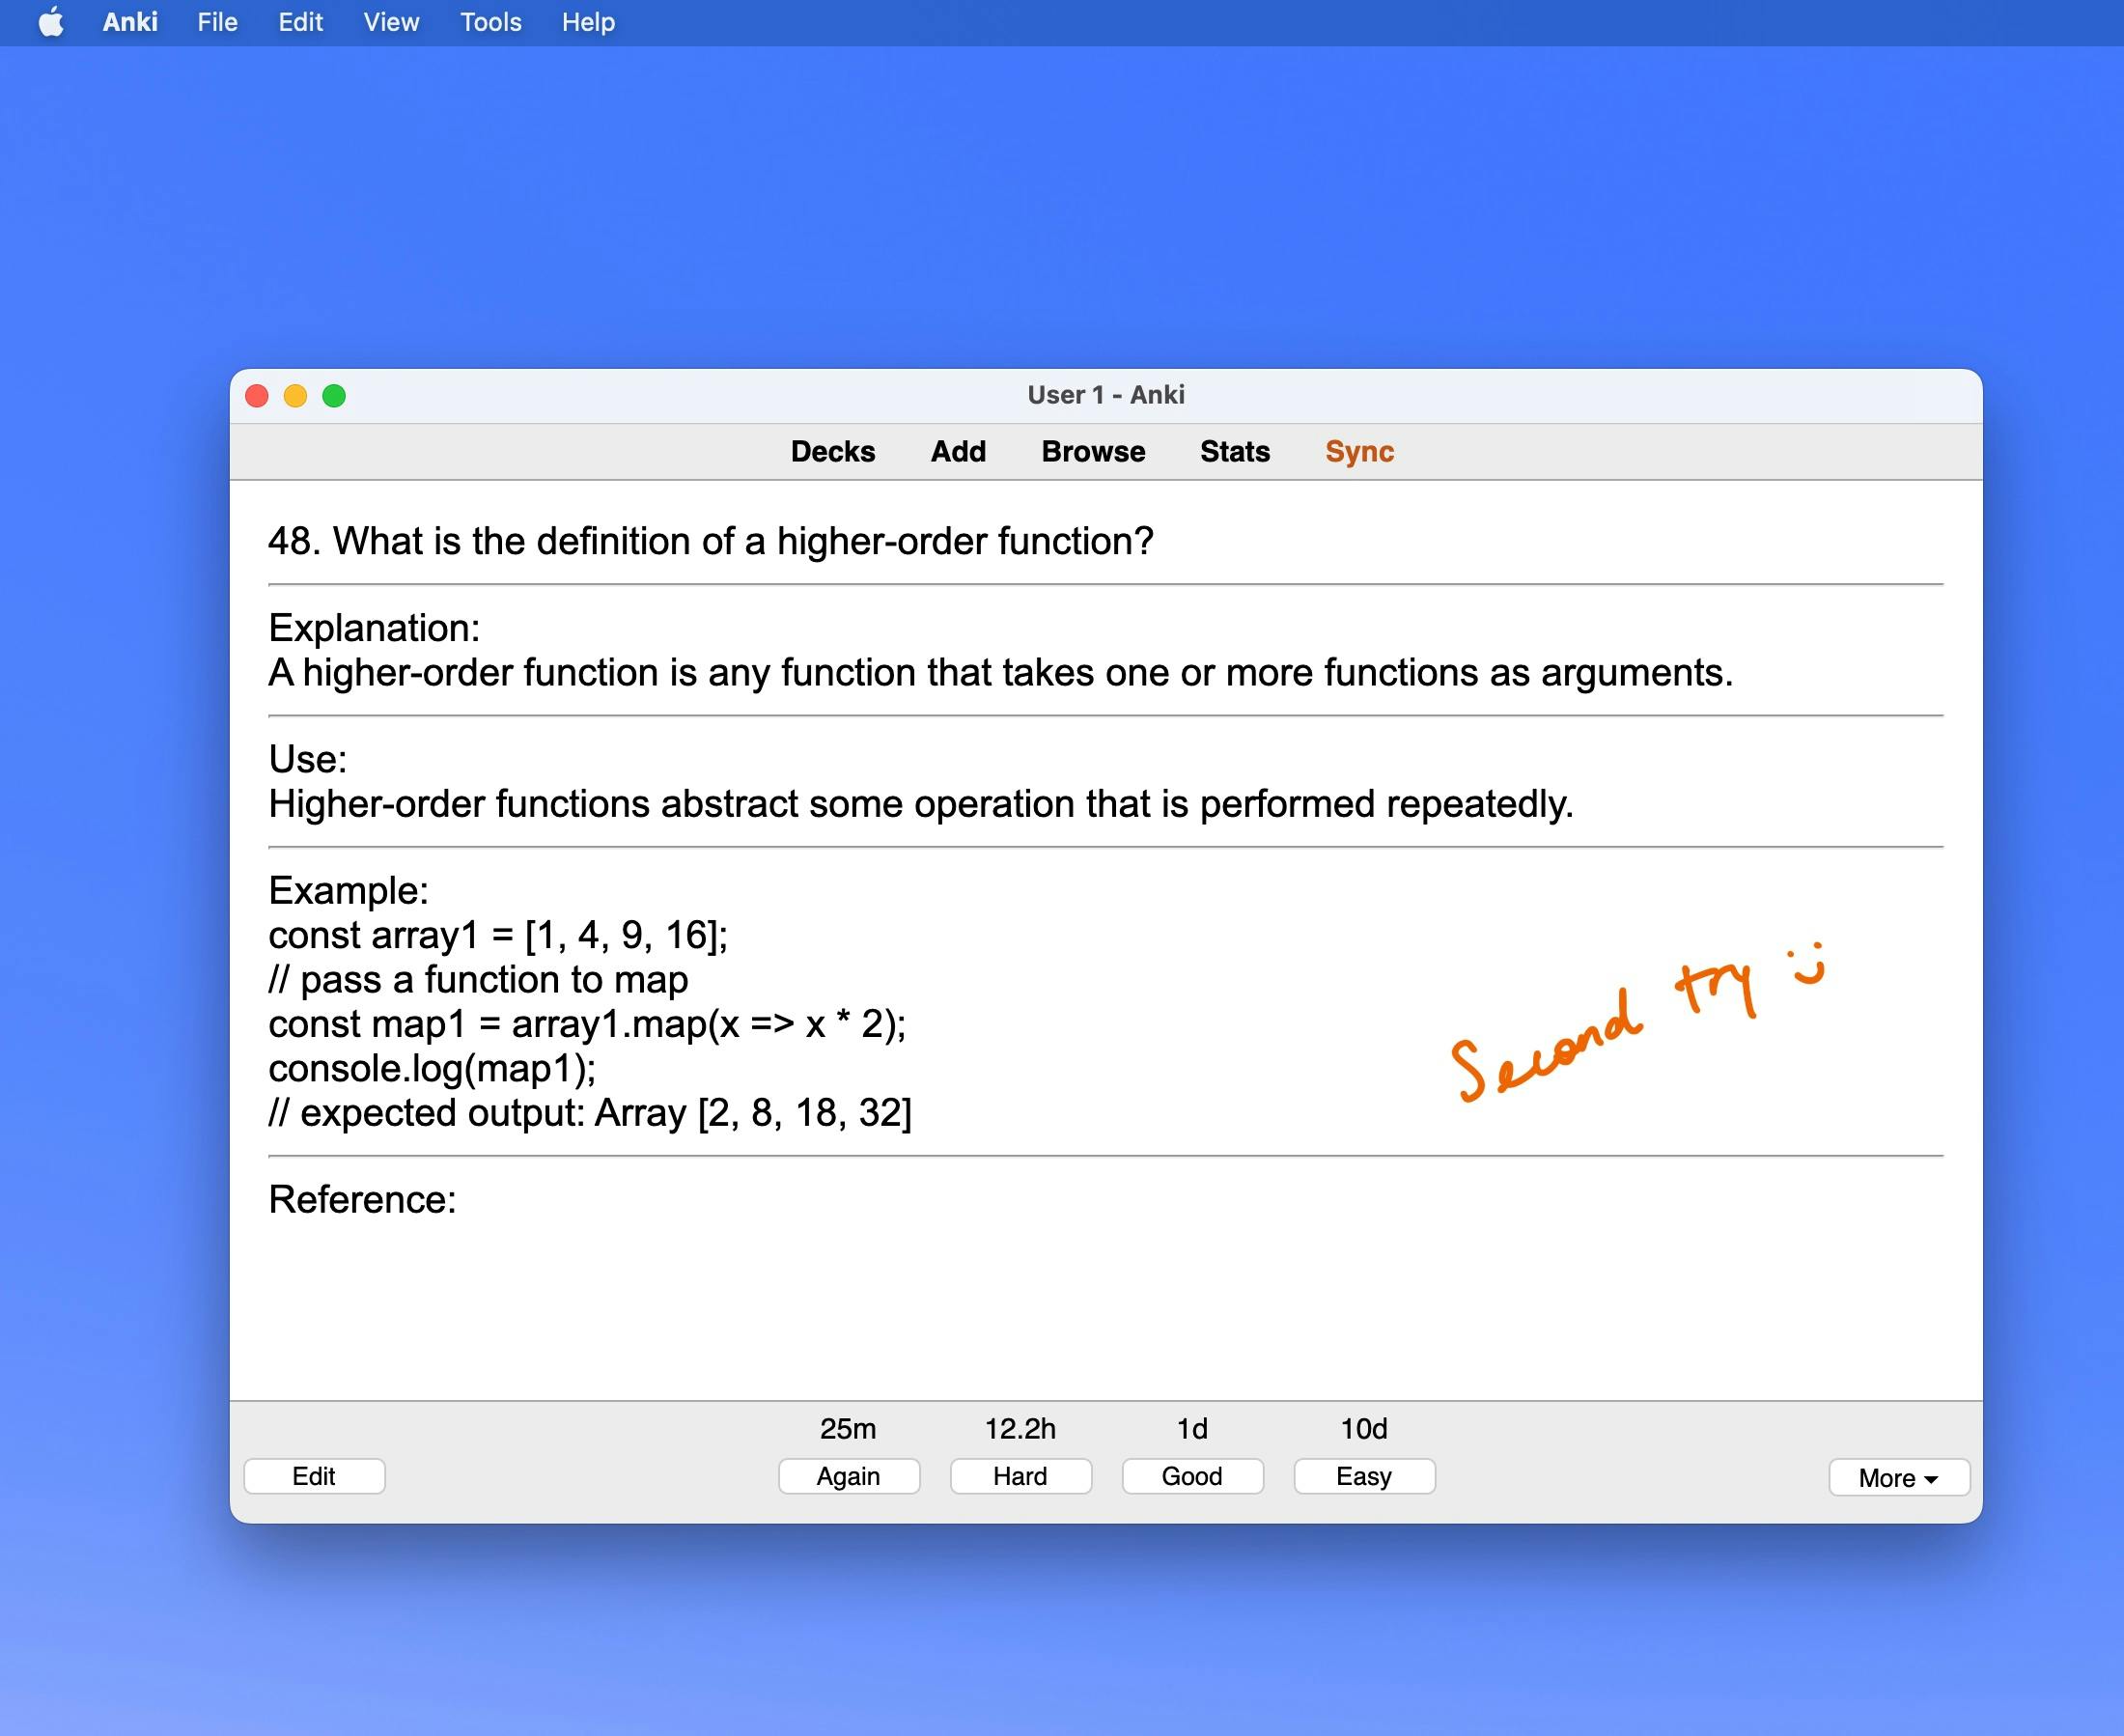
Step 28: Study the new deck and now the back of the cards should have all the fields/sections. (A section would be blank if it was an empty cell on your original spreadsheet.) Second try is not bad at all!
I probably over explained and made too many screenshots but I wanted to be as thorough as I could so no one feels lost following these steps. I hope once you've learned to download/import .csv files and customizing your Anki note type and deck card templates, you'll be able to save some time and energy, and take full advantage of Anki.
That's all. Now go study!
Once again, thank you Leon Noel and the 100Devs community for inspiring me to be a better software engineer, and not be afraid to solve problems and share my experience with others.